SMART Notebook Software Learner Resource
SMART Notebook Software Version 10
For Windows
®
Operating System
SMART Technologies ULC
3636 Research Road NW
Calgary, AB T2L 1Y1
CANADA
Phone 1.888.42.SMART or + 1.403.245.0333
www.smarttech.com
e-mail: training@smarttech.com
Learner Resource
SMART Board Interactive Whiteboard Basics
Introduction
The SMART Board
™
interactive whiteboard is a touch sensitive display that you connect to your
computer:
• The computer sends an image of an application to the projector
• The projector casts the image onto the interactive whiteboard
• The interactive whiteboard acts as both the monitor and input device, letting you control any
application by touching the screen
• Anything you can do on your computer, you can do on the interactive whiteboard
You can use an interactive whiteboard instead of flip charts, whiteboards, overhead projectors and
chalkboards:
• Use SMART Notebook software and SMART Board tools to create, save and reuse engaging
learning materials
• Integrate audio, video and the Internet into your lessons
• Encourage collaboration and interaction
© 2008 SMART Technologies ULC. All rights reserved. smarttech and the SMART logo are trademarks or registered trademarks of SMART Technologies ULC in the
U.S. and/or other countries. All other third-party product and company names are for identification purposes only and may be trademarks of their respective owners.
Printed in Canada 06/2008.
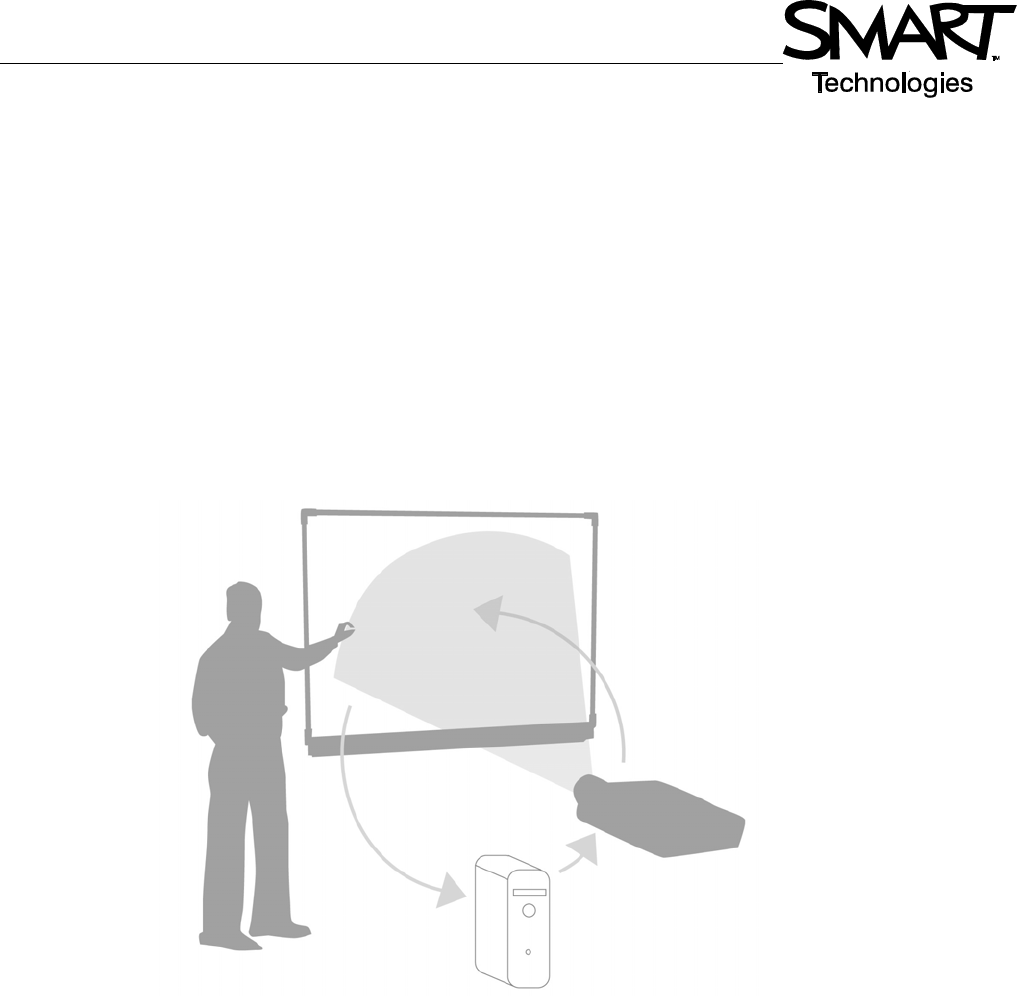
Orienting the SMART Board interactive whiteboard
Orienting the SMART Board interactive whiteboard tells the computer where the image is projected
on the interactive whiteboard. Complete this process in any of the following situations:
• When you set up the interactive whiteboard
• When you have moved the interactive whiteboard or the projector
• When the interactive whiteboard does not interpret your touch accurately
Hands-on Practice
Action Method
Orient the SMART
Board interactive
whiteboard
Try the following tasks to test your knowledge
Connect your computer to the SMART Board interactive whiteboard
Orient the SMART Board interactive whiteboard
OR
Learner Resource
Touch, write and save
Introduction
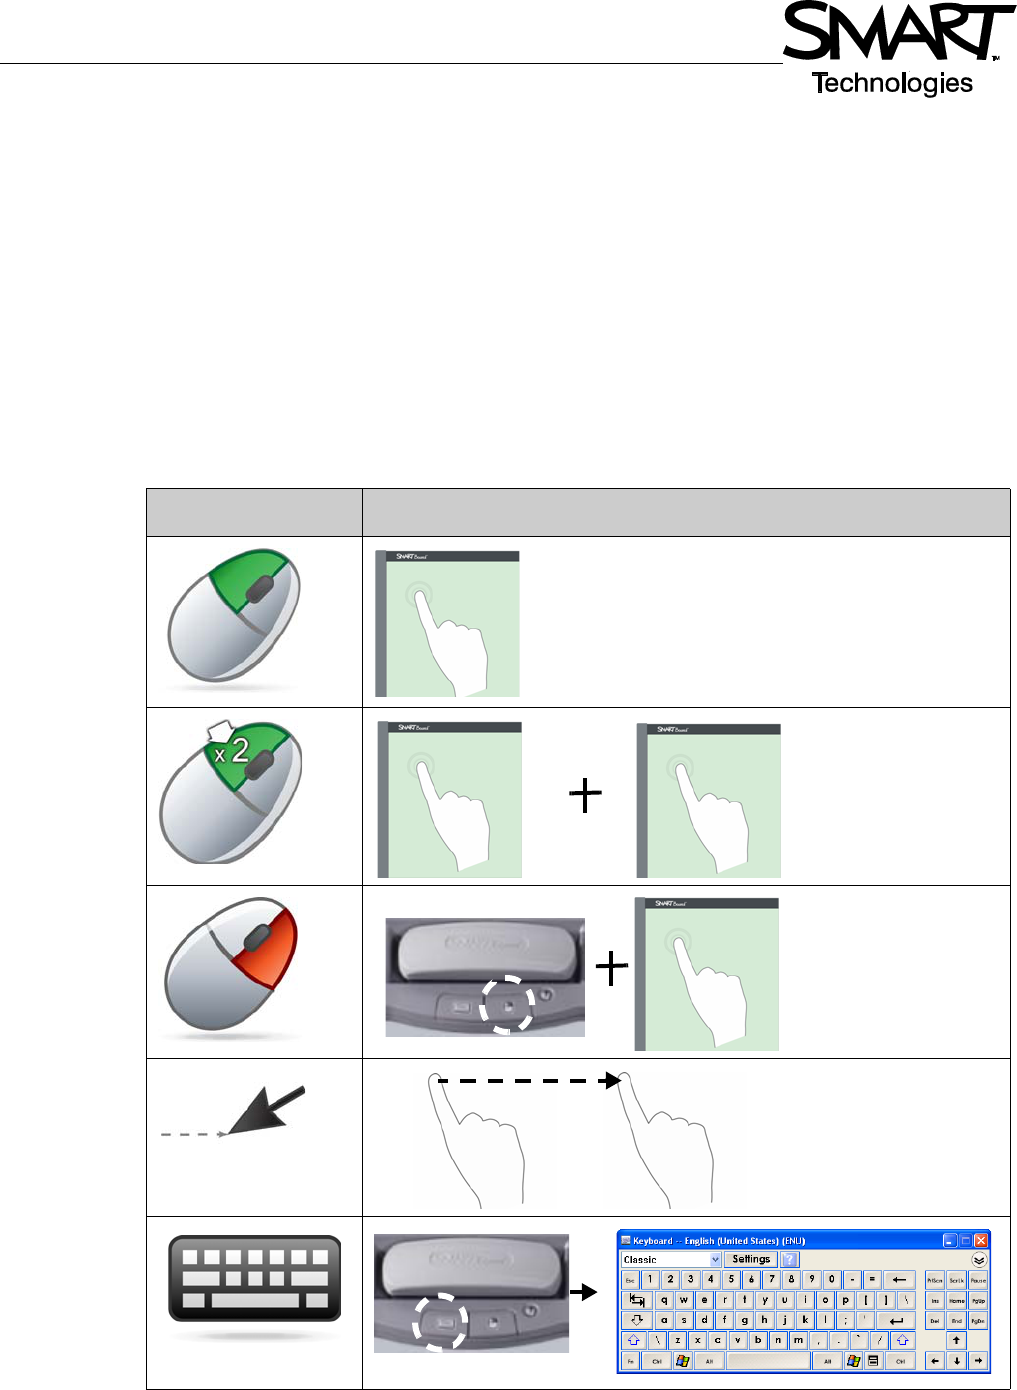
Anything you can do on your computer, you can do on your interactive whiteboard:
• Use your finger as a mouse
• Use the pen tools to write
• Use the Eraser tool to erase your notes
• Use the On-screen Keyboard to type
Using your finger to input information
Action Method
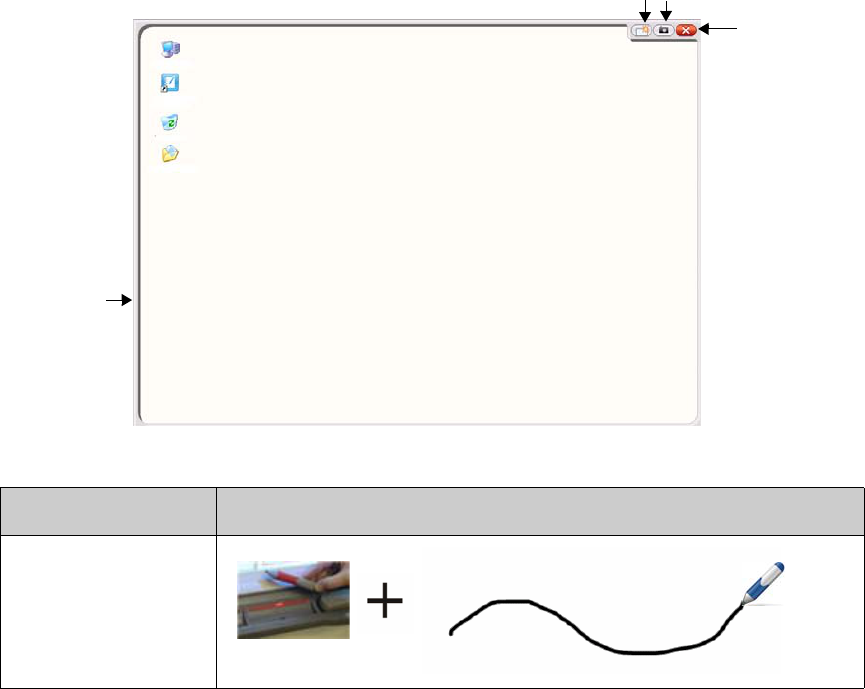
Writing on the interactive whiteboard
When you pick up a pen tool, a border appears around the desktop. This border indicates that the
Digital Ink Layer (a fixed image of your desktop) is in place. It lets you write on your interactive
whiteboard without affecting the applications that you are displaying.
When you return all pen and eraser tools to the pen tray and touch the interactive whiteboard, a
menu appears allowing you to clear or save your notes, and close the Digital Ink Layer.
Consider the following points when you are writing on the interactive whiteboard:
• The SMART Board interactive whiteboard recognizes the last tool that you picked up
• Each pen tool slot has an optical sensor that detects when that pen is not in the pen tray. A light
in each tool slot indicates which tool is active.
• The digital ink is the color of the last pen you picked up, regardless of which pen you use or how
many tools you have removed from the pen tray
• Once you remove a pen tool from the tray, you can use your finger to write on the interactive
whiteboard
Action Method
Write
Digital Ink
Layer border
Clear writing Save writing
Close Digital Ink
Layer
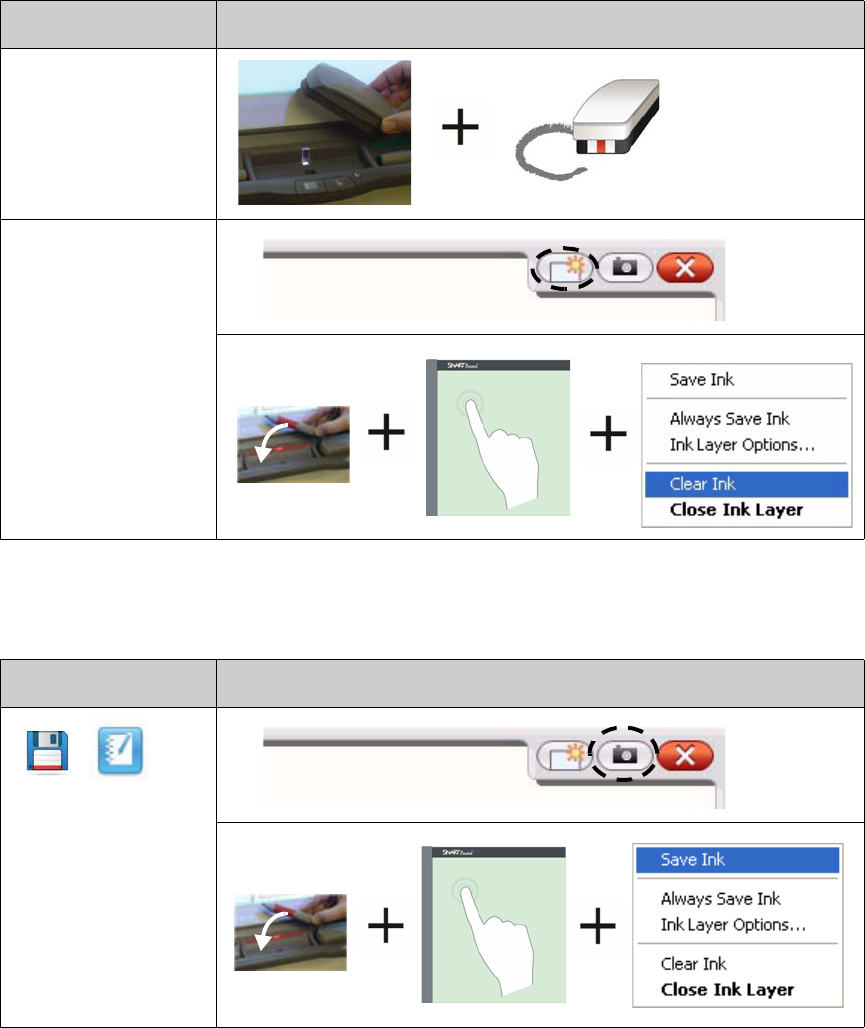
Erasing digital ink
Saving digital ink
You can save your notes and drawings as a SMART Notebook software file.
Action Method
Erase some of your
notes
Clear all of your
notes
Action Method
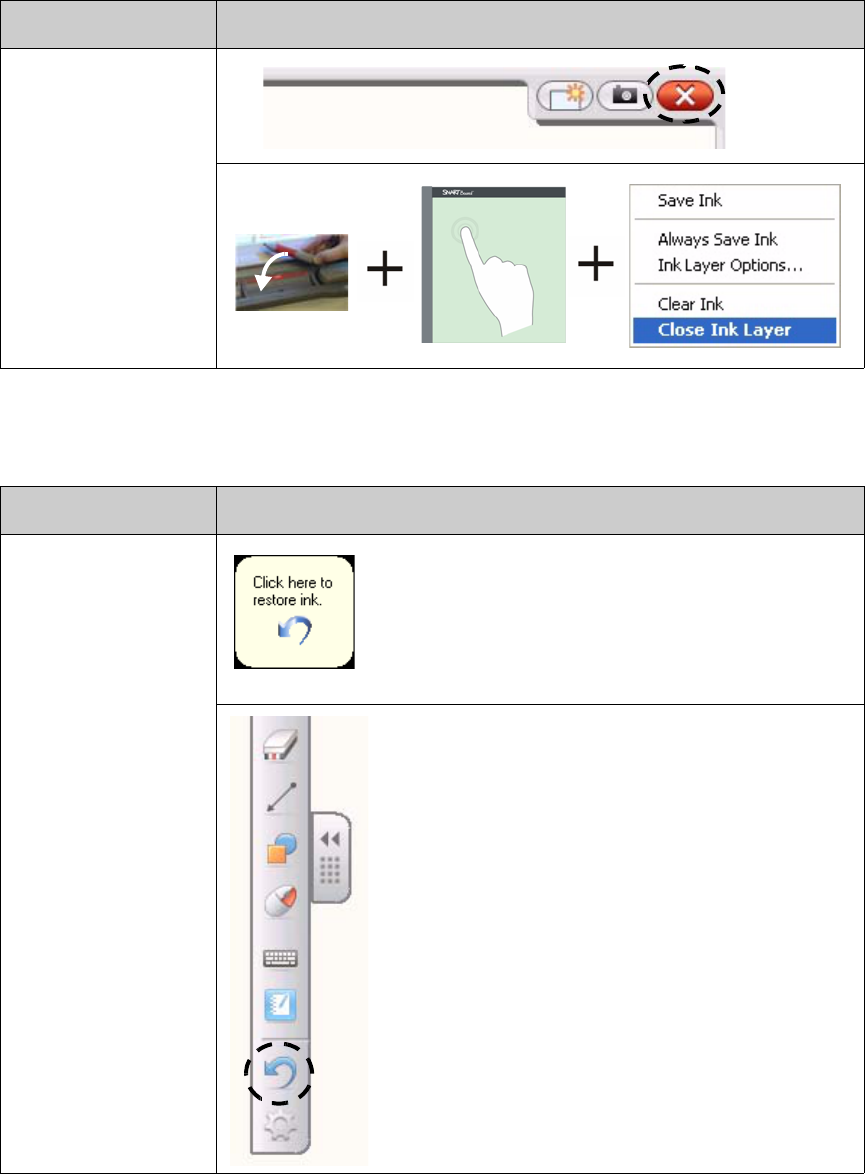
Closing the Digital Ink Layer
Close the Digital Ink Layer when you finish writing on the interactive whiteboard and want to work
with an application.
Restoring notes
If you accidentally clear your notes by closing the Digital Ink Layer, you can restore them.
Action Method
Close the Digital Ink
Layer
Action Method
Restore Notes

© 2008 SMART Technologies ULC. All rights reserved. smarttech and the SMART logo are trademarks or registered trademarks of SMART Technologies ULC in the
U.S. and/or other countries. All other third-party product and company names are for identification purposes only and may be trademarks of their respective owners.
Printed in Canada 06/2008.
Hands-on Practice
Try the following tasks to test your knowledge
Open your Internet browser using the SMART Board interactive white-
board
Use the On-Screen Keyboard to enter the address for a web page in
the address bar
Use a Pen Tool to draw over the web page
Capture an image of your drawing into SMART Notebook software
Close the Digital Ink Layer
Restore your drawings
Learner Resource
Ink Aware
Introduction
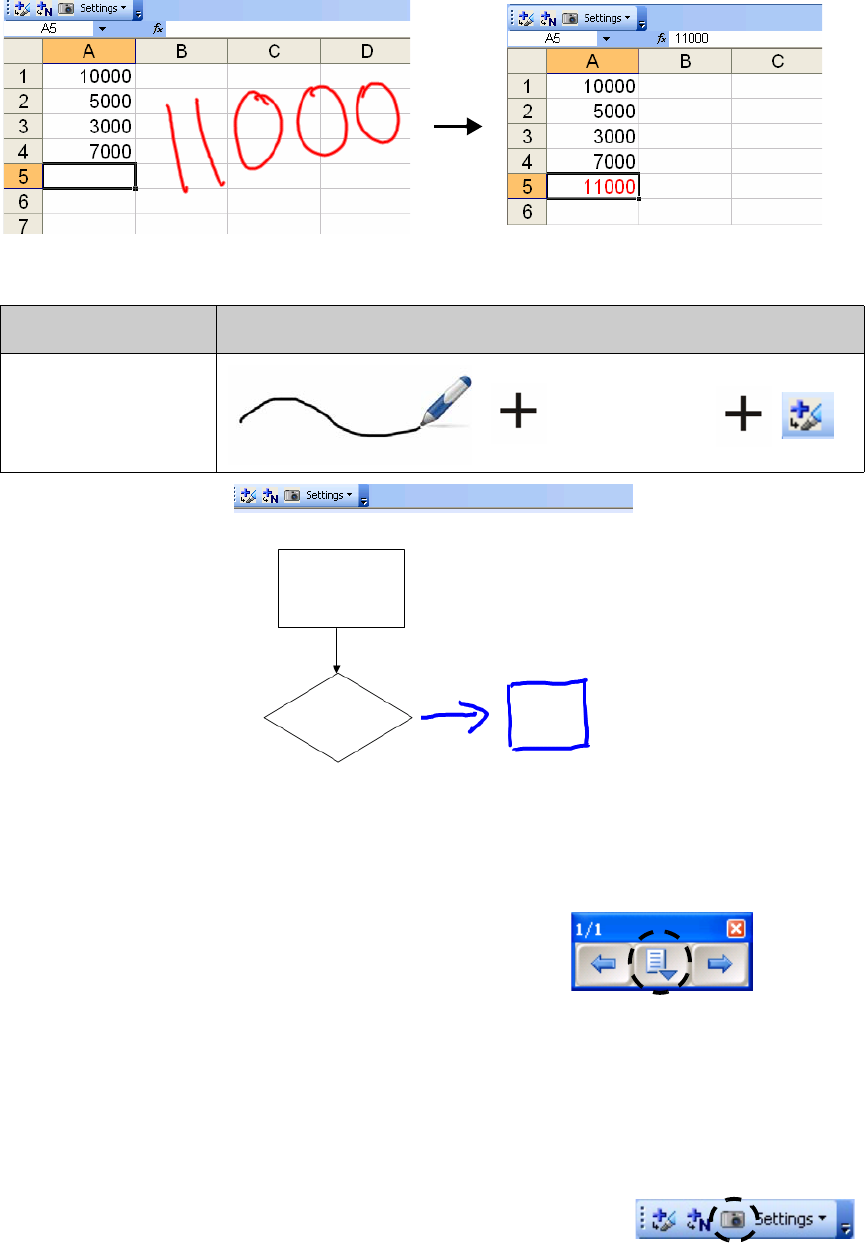
You can write and draw directly into Ink Aware files. Insert your writing as text or graphics instead
of writing on the Digital Ink Layer.
There are several Ink Aware applications, including Microsoft Office and Open Office.org
applications. This document provides information on Microsoft Office applications.
Points to consider
Ink Aware functions are different in each aplication. The following points apply to Ink Aware
Microsoft Office applications:
• When you pick up the pen tool, the SMART Aware Toolbar appears instead of the Digital Ink Layer
N
OTE: The SMART Aware Toolbar may appear in other toolbars, or as a floating toolbar. If the
SMART Aware Toolbar is not visible, select View > Toolbars > SMART Aware Toolbar from the
menu.
• You can write anywhere on the document
• Touch the interactive whiteboard where you want to insert the writing
• Press a button on the SMART Aware Toolbar to insert writing into the document
• Save your writing in your document or capture it to a SMART Notebook file
• In Microsoft PowerPoint presentation graphics program, the SMART Aware Toolbar appears as
a floating toolbar in the normal view, and the slide show toolbar in presentation view. For more
information, see Writing over a Microsoft PowerPoint presentation on the following page.
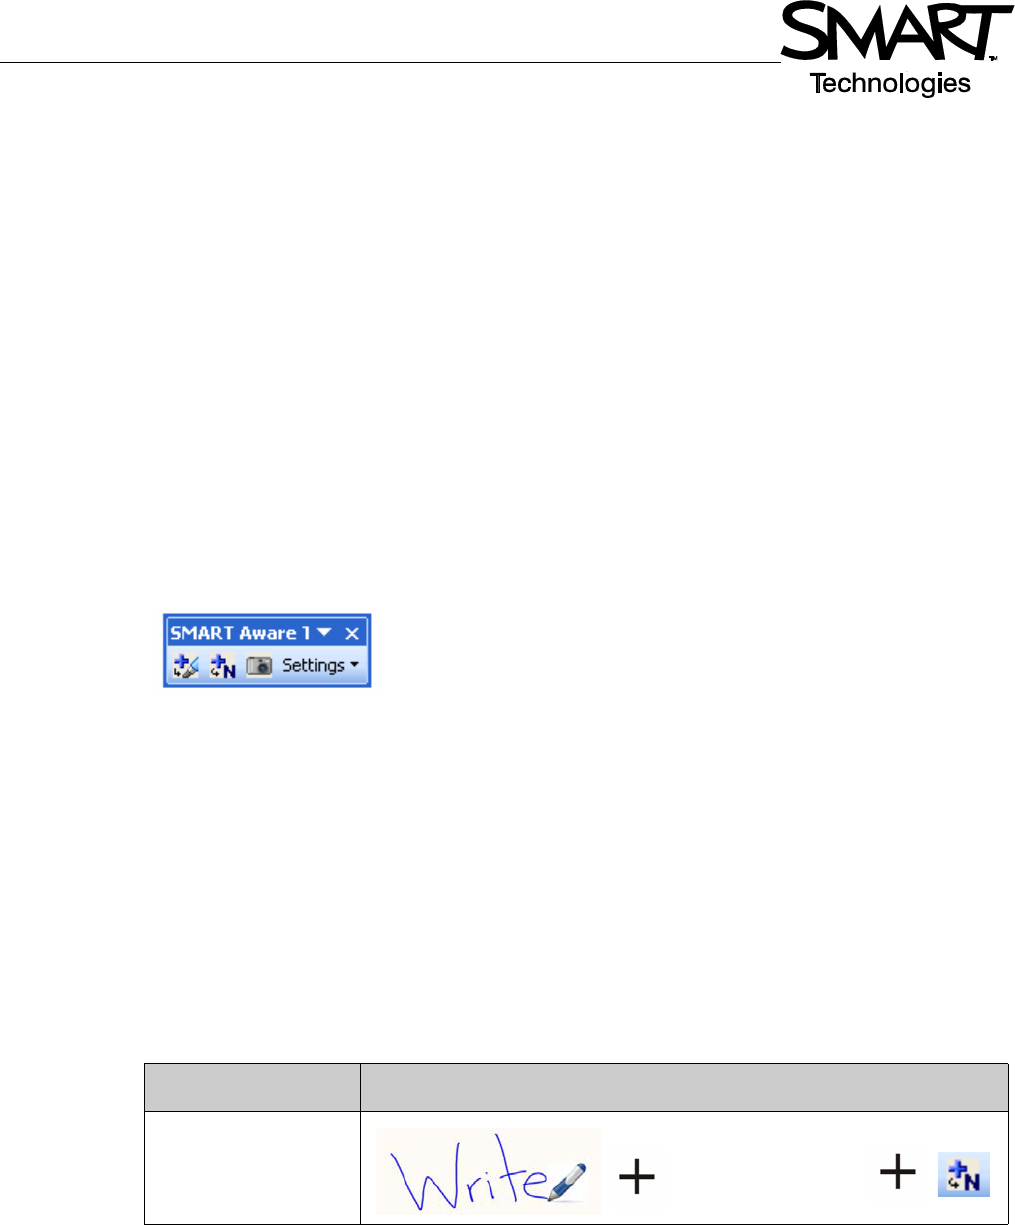
Inserting writing into a document
Action Method
Insert writing as text Touch where
you want to
insert the text
Writing over a Microsoft PowerPoint presentation
• The SMART Aware toolbar is not visible when you use an interactive whiteboard to present a
PowerPoint software file
• Press the Command Menu button on the Slide Show toolbar
to access the Ink Aware features
• You do not need to insert your notes each time you write. You will be prompted to insert your
notes into the document at the end of the presentation
Saving your writing
• If you used the Insert as Text or Insert as Drawing buttons as explained above, when you save
the file, your writing will save with it
• You can also use the Capture tool to save an image of your work
into a SMART Notebook file.
Action Method
Insert writing as a
graphic
Touch where
you want to
insert the
graphic
© 2008 SMART Technologies ULC. All rights reserved. smarttech and the SMART logo are trademarks or registered trademarks of SMART Technologies ULC in the
U.S. and/or other countries. All other third-party product and company names are for identification purposes only and may be trademarks of their respective owners.
Printed in Canada 06/2008.
Hands-on Practice
Try the following tasks to test your knowledge
At your computer, create a brief two-question quiz using Microsoft
Word
At the interactive whiteboard, open the quiz and use a Pen Tool to write
the answers to the questions
Insert the answers as text into the document
Save the file including the answers
Learner Resource
Working with SMART Notebook software
Introduction
SMART Notebook software is designed to use with a SMART Board interactive whiteboard. You
can use it to create interactive and collaborative presentation materials. The intuitive interface
makes it easy to use.
SMART Notebook software lets you:
• Draw or write on the pages using the pen and eraser tools from the pen tray or the SMART
Notebook software toolbar
• Access thousands of learning objects in the SMART Notebook software Gallery
• Attach documents, shortcuts and hyperlinks to the SMART Notebook file for easy access
• Reorder, copy and delete pages
• Add an unlimited number of pages
Creating a SMART Notebook file
Action Method
Open SMART
Notebook software
OR
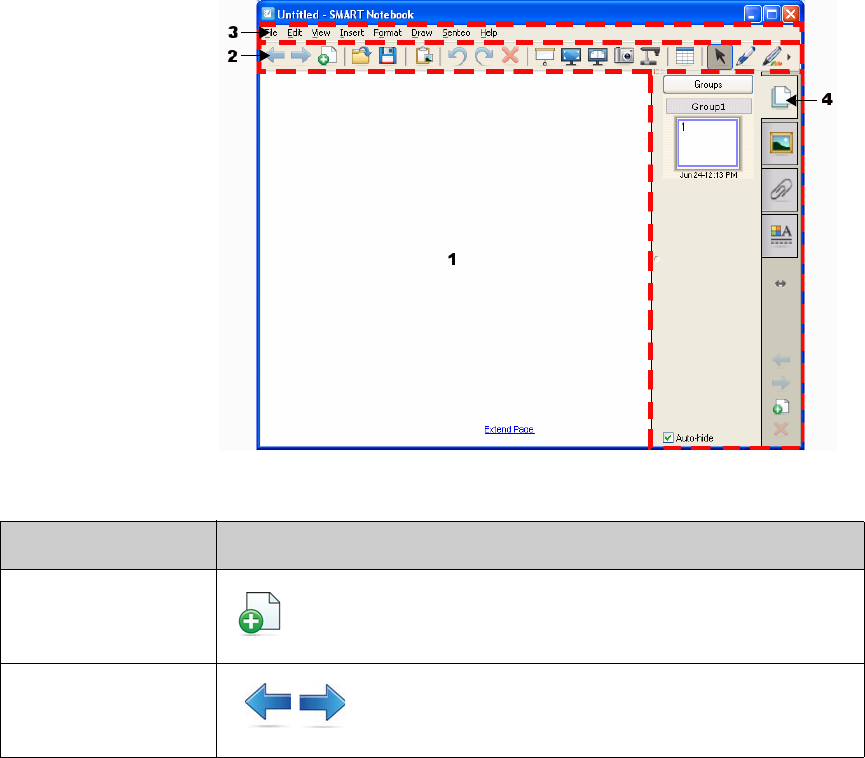
The SMART Notebook software interface includes four main parts:
1 Work area – lets
you work with
objects, including
handwritten
notes, typed text,
graphics, clip art
and Flash
®
files
2 SMART
Notebook
software toolbar
– provides tools
for creating and
presenting files
3 Menu bar –
provides text-
based options
4 Side Tabs –
provide additional
tools and features
Action Method
Add a blank page
Navigate to the next
or previous page
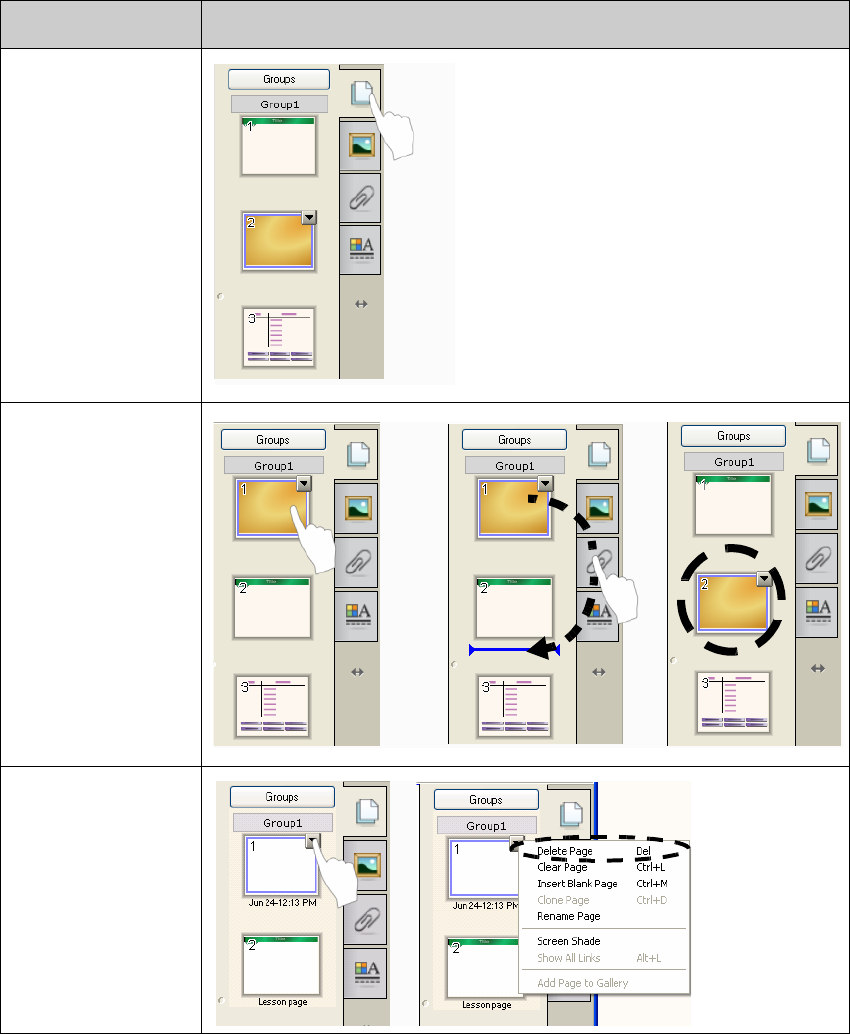
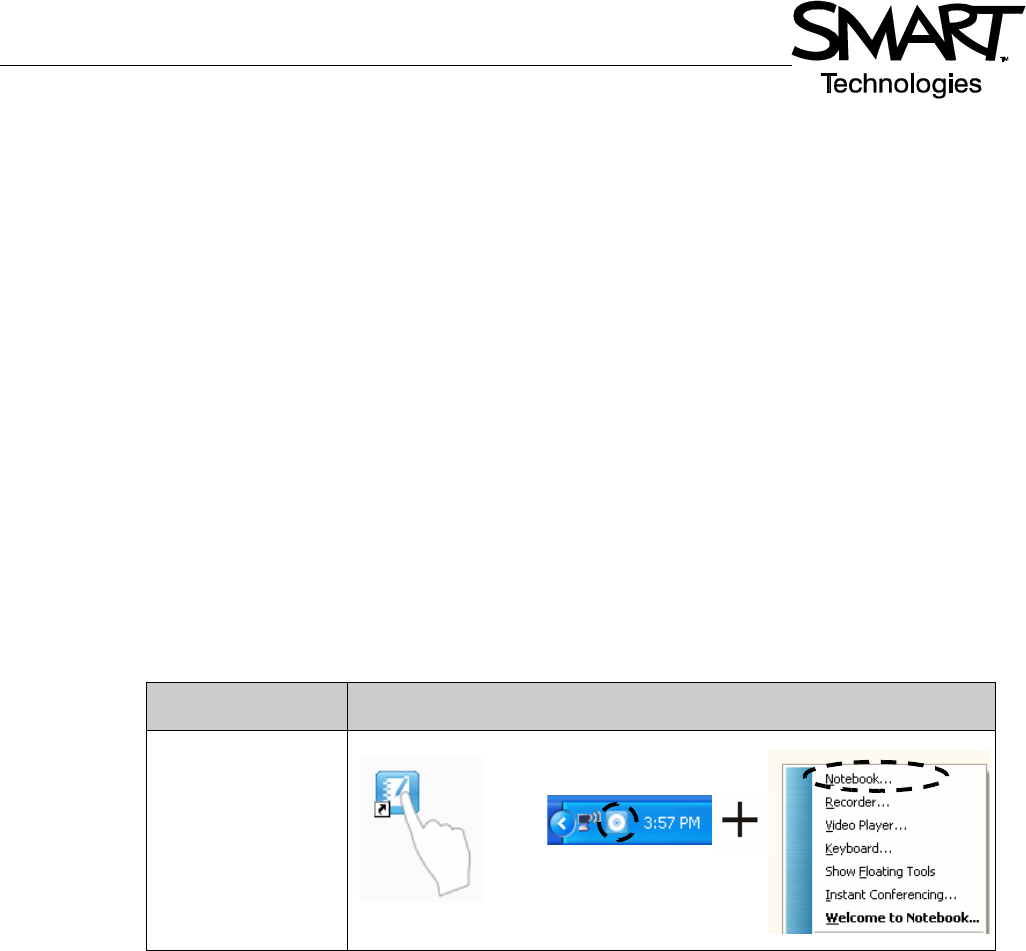
Organizing and enhancing pages
The Page Sorter tab lets you see an overview of all pages in the SMART Notebook file, navigate to
a different page and reorder the pages.
Action Method
See all pages
Move a page
Delete a page
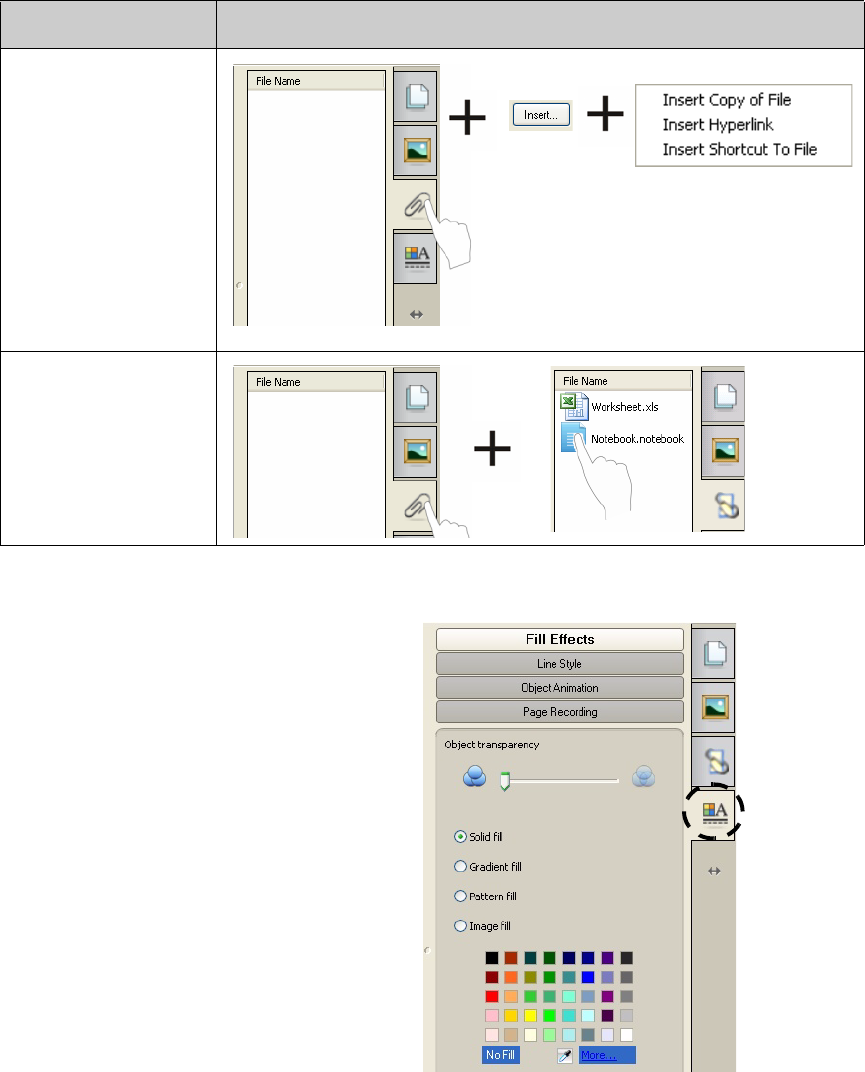
Attaching external files and links
You can attach supporting documents, shortcuts and web links to a SMART Notebook file to keep
your documents organized and improve the flow of your lesson.
There are three types of attachments you can add to a SMART Notebook file:
• Copy of File – stores a copy of the document in the SMART Notebook file
• Shortcut to File – stores the file path on your computer and minimizes the size of your SMART
Notebook file
• Hyperlink – links to a website
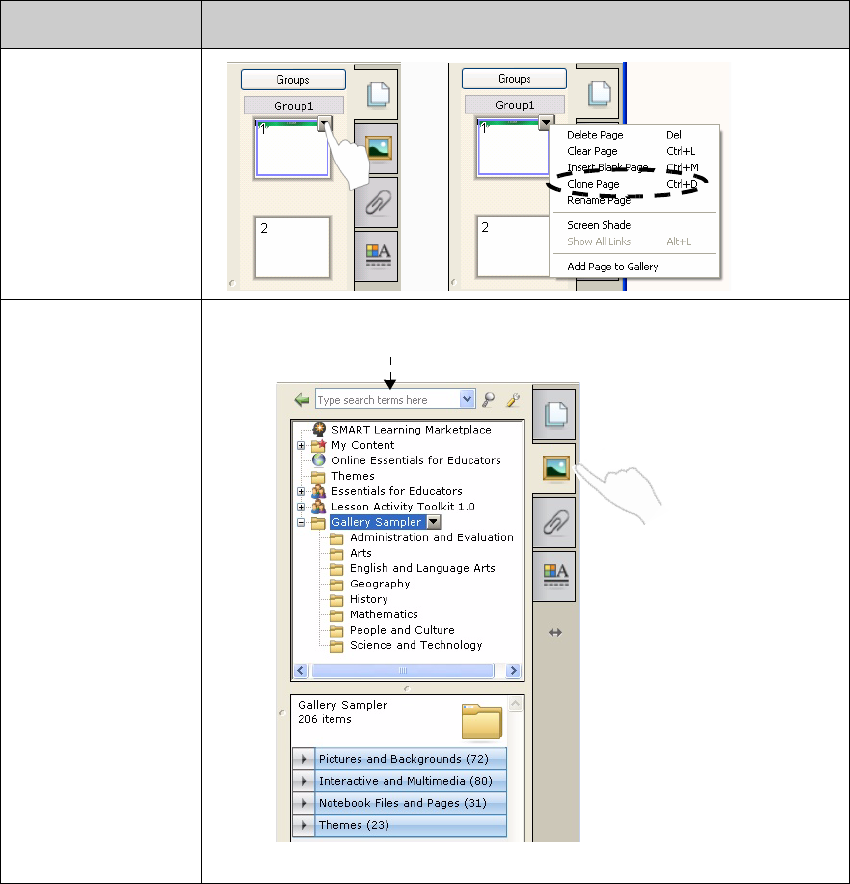
Duplicate an
existing page
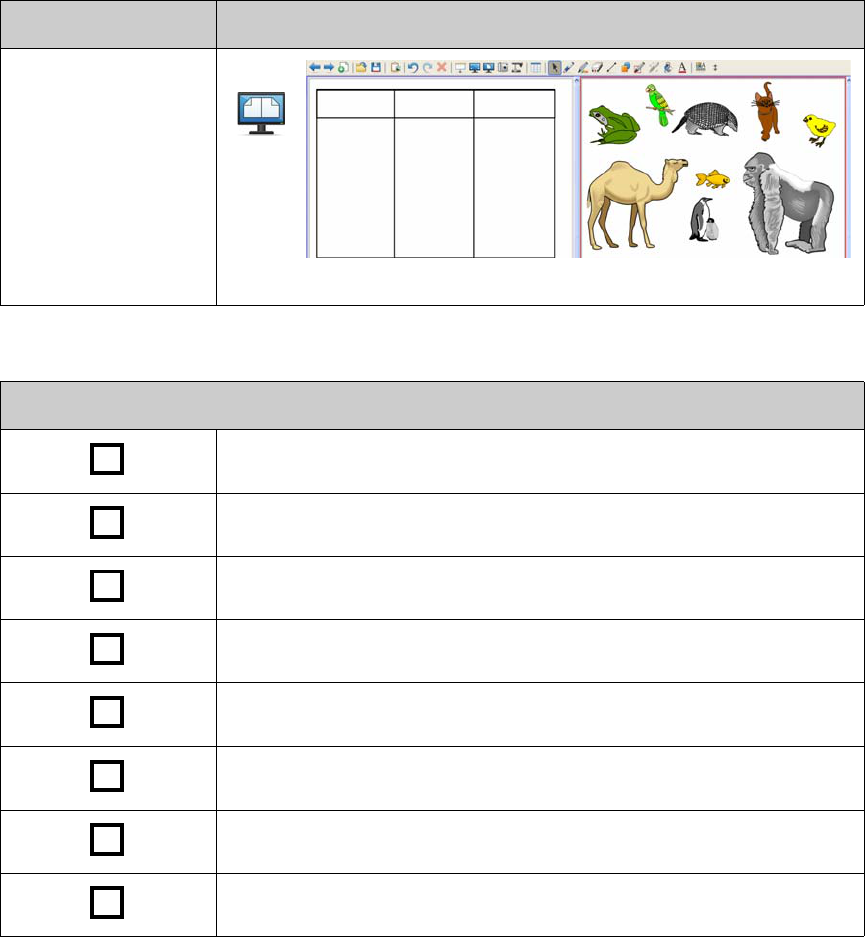
Add learning
objects from the
Gallery
Action Method
Type search terms here
You can access attachments by pressing the Attachments tab or a linked object on a SMART
Notebook page.
Formatting objects
Anything you add to the SMART Notebook
page is an object, including Gallery items or
items created with a pen tool. After you add an
object, you can format or animate it by
selecting the object and clicking the
Properties tab. The options that appear
depend on the type of object that you selected.
Action Method
Add an attachment
Open an attachment
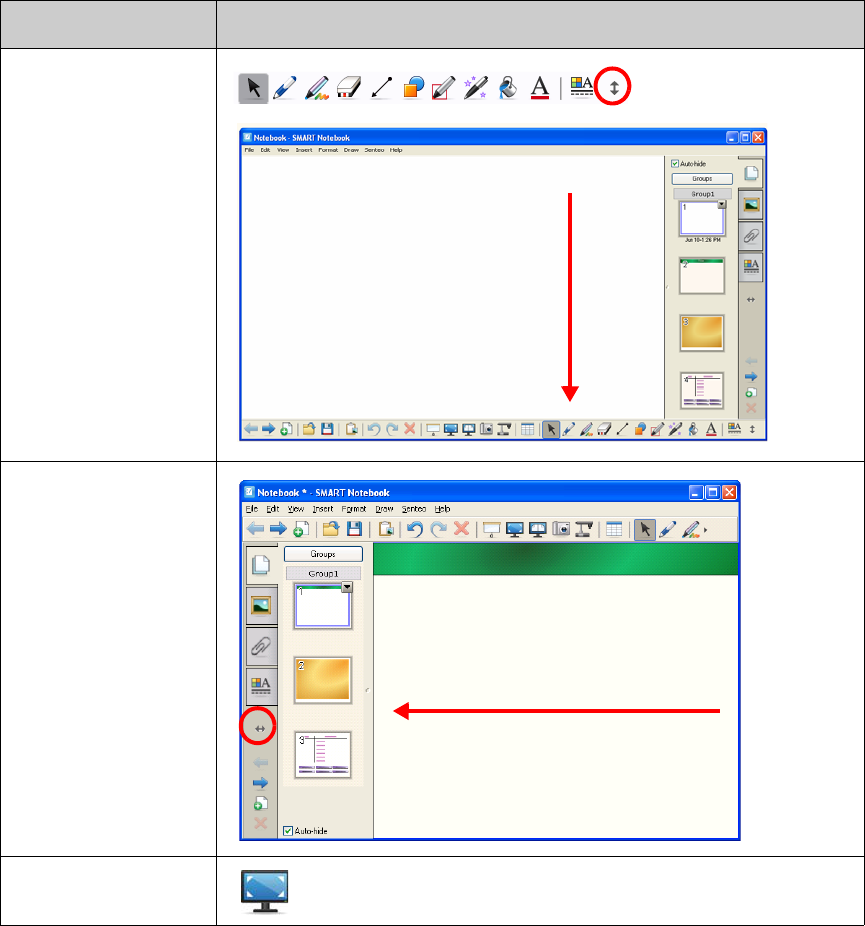
Customizing your workspace
You can customize the SMART Notebook software interface to suit your delivery style and
classroom needs.
Option Press
Change the toolbar
location
Change the Side Tab
location
Maximize work space
© 2008 SMART Technologies ULC. All rights reserved. smarttech and the SMART logo are trademarks or registered trademarks of SMART Technologies ULC in the
U.S. and/or other countries. All other third-party product and company names are for identification purposes only and may be trademarks of their respective owners.
Printed in Canada 06/2008.
Hands-on Practice
View more than one
page at a time
Try the following tasks to test your knowledge
Create a new SMART Notebook file
Add a new page
Use a Pen Tool to write your name on the first page
Add an object from the Gallery to the second page
Move the page with your name on it to the end of the SMART Note-
book file
Attach a file
View both pages at once using Dual Page Display
Return to Single Page Display
Option Press
Learner Resource
Working with objects in SMART Notebook software
Introduction
Anything that you can select on the SMART Notebook page is an object. Each object can be moved,
resized or rotated. You can also change additional properties depending on the type of object.
You can add an object to a page using the following methods:
• Typing text
• Drawing or writing in the work area
• Using the drawing tools on the SMART Notebook software toolbar
• Inserting content from the Gallery, your computer or the Internet
• Capturing an area of your screen with the Capture tool
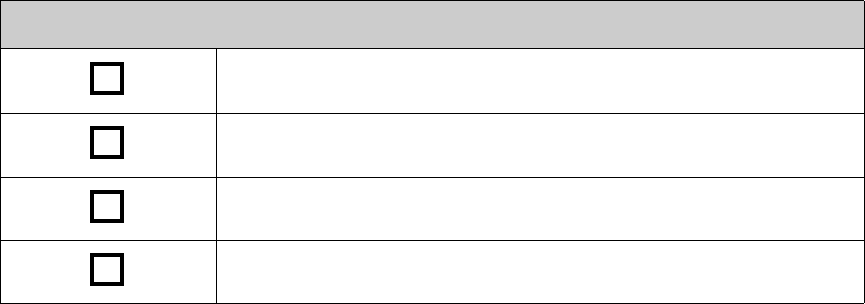
Creating your own objects
The easiest way to create an object is to pick up a pen tool and write or draw on the SMART
Notebook page.
You can also use the drawing tool buttons on the SMART Notebook software toolbar. You can
customize most drawing tools by using the tool button’s sub-menus.
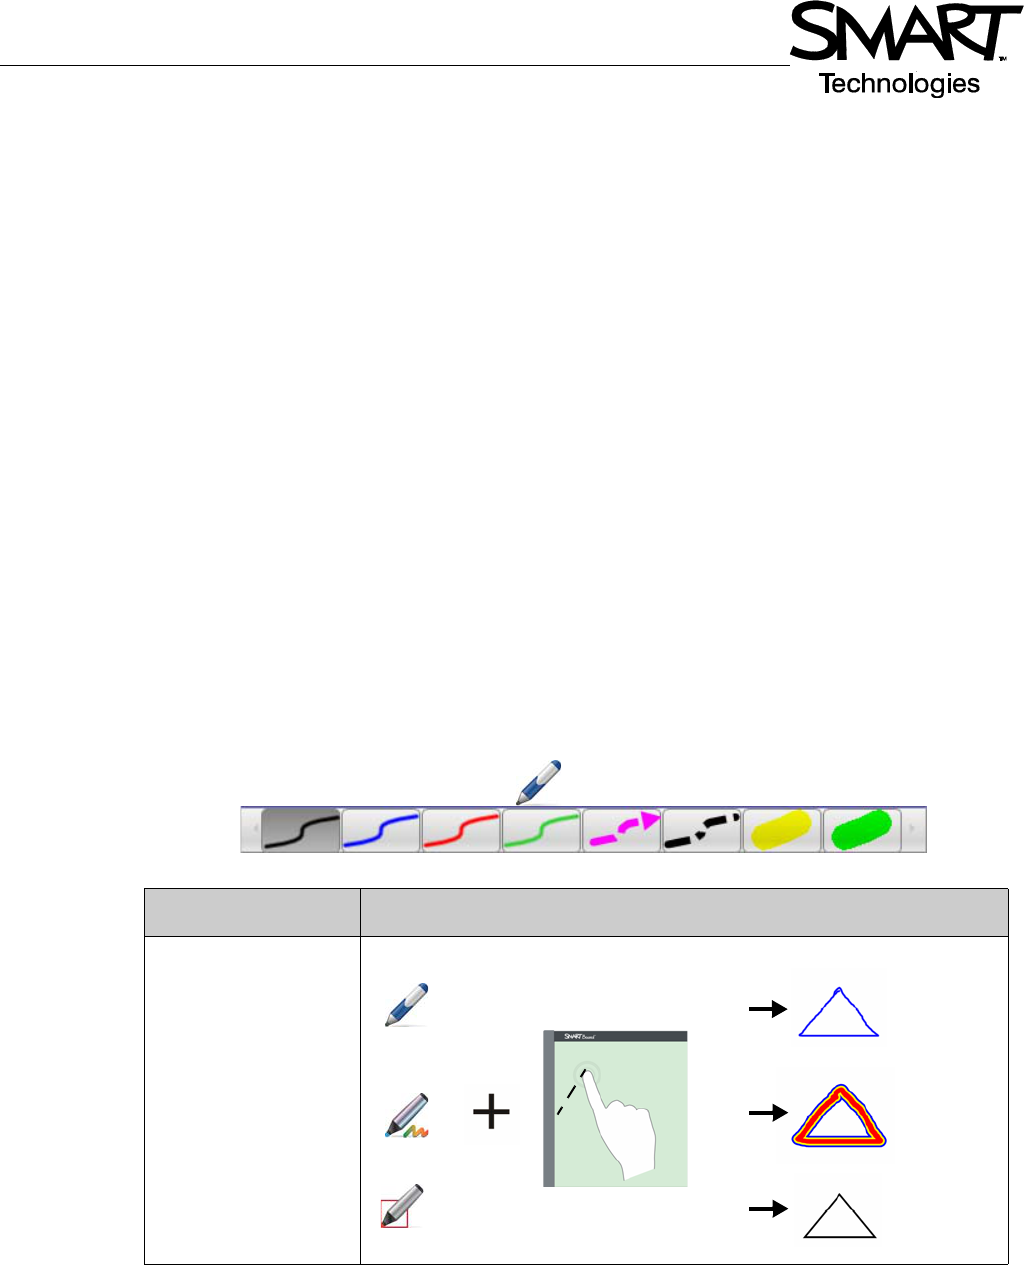
Action Method
Write or draw a
freehand shape
Erase your writing or
drawing
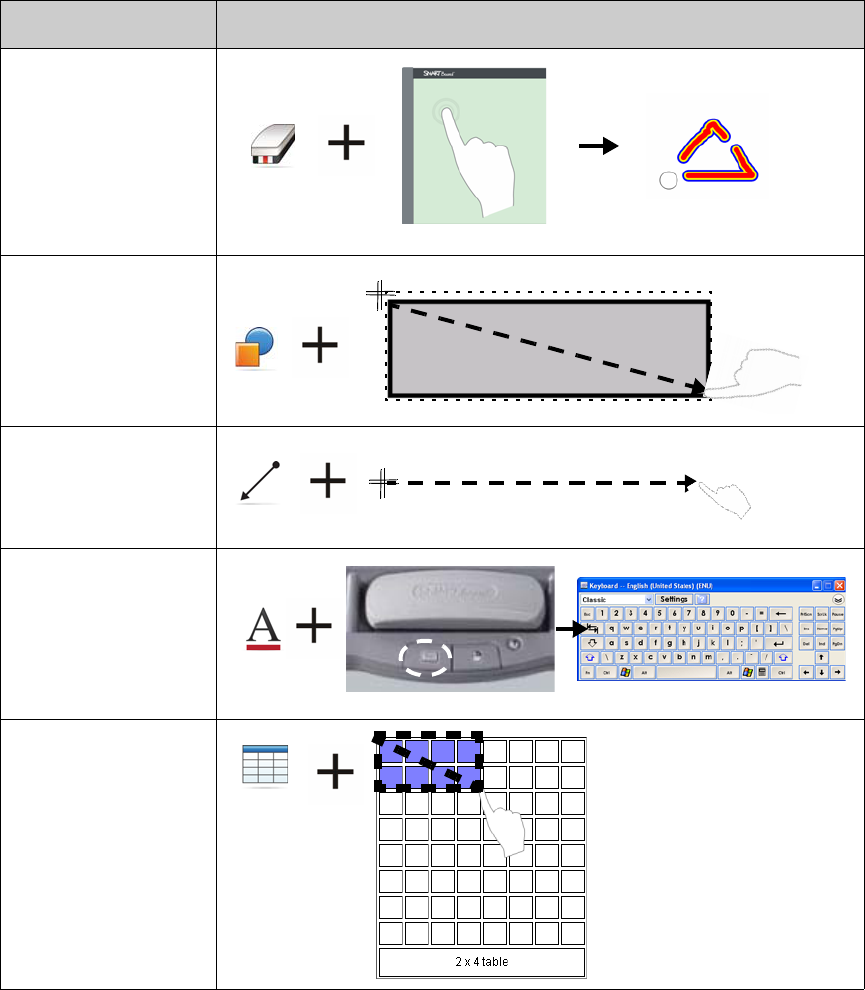
Create a shape
Create a straight line
Create a text object
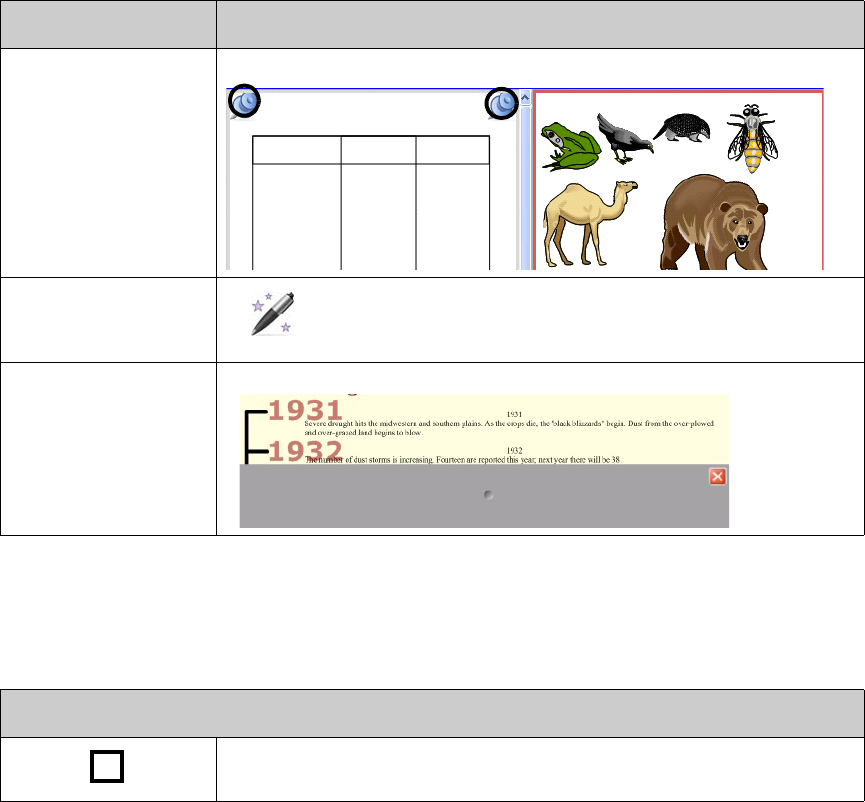
Create a table
Action Method
Searching for Gallery objects
The Gallery contains thousands of images, pages, videos and Flash files that you
can add to your SMART Notebook file. There are two ways to find content in the
Gallery:
• Browse the Gallery collection folders
• Search by keyword
Task Method
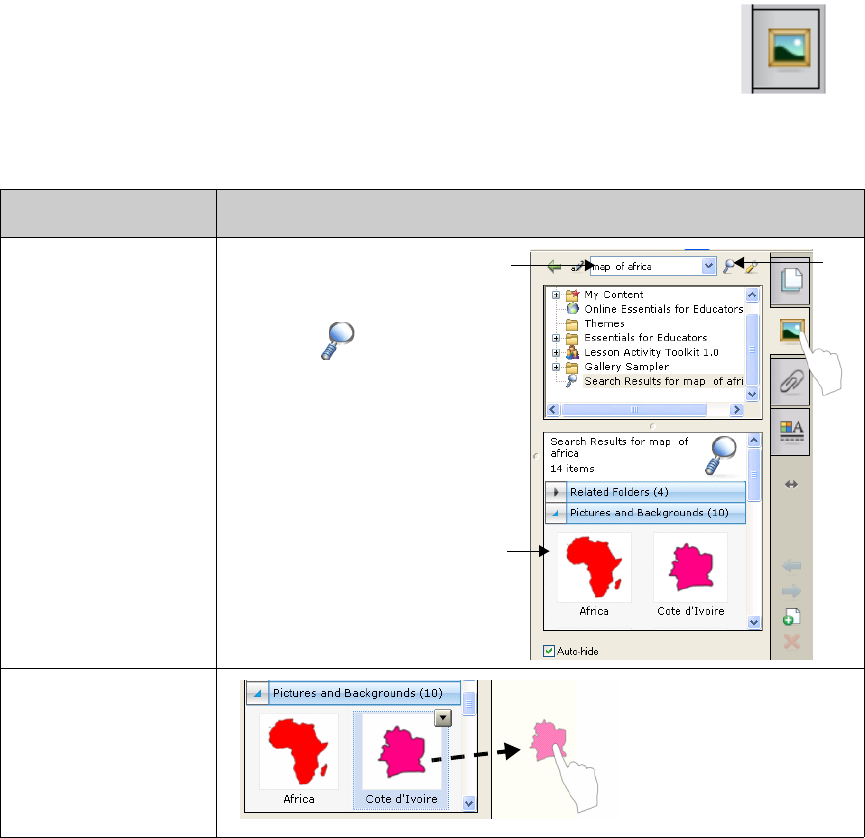
Search by keyword 1 Open the Gallery tab
2 Type a search term in
the Search box
3 Press to begin
the search
4 Search results appear
in the lower frame
Add a Gallery object
to a page
2
3
4
1
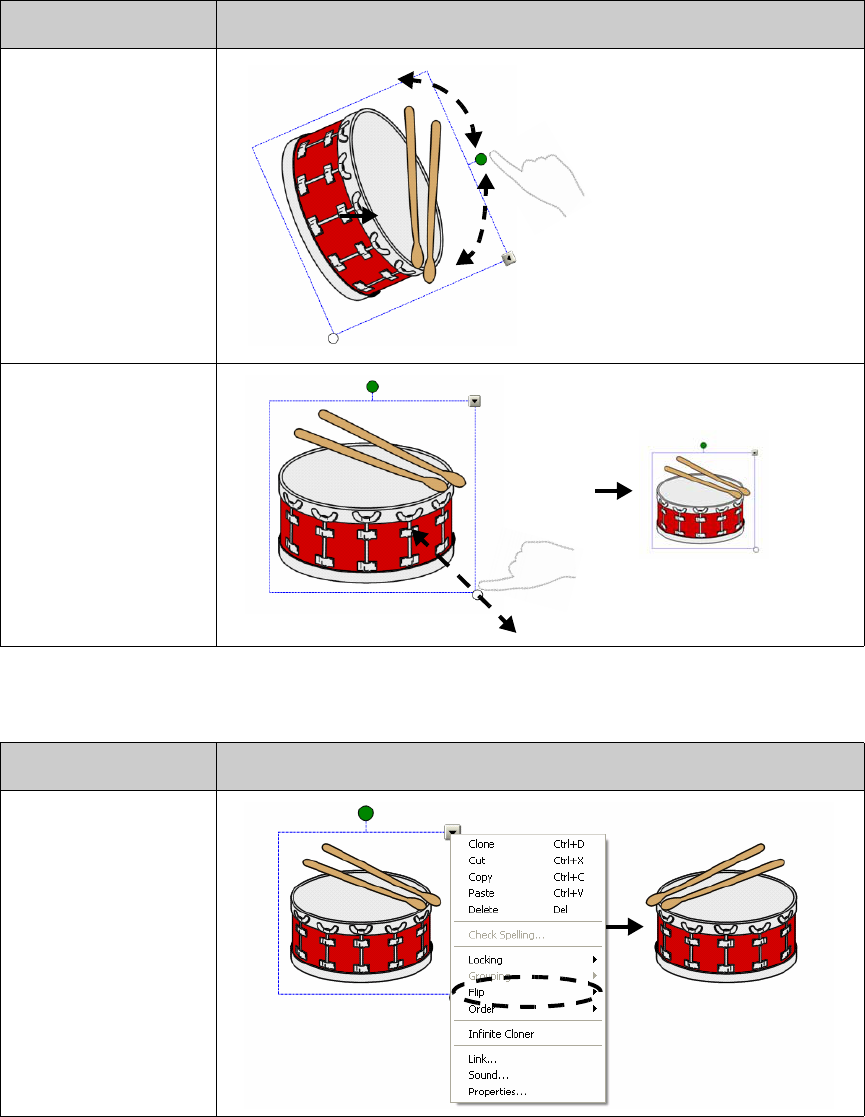
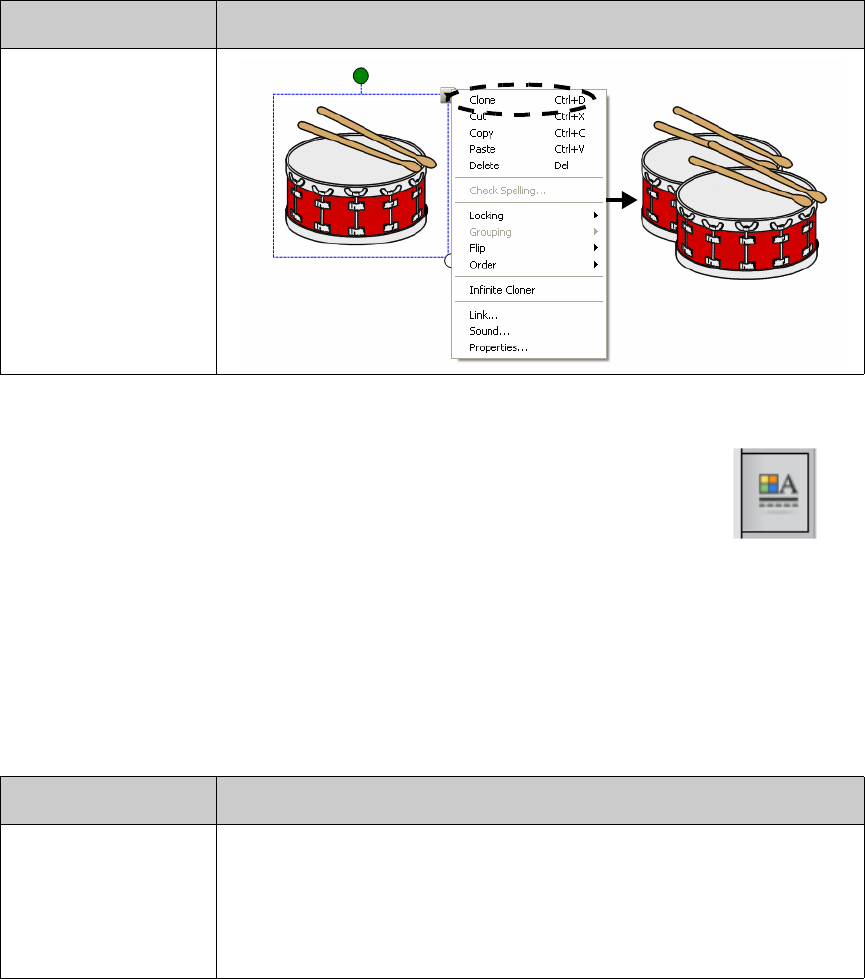
Manipulating objects
Press or click an object to select it. Two handles and a drop-down menu arrow appear.
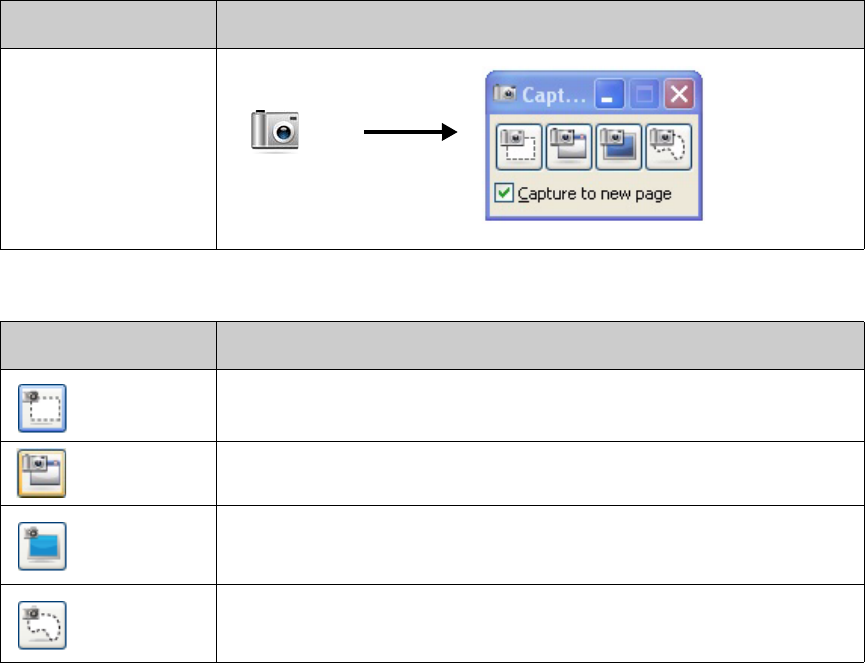
The object drop-down menu provides access to additional actions. Flip and Clone are examples of
these actions:
Action Method
Rotate an object
Resize an object
Action Method
Flip an object
Modifying object properties
The Properties side tab lets you make changes to an object. Using this tab,
you can modify the following object properties:
• Line style
• Text style
• Fill
• Animation
The options that are available in the Properties tab vary depending on the object that you have
selected. If no object is selected, changes will affect the background of the SMART Notebook page.
Create a copy of an
object
Action Method
Change object
properties
1 Select the object you want to modify
2 Press the Properties tab
3 Press the button for the property you want to change
4 Select properties from the options provided. The changes are
visible immediately.
Action Method
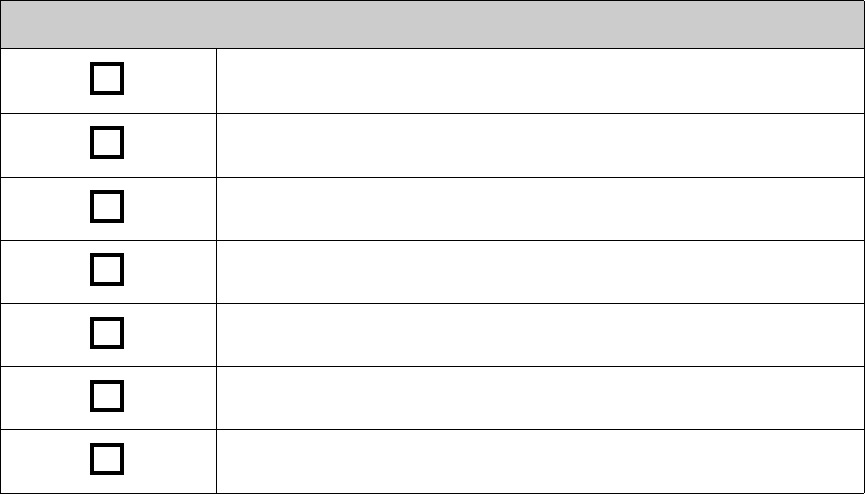
Capturing an image
You can use the Capture tool to capture anything that is displayed on your screen and use it as an
object in a SMART Notebook software file. When you press the Capture button, the Screen
Capture toolbar appears.
The captured image appears in a new SMART Notebook page as an object.
You can access the Screen Capture toolbar when you are not using SMART Notebook software.
Press the SMART Board icon in the Windows Notification area. Select Other SMART Tools >
Screen Capture Toolbar.
Action Method
Open the Capture
toolbar
Button Captured image
A rectangular area
The active window
The entire screen
A freehand shape
© 2008 SMART Technologies ULC. All rights reserved. smarttech and the SMART logo are trademarks or registered trademarks of SMART Technologies ULC in the
U.S. and/or other countries. All other third-party product and company names are for identification purposes only and may be trademarks of their respective owners.
Printed in Canada 06/2008.
Hands-on Practice
Try the following tasks to test your knowledge
Create an object using each of the drawing tools found on the
SMART Notebook software toolbar
Use the Properties tab to modify the color, line style and text style of
the objects
Create a table with two rows and two columns
Find a map of your country using the Gallery search tool
Add the map to the SMART Notebook page
Flip, rotate and clone the map
Experiment with the other options found in the object drop-down menu

Learner Resources
Advanced SMART Notebook software features
Enhance the appearance of your SMART Notebook file
Organize your work
Feature Function
Themes Apply a consistent background to one or all SMART Notebook pages
Spell Check Check text spelling
Alignment Guides Align objects horizontally or vertically
Fill Effects
Feature Function
My Content Add your own objects to the
Gallery and save your
favorite items
Solid
Image
Pattern
Gradient
Integrate interactive media into your lessons
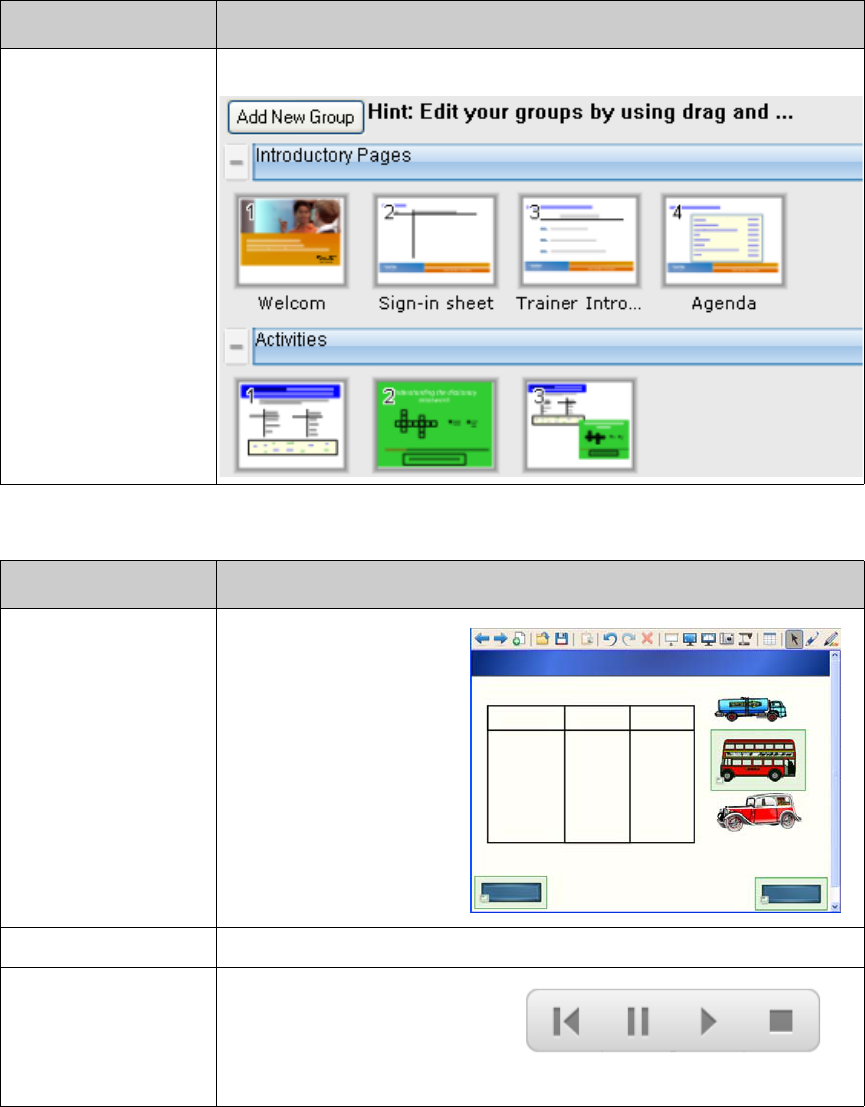
Page Grouping Sort your pages into groups
Feature Function
Show All Links Highlight all linked
objects
Animation Spin, fade in, shrink
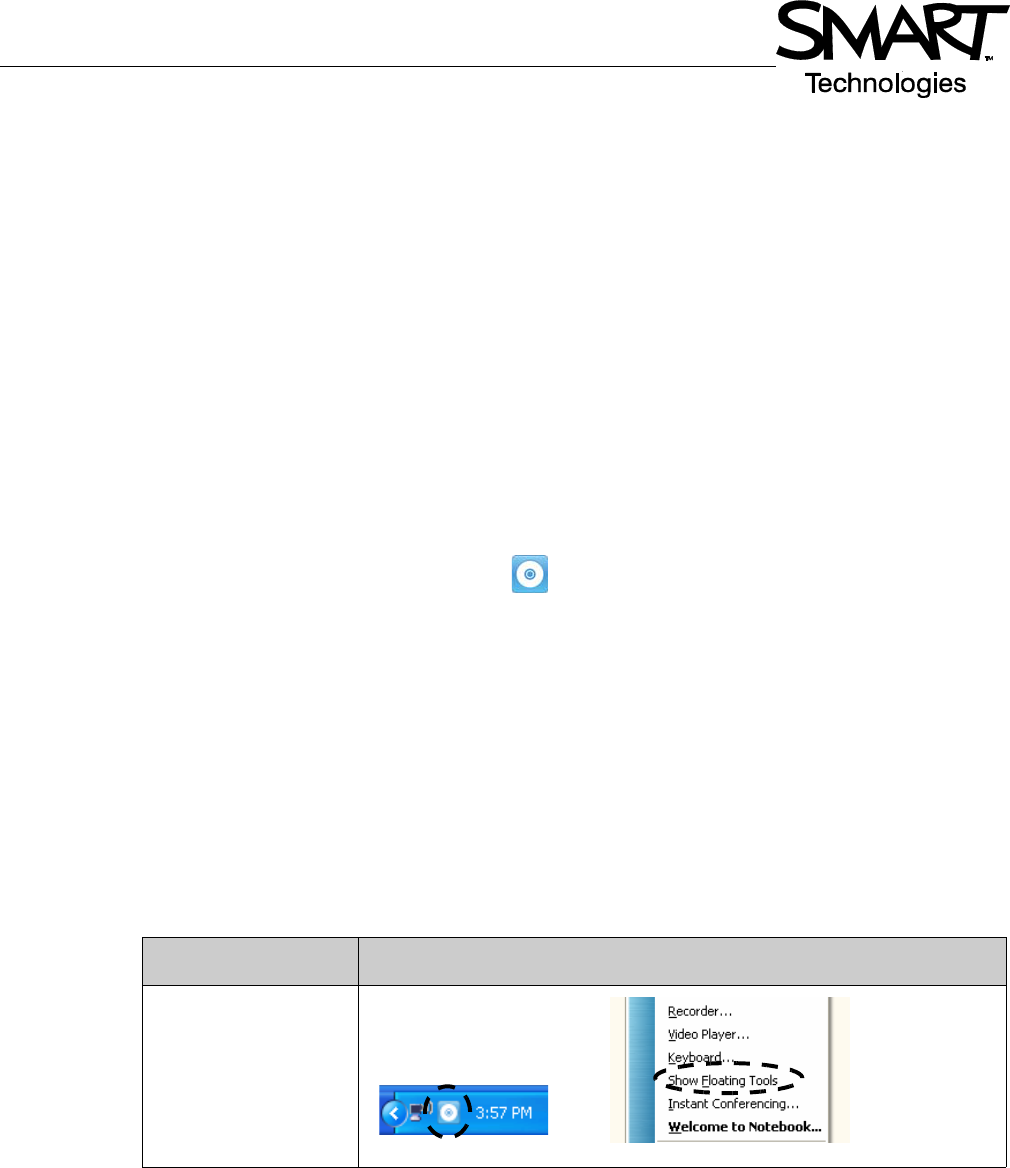
Page Recording Record and play back actions
on a SMART Notebook page
Feature Function
Back Pause Play Record
© 2008 SMART Technologies ULC. All rights reserved. smarttech and the SMART logo are trademarks or registered trademarks of SMART Technologies ULC in the
U.S. and/or other countries. All other third-party product and company names are for identification purposes only and may be trademarks of their respective owners.
Printed in Canada 06/2008.
Present your SMART Notebook file
You can find additional information about these and other features in the SMART Notebook
software Help file. To access Help, select Help > Contents from the menu bar.
Hands-on Practice
Feature Function
Pin Page Keep one page locked in place in Dual Page Display
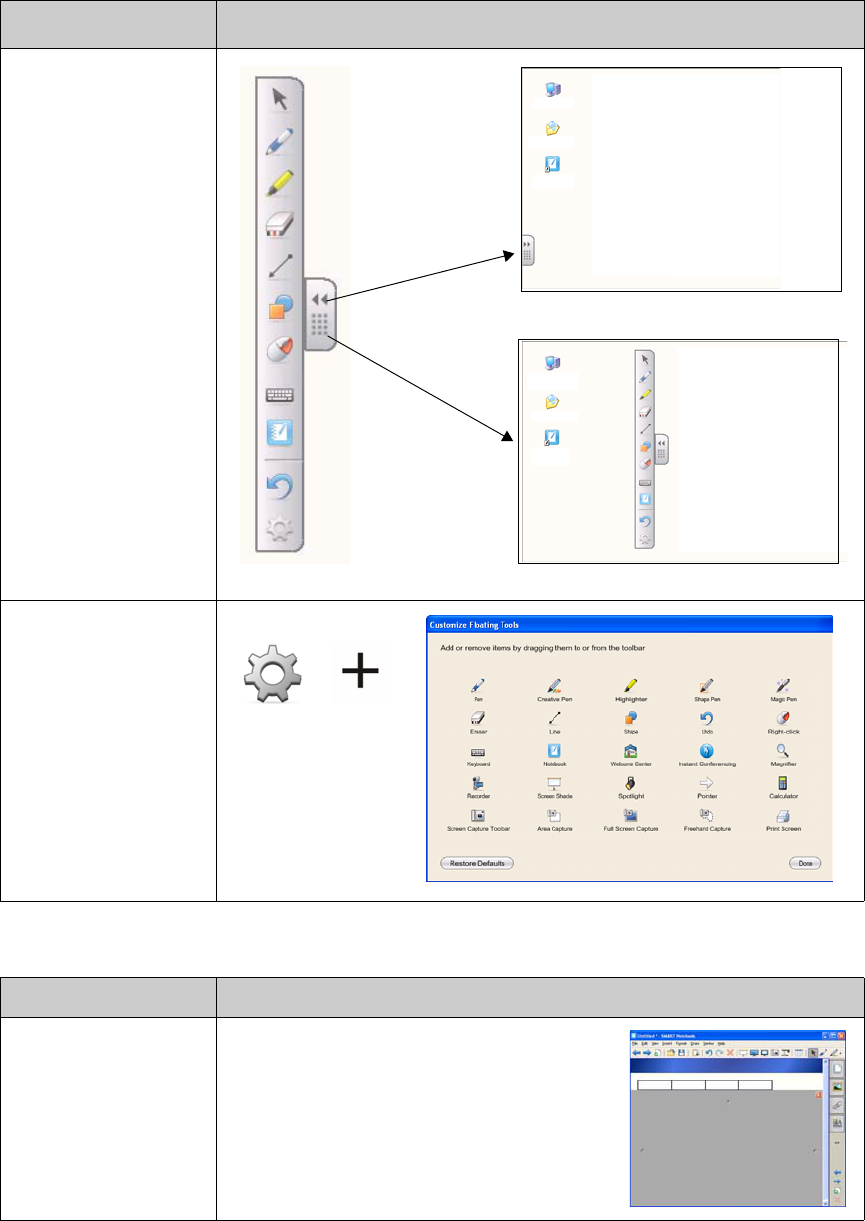
Magic Pen Create a Spotlight, Magnifier or write in disappearing ink
Screen Shade Cover information and reveal it slowly during a presentation
Try the following tasks to test your knowledge
Create a two-page SMART Notebook file using three of the advanced
features listed in this section
Learner Resource
Using SMART Tools effectively
Introduction
SMART Notebook software includes several tools that enhance your use of the SMART Board
interactive whiteboard. SMART Tools let you do the following:
• Access the tools that you use most frequently
• Focus attention on a particular area of the display
• Integrate multi-media files into your presentation
• Type text
• Configure the SMART Board interactive whiteboard
You can use SMART Tools while working with any application on the SMART Board interactive
whiteboard. Click the SMART Board icon in the Windows notification area to access the
SMART Tools.
Accessing frequently used tools
Use the Floating Tools toolbar to access the tools and features that you use most frequently on the
interactive whiteboard.
The Floating Tools toolbar floats on top of other applications and can be:
• Moved anywhere on the screen
• Minimized or hidden
• Customized to include the tools that you find most useful
Task Method
Open the Floating
Tools
+
Drawing attention to part of the screen
Hide, reveal and
move Floating Tools
Add or remove items
to Floating Tools
Tool Function
Screen Shade Gradually reveal information or hide text
and graphics by dragging the shade
vertically or horizontally
Task Method
Configuring the SMART Board interactive whiteboard
Integrating multimedia into your presentation
Spotlight Draw the attention of your audience to a
specific part of the screen
Magnifier Enlarge small text or images
Pointer Direct audience attention to an
important piece of information
Tool Function
Control Panel Configure a variety of software and hardware options
Orient Orient the image of the desktop on
the surface of the interactive
whiteboard
Tool Function
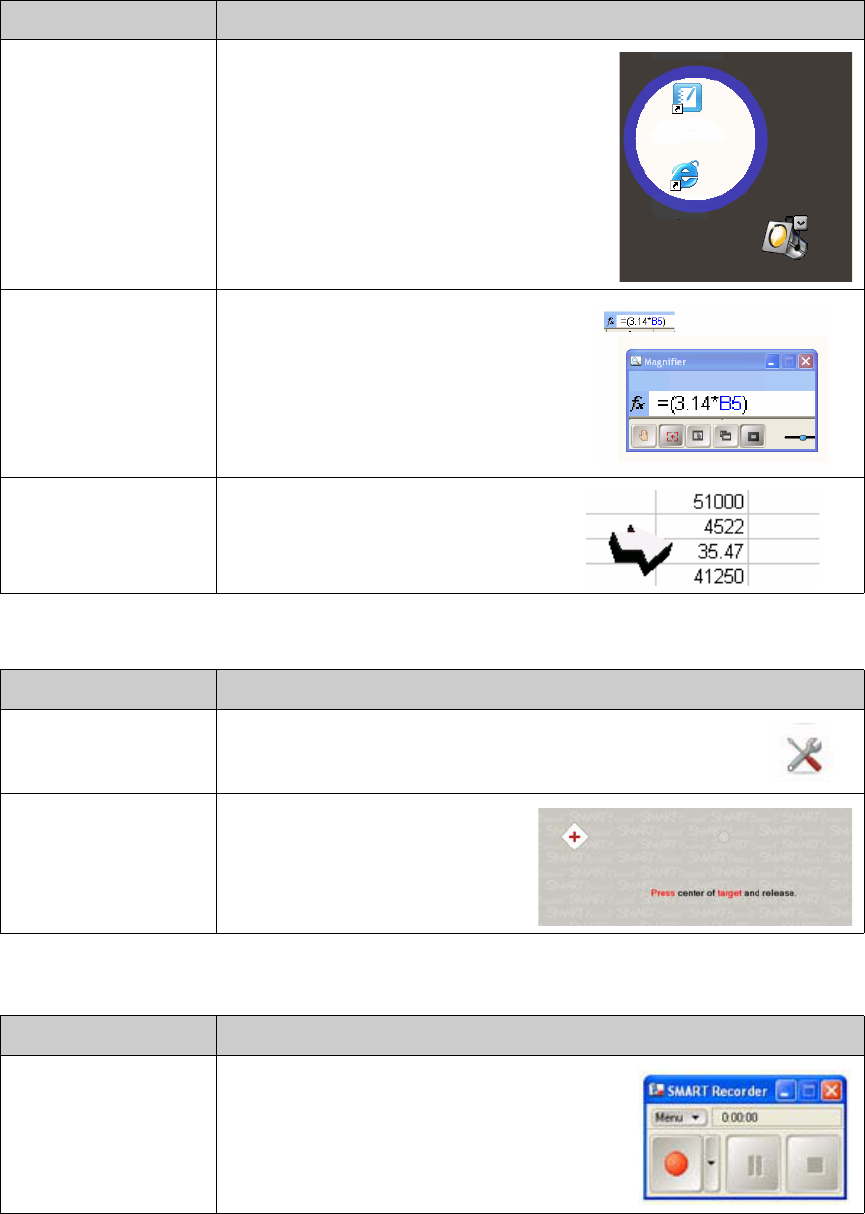
Recorder Record actions on the interactive whiteboard
Tool Function
© 2008 SMART Technologies ULC. All rights reserved. smarttech and the SMART logo are trademarks or registered trademarks of SMART Technologies ULC in the
U.S. and/or other countries. All other third-party product and company names are for identification purposes only and may be trademarks of their respective owners.
Printed in Canada 06/2008.
Typing text
Hands-on Practice
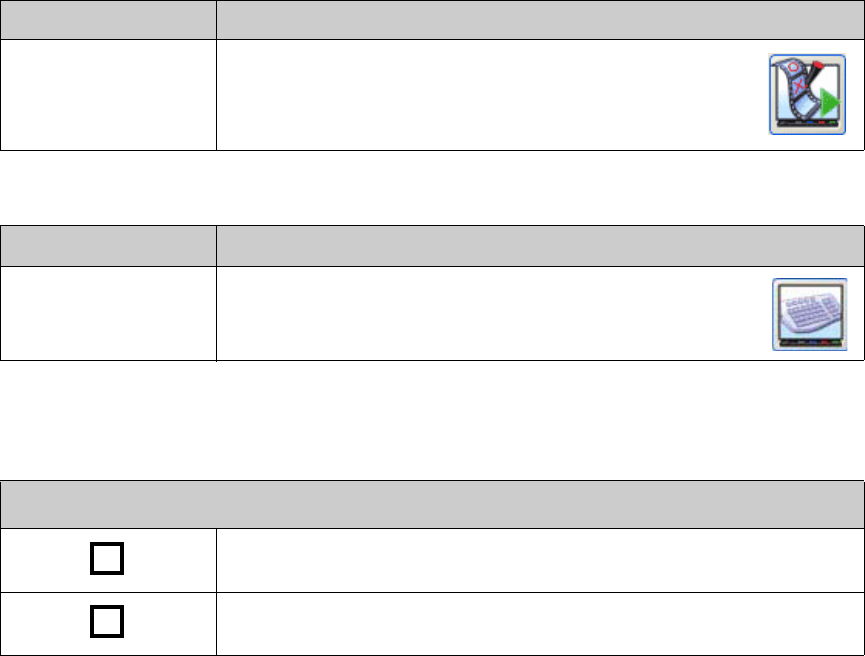
Video Player Play video files and write or draw over video
Tool Function
On-Screen Keyboard Type or edit text in any application
Try the following tasks to test your knowledge
Launch and customize the Floating Tools toolbar
Experiment with two SMART Tools
Tool Function
