
Safety Activity
Checkpoints
Safety guidelines for Girl Scouts of the United States of America (GSUSA)
and Girl Scouts of Greater Iowa approved activities.
2024–2026 Edition

2024–2026 Safety Activity Checkpoints Page 2 of 226
Introduction: Standard Safety Guidelines ........................................................................................................................................................ 6
Understanding Which Activities Are Not Permitted ................................................................................................................................ 14
Chartered Aircraft Trips and Aviation............................................................................................................................................................ 15
Other Actions Girl Scouts and Volunteers Should Not Take ................................................................................................................. 15
First Aid........................................................................................................................................................................................................................ 16
Overall Health, Well-Being, and Inclusivity.................................................................................................................................................. 18
Transporting Girl Scouts ...................................................................................................................................................................................... 21
Troop Meeting Space.............................................................................................................................................................................................. 23
Activities at a Glance .............................................................................................................................................................................................. 25
How to Use Safety Activity Checkpoints ........................................................................................................................................................ 34

2024–2026 Safety Activity Checkpoints Page 3 of 226
Aerial Fitness ............................................................................................................................................................................................................. 35
Amusement Parks ................................................................................................................................................................................................... 37
Animal Interaction .................................................................................................................................................................................................. 39
Backpacking ............................................................................................................................................................................................................... 43
Bicycling....................................................................................................................................................................................................................... 46
Camping ....................................................................................................................................................................................................................... 50
Climbing and Adventure Sports—Master Progression Chart .............................................................................................................. 54
Challenge Courses ................................................................................................................................................................................................... 56
Climbing and Rappelling ...................................................................................................................................................................................... 59
Recreational Tree Climbing................................................................................................................................................................................. 63
Zip Lining..................................................................................................................................................................................................................... 65
Community Clean-Ups ........................................................................................................................................................................................... 67
Girl Scouts Computer Internet Safety Pledge .............................................................................................................................................. 74
Virtual Troop Meetings ......................................................................................................................................................................................... 75
Cookie and Product Programs ........................................................................................................................................................................... 79
Cross-Country Skiing.............................................................................................................................................................................................. 83
Downhill Skiing and Snowboarding ................................................................................................................................................................ 85
Fencing ......................................................................................................................................................................................................................... 87
Fishing and Ice Fishing .......................................................................................................................................................................................... 89
Fishing and Ice Fishing Checkpoints ............................................................................................................................................................... 89
Ice Safety Quiz ........................................................................................................................................................................................................... 92
Geocaching .................................................................................................................................................................................................................. 93
Go-Karting ................................................................................................................................................................................................................... 95
Hiking ............................................................................................................................................................................................................................ 99
Horseback Riding .................................................................................................................................................................................................. 101
Ice Skating and Roller Skating......................................................................................................................................................................... 104
Ice Safety Quiz ........................................................................................................................................................................................................ 106
Indoor Skydiving ................................................................................................................................................................................................... 107
Indoor Trampoline ............................................................................................................................................................................................... 109
Inflatables................................................................................................................................................................................................................. 111
Miscellaneous Activities .................................................................................................................................................................................... 113
Offshore Water Vessels ...................................................................................................................................................................................... 114

2024–2026 Safety Activity Checkpoints Page 4 of 226
Orienteering ............................................................................................................................................................................................................ 118
Outdoor Cooking ................................................................................................................................................................................................... 120
Paddling and Rowing Sports—Master Progression Chart ................................................................................................................. 125
Canoeing ................................................................................................................................................................................................................... 132
Corcl Boats ............................................................................................................................................................................................................... 137
Row Boating ............................................................................................................................................................................................................ 150
Stand-Up Paddleboarding ................................................................................................................................................................................. 154
Whitewater Rafting.............................................................................................................................................................................................. 158
Parades and Other Large Gatherings ........................................................................................................................................................... 162
Pocket Knife and Jackknife Safety ................................................................................................................................................................. 164
Girl Scout Pocket Knife/Jackknife Safety Pledge .................................................................................................................................... 165
Rocketry / Model Rocketry .............................................................................................................................................................................. 166
Sailing......................................................................................................................................................................................................................... 169
Scuba Diving............................................................................................................................................................................................................ 172
Sledding and Tobogganing ............................................................................................................................................................................... 176
Snorkeling ................................................................................................................................................................................................................ 178
Snowshoeing ........................................................................................................................................................................................................... 181
Surfing ....................................................................................................................................................................................................................... 185
Swimming ................................................................................................................................................................................................................ 188
Sample Swim Assessment—Documented Verification of Completion ......................................................................................... 192
Target and Shooting Sports—Master Progression Chart.................................................................................................................... 193
Archery ...................................................................................................................................................................................................................... 194
Ax, Knife, and Hatchet Throwing ................................................................................................................................................................... 197
Slingshot ................................................................................................................................................................................................................... 200
Shooting Sports/Guns......................................................................................................................................................................................... 203
Tethered Hot Air Balloon Rides...................................................................................................................................................................... 206
Tools—Hand and Power ................................................................................................................................................................................... 209
Master Tool Chart ................................................................................................................................................................................................. 211
Tubing ........................................................................................................................................................................................................................ 219
Waterskiing and Wakeboarding .................................................................................................................................................................... 222
Windsurfing ............................................................................................................................................................................................................ 225

2024–2026 Safety Activity Checkpoints Page 5 of 226

2024–2026 Safety Activity Checkpoints Page 6 of 226
Introduction: Standard Safety Guidelines
Safety Activity Checkpoints (SAC) provides the standard safety guidelines for Girl Scouts of the United States of
America (GSUSA) and Girl Scouts of Greater Iowa’s approved activities.
GSUSA, local councils, and other units holding a credential—including USA Girl Scouts Overseas (USAGSO)—shall
be responsible for seeing that all activities are planned and carried out in a manner that considers the health,
safety, and general well-being of all participants in accordance with these standard safety guidelines.
In this section, you will find GSUSA’s standard safety guidelines, by topic, which apply to all Girl Scout activities.
Please read and become familiar with all topics in this section.
Throughout Safety Activity Checkpoints, several individual activities, such as Paddling and Rowing, Climbing and
Adventure, and Target Sports, are categorized under related sections to provide continuity as well as grade level
and skill progression information.
Standard Safety Guidelines are to be used in conjunction with the specific, individual activity’s safety checkpoints
along with reasonable common-sense adjustments to ensure a safe and positive experience for Girl Scout
members. The intent of providing these standard safety guidelines is to establish a checklist for success and to
foster confident leadership.
Adult Supervision
Girl Scouts has a strict standard that whenever Girl Scouts meet, whether in person or virtually, there are to
be at least two unrelated, registered, and Girl Scout–approved adults who have been background checked,
and one of whom is female, supervising Girl Scout members. A registered and approved adult volunteer is one
who has passed a background check and has been through the council’s volunteer onboarding and training
process. The two adult volunteers must not be related to each other (for example, not a sibling, spouse, domestic
partner, parent, child, or anyone who would be considered a family member) and who do not live in the same
residence.
This requirement applies to every Girl Scout gathering including troop meetings (in person and virtual), day
trips, camp, sleep-away travel, special events, activities, and projects. Members should be advised of this policy so
that they can report to the council if there is a violation.
Troop leaders must always be adults. Youth or youth members are not permitted to substitute for adult
supervision. This rule applies to every Girl Scout gathering including troop meetings (in person and virtual), day
trips, camp, sleep-away travel, events, activities, and projects. There are no exceptions to this rule.
There are different specific adult-to-youth ratio requirements for Girl Scout troop meetings as compared to events
outside of the regular Girl Scout troop meeting such as outings, activities, camping, and travel. Activities and travel
outside of the regular troop meeting space require more adult supervision.
For Troop Meetings
The adult-to-youth ratio means a minimum of two registered, approved, adult volunteers who are unrelated,
including one female, for up to this number of Girl Scouts:
• 12 Daisy Girl Scouts
• 20 Brownie Girl Scouts
• 25 Junior Girl Scouts
• 25 Cadette Girl Scouts
• 30 Senior Girl Scouts
• 30 Ambassador Girl Scouts

2024–2026 Safety Activity Checkpoints Page 7 of 226
There should be one extra registered, approved, adult volunteer for every additional:
• 1–6 Daisy Girl Scouts
• 1–8 Brownie Girl Scouts
• 1–10 Junior Girl Scouts
• 1–12 Cadette Girl Scouts
• 1–15 Senior Girl Scouts
• 1–15 Ambassador Girl Scouts
Adult Volunteer-to-Youth Ratios
Girl Scout
Volunteer-to-Youth
Ratios
Group Meetings
Events, Travel, and Camping
Two
unrelated
volunteers (at least
one of whom is
female) for up to
this number of
youth:
One
additional volunteer
to each additional:
Two
unrelated
volunteers (at least
one of whom is
female) for up to
this number of
youths:
One
additional volunteer to
each additional:
Girl Scout Daises
(Grades K–1)
12
1–6
6
1–4
Girl Scout Brownies
(Grades 2–3)
20
1–8
12
1–6
Girl Scout Juniors
(Grades 4–5)
25
1–10
16
1–8
Girl Scout Cadettes
(Grades 6–8)
25
1–12
20
1–10
Girl Scout Seniors
(Grades 9–10)
30
1–15
24
1–12
Girl Scout Ambassadors
(Grades 11–12)
30
1–15
24
1–12
For Outings, Activities, Travel, and Camping
The adult-to-youth ratio means a minimum of two registered, approved, adult volunteers who are unrelated,
including one female, for up to this number of Girl Scouts:
• 6 Daisy Girl Scouts
• 12 Brownie Girl Scouts
• 16 Junior Girl Scouts
• 20 Cadette Girl Scouts
• 24 Senior Girl Scouts
• 24 Ambassador Girl Scouts
There should be one extra registered, approved, adult volunteer for every additional:

2024–2026 Safety Activity Checkpoints Page 8 of 226
• 1–4 Daisy Girl Scouts
• 1–6 Brownie Girl Scouts
• 1–8 Junior Girl Scouts
• 1–10 Cadette Girl Scouts
• 1–12 Senior Girl Scouts
• 1–12 Ambassador Girl Scouts
Some high-adventure activities may require more adult-to-youth supervision than stated above. For those
activities, the individual activity’s safety activity checkpoints will provide the specific adult-to-youth supervision
ratios. Remember, some activities are less safe for younger members, particularly Daisies and Brownies. Younger
Girl Scout members may not be permitted to participate based on their age, as appropriate, and this will be
specified on the individual activity’s safety activity checkpoints. In cases where younger girl participation is an
option, but only under certain conditions, this is indicated on the first page of the individual activity’s safety
activity checkpoints.
Note: For mixed-grade level troops (Multi-Level Troops), use the adult-to-youth ratio for the lowest grade level in the
troop. For example, if the troop consists of Daisies and Brownies, the Daisy adult-to-youth ratio should be followed.
Activity Council Approval Requirement. On the first page of each individual activity’s safety activity checkpoints,
you will see a field indicating whether your Girl Scout council requires you to have prior council approval to
perform the activity. Council prior approval is required for those activities that are rated as high risk by Girl Scouts’
national insurance carriers. A council may approve an activity once for the duration of the year or require
individual approval each time the activity takes place. This is a council decision as local norms and laws vary from
state to state. The three council approval requirement types are:
• Required. You must check with your Girl Scout council for prior approval.
• Not Required. You do not need to check with your Girl Scout council for prior approval.
• May Be Required. Your Girl Scout council will determine if prior approval is required.
Activities Not Listed in Safety Activity Checkpoints. In a challenging, learn-by-doing environment like Girl Scouts,
it is only natural that Girl Scout members will sometimes want to take part in activities that are not specifically
addressed in Safety Activity Checkpoints. If safety checkpoints are not provided for a specific activity in Safety
Activity Checkpoints, the first step is always to contact your Girl Scout council to make sure your council approves
of the activity.
Be sure to have a plan or process in place for addressing and handling requests for activities that are not
specifically listed in Safety Activity Checkpoints. When considering activities not specifically listed in Safety Activity
Checkpoints:
• Consult with your Girl Scout council for clarification and approval in advance. Your Girl Scout council
may or may not permit the activity. If your council does approve the activity, they may direct you to a
specific vendor or facility or advise you to stay away from other vendors or facilities.
• Investigate whether the activity is similar to another activity and if the safety activity checkpoints for that
activity can easily translate and apply to an approved activity, then follow those checkpoints.
• Consider whether the proposed activity requires any additional expert supervision or special certification
for the instructor.
• Think about the quality of the experience in terms of how participation ties to Girl Scouts’ Five
Outcomes, the long-term positive outcomes Girl Scout members receive in Girl Scouting.
Selecting an Activity to Do with Girl Scout Members. When considering what types of activities to do, whether
specifically listed in Safety Activity Checkpoints or not, be thoughtful and intentional when selecting the activity and
be mindful of the long-term positive outcomes that Girl Scout members receive through Girl Scouting. Think about

2024–2026 Safety Activity Checkpoints Page 9 of 226
how participating in the activity ties to at least one of the Girl Scouts Five Outcomes. Girl Scouts has proven to help
girls thrive in five ways:
Strong sense of self. Girls have confidence in themselves and their abilities and form positive identities.
Positive values. Girls act ethically, honestly, and responsibly and show concern for others.
Challenge seeking. Girls take appropriate risks, try things even though they might fail, and learn from their
mistakes.
Healthy relationships. Girls develop and maintain healthy relationships by communicating their feelings
directly and resolving conflict constructively.
Community problem solving. Girls contribute to the world in purposeful and meaningful ways, learn how to
identify problems in the community, and create “action plans” to solve them.
Activities chosen should work towards intentionally helping Girl Scout members be successful in these key areas.
As part of the planning process, consider how and why the activity selected connects to Girl Scouts Five Outcomes.
Make it girl-led by sharing these outcomes with them and engaging them in the activity selection and planning
process.
Infectious Disease Safety in Girl Scouts
The health and safety of our members is always Girl Scouts’ highest priority. Recognize that communicable
diseases, including COVID-19, have always presented risks for Girl Scout members to handle. Following Centers for
Disease Control standards along with guidance from local jurisdictions is expected. Be prepared to monitor
evolving health matters.
Have an Emergency Action Plan (EAP)
Keeping to the Girl Scout motto, “Be Prepared,” proper preparation is the key to success. An important thing to
consider, before heading out on a trip or to an activity, is an Emergency Action Plan (EAP). Volunteers can review
their troop’s EAP with participants as a learning experience for them, to the extent it makes sense according to
their age and maturity.
For the adult volunteer, it is important to think about and document an EAP for troop meetings and activities to
ensure you are prepared in the event of an accident or injury. When creating an EAP, think through scenarios of
what can go wrong, such as physical injury, severe weather, fire, intruders, missing persons, or sudden illness. This
basic step is invaluable. The key elements included in an effective risk management plan are:
Identify the type of emergency:
• Medical: A member becomes suddenly ill.
• Accidental injury: A member is hurt during an activity.
• Weather-related crisis or challenging environment: As with backpacking. Always pay attention to
weather so that the activity can be rescheduled if there is a severe storm or weather-related risk.
• Fire: Become aware of all entrances and exits, and alternative exit routes.
• Missing or lost member.
• Mitigate and minimize the damage, injury, or time element in seeking help: Know how far the activity
is from the nearest Emergency Medical Service (EMS).
o If EMS is more than 30 minutes away, an Advanced First Aider should always be present,
preferably with Wilderness First Aid (WFA) or Wilderness First Responder (WFR) credentials.
o If EMS is less than 30 minutes away, a General First Aider should be present with Girl Scout
members.
• If more than 200 people at an event, an Advanced First Aider should be added to the General First Aider
for every 200 people.

2024–2026 Safety Activity Checkpoints Page 10 of 226
• Make sure emergency response vehicles can access the area where the activity is being held. If an
emergency vehicle cannot access the site, notify either local EMS, park services, or other authorities ahead
of time and tell them where you will be, what you will be doing, and how many members are with you.
Respond once having confirmed the properly trained first aiders are present:
• Immediately engage the first aider to the accident scene involving an illness, accident, or injury.
• Notify and coordinate the arrival of emergency medical services or law enforcement.
• Contact all relevant parties:
o Parents or legal guardians
o Council staff
o Law enforcement
o Property owner or facility manager
Key Components of an Effective Emergency Action Plan
• Contact list. Create a chart, table, or simple list for all participants, including adults, with parent and legal
guardian contact phone numbers as well as key emergency phone numbers in addition to 911, such as the
nearest hospital, medical center, law enforcement office, or emergency transportation. Share this
information with a trusted individual, so that all information does not rest with one person. Consider a
hard copy for quick reference in an emergency.
• Roles and responsibilities. Keep predetermined and established emergency role assignments showing
who does what in the event of an emergency. For example, the leader stays with Girl Scout members while
the co-leader calls for help and coordinates the arrival of emergency services and notifies the parents, or
vice versa. Agree on this ahead of time so that you are calm and prepared if the worst occurs. Also think
through what you will do if the injured person is one of the adults.
• Exit strategy. Be aware of all emergency exits and/or evacuation plans beforehand. Identify and
communicate alternative exit routes with all present.
• Meeting place. Determine and communicate a prearranged meeting place (designated spot) in the event
the group becomes separated, or a Girl Scout member should become lost.
• Communication method. Have a method of emergency communication that works. If camping or
backpacking, consider a whistle or horn as an emergency call-out. Make sure to inform Girl Scout members
that this is the sound of an emergency. When they hear this sound, they know to go to the designated spot.
If there is cell service at the activity site, save all contact names and numbers, including those for the
appropriate authorities, in your mobile phones before the activity takes place.
Activity Preparation. Communicate with your Girl Scout council and caregivers about the activity, including
details about safety precautions and any appropriate clothing or supplies that may be necessary. Follow council
procedures for activity approval, certificates of insurance, and guidelines about general health examinations. Girl
Scouts are key to activity planning. Keeping their grade level abilities in mind, encourage them to take proactive
leadership roles in organizing details of the activity.
Review Safety Activity Checkpoints with Instructors. Standard Safety Guidelines and the individual activity’s
safety activity checkpoints should be reviewed with the vendor, facility, camp, or your Girl Scout council as
appropriate to determine if the safety checkpoints can be complied. Take any questions or issues with safety
compliance to your Girl Scout council for guidance and next steps.
Itinerary and Key Contacts. Give an itinerary to a contact person at home. Call the contact person upon departure
and return. Create a list that includes Girl Scout members’ parent/caregiver contact information, council contacts,
and emergency services contacts. Keep this list on hand or post in an easily accessible location. Emergency and
parent contact information should be saved to an adult’s mobile phone on the trip and be provided to the contact
person at home.
Organizing Gear

2024–2026 Safety Activity Checkpoints Page 11 of 226
• Safety Gear includes clothing and equipment members will need to safely take part in the activity. These
items are necessary to ensure safety. Always opt to take the safety equipment offered by an organization or
facility, even if it is not specifically listed in the individual activity’s safety activity checkpoints. If the facility
offers helmets, always accept the use of helmets, and have members wear them.
• Required Gear simply means activity-specific gear necessary to participate in the activity. For example, for
skiing, members will need skis, boots, and poles, or otherwise plan for rental equipment.
• Additional Gear may include items that support a safe and healthy outdoor learning experience. Always
take additional gear into consideration when planning an outdoor activity or trip in addition to the safety
gear required for the specific activity. These are items that often make the experience more comfortable.
Recommended items, based on Girl Scout experience, include:
o Layers of clothing for wintertime or activities on or by the water or mountains, where temperatures
or wind can change dramatically within a short period of time
o Sunglasses, sunscreen, hat, sun visor, and lip balm
o Change of clothes for water-related activities or those involving dirt or mud, such as spelunking
o Comfortable shoes and socks if hiking or spending long days outside in order to prevent ticks and
blisters
o Watch, compass, and map(s)
o Insect repellent
o Towels for waterfront, pool, and paddling activities
o Bottle of drinking water and healthy snacks
o Backpacks (Girl Scout members carry their own gear and supplies)
Instructor Credibility. Verify instructor knowledge, experience, and maturity. Ensure the volunteers or onsite
instructors possess the proper skills, knowledge, training, and certification, or documented experience required to
meet your council’s guidelines and as outlined in the individual activity’s safety activity checkpoints for the
approved activity.
With respect to instructing and safeguarding children, maturity level and years of experience can positively impact
the support needed for volunteers to safeguard Girl Scout members. For example, while the legal definition of an
adult lifeguard is 18, qualified lifeguards of 21 years of age or over are preferred whenever possible.
Visiting and Participating Adults. Occasionally, friends and family members join Girl Scout outings or trips, or
experts in a subject may be invited to troop meetings to help work on badges. Verify with your Girl Scout council
any specific requirements when adults attend Girl Scout gatherings. Arrange for background checks for
participating adults or episodic volunteers. Depending on your jurisdiction, there may be specific background
check, fingerprinting, or child abuse prevention training requirements for adults who will regularly or periodically
attend Girl Scout gatherings, have shared oversight over members, participate in an overnight stay, handle money,
or drive youth members.
Facility General Insurance. Commercial general liability insurance protects the Girl Scout organization. The
facility or vendor that hosts your troop event (for example, a riding stable, a hotel, or a bus company) should carry
general liability insurance and auto liability insurance when motor vehicles are involved. A facility that carries
valid general liability insurance has almost always been examined for risk by its insurance carrier. If a facility or
vendor does not carry general liability insurance, it’s a red flag. It may not be safe, so it would be best to select
another facility or vendor.
When your Girl Scout council requires you to provide documented evidence of insurance, ask the facility for a
certificate of insurance for your records. Be aware that some places either do not or cannot provide a certificate of
insurance to all customers, only provide a certificate of insurance when a group is very large, or if the group plans
to pay a certain amount in advance. Still, the conversation will give you an idea of whether the facility is adequately
insured, and you can consult your council representative for next steps.

2024–2026 Safety Activity Checkpoints Page 12 of 226
When planning to use a written contract with a facility or when considering a new vendor, remember to consult
with your Girl Scout council for the proper insurance requirements and to see if your council uses an approved
vendor list. Check to confirm the certificate of insurance you will be obtaining validates the insurance limits
outlined in your contract or agreement before submitting a contract to your council for signature.
Activity Accident Insurance. Activity accident insurance is supplemental health insurance that protects
registered Girl Scout members. Registered members are automatically covered under activity accident insurance
when participating in all Girl Scout events and activities. Invited non-member participants are also covered. When
planning extended trips, always consult with your Girl Scout council to see if extra activity accident insurance is
needed. International trips always require Activity Accident Insurance Plan 3PI.
Leave No Trace. Girl Scouts has a long tradition of leaving an area better than we found it. Search the web for tips
on environmental responsibility and remember our principle of Leave No Trace. Doing so will teach Girl Scout
members responsibility and safeguard your troop and local Girl Scout council from complications or issues
involving the use of public property.
Weather Conditions. Always monitor the weather in the days preceding an activity or trip. Check the local
weather report on the day of the trip. For circumstances in which forecasted weather could be a risk to safety,
consider scheduling alternatives and options. In the case of severe wind, lightning, hail, ice, snowstorm, flood
warnings due to heavy rain, or a hurricane or tropical storm, make contingency plans for itineraries and
transportation. Reschedule the event if the weather report is severe. Adhere to public safety announcements
concerning staying indoors or evacuating the area. In extremely hot weather, do outdoor activities in the morning
and late afternoon hours and, during the hottest time of day, stay in a shaded area or inside with air conditioning.
On extremely hot days, it is important to plan for easy access to plenty of drinking water to prevent heat
exhaustion and dehydration. If extreme weather or temperature conditions prevent a trip, be prepared with a
backup plan or alternative activity.
Buddy System. For trips and activities, it is helpful for members of similar age to pair up as partners. Each Girl
Scout member is responsible for staying with their buddy throughout a trip or activity. A buddy can warn their
partner of danger, lend a helping hand, or get immediate assistance when the situation warrants it. All Girl Scout
members are encouraged to stay near the group so if someone is injured or not feeling well, there are others,
including an adult, close by to seek help.
Annual Permission Slips. Annual permission slips are parental or legal guardian consent forms for attendance at
regular troop meetings throughout the year. If annual permissions are practiced in your council, in addition to
specific activity permission slips, volunteers should keep copies of all permission forms for all Girl Scout members.
Permission Slips for Day Trips and Activities. It is imperative to secure a signed permission slip from a child’s
parent or guardian for any trip or special activity outside the troop meeting space. This applies to all Girl Scout
members under the age of 18. Always keep a copy of these permissions. In most cases, one parental consent or one
legal guardian is legally acceptable. However, there may be circumstances regarding a custody situation or a
standard in your council where dual parental consent is required. For international trips, written consent is
generally required from both parents/legal guardians. If there is a question about single versus dual parental or
dual guardian consent, consult your Girl Scout council and they can consult local or state laws for specific local
guidance.
Overnight Trips. Prepare Girl Scout members to be away from home by involving them in planning the activity or
event so they know what to expect. On trips where male volunteers are part of the group, it is not appropriate for
them to sleep in the same space as girl members. Always support and maintain a single-sex atmosphere for
sleeping quarters. Men may participate only when separate sleeping quarters and bathrooms are available for their
use. Men should not be in a situation where they must walk through Girl Scouts’ sleeping quarters to enter or exit
their sleeping quarters or access restrooms. In some circumstances, such as a museum or mall overnight, with
hundreds of Girl Scouts, this type of accommodation may not be possible. If this is the case, men do not supervise
girls in the sleeping area of the event and the adult-to-youth ratio is adjusted accordingly.

2024–2026 Safety Activity Checkpoints Page 13 of 226
An exception is made for family members during events such as parent-daughter or family overnights, where one
family may sleep together in an area specifically designated to accommodate families. Also please make note of the
following:
• Each participant has their own bed.
• Parent/guardian permission must be obtained if youth members are to share a bed.
• Youth members and adults do not share a bed; some councils make exceptions for family members.
• It is not mandatory that an adult sleep in the sleeping area with youth members.
• If an adult female does share the sleeping area, there must always be at least two unrelated adult females
present.
Vacation Rentals. See About Travel/Trips for specific safety checkpoints when utilizing Airbnb, VRBO, and
HomeAway. There are specific steps that must be followed when utilizing these privately owned property rentals,
steps that are not necessarily taken with traditional commercially owned and operated properties such as hotels.
Modeling the Right Behavior. Adult volunteers should adhere to the Girl Scout Promise and Law. When spending
time with Girl Scout members or representing Girl Scouts, do not consume alcohol, smoke, vape, or use foul
language. Always obey the law, for example, by not texting while driving or jaywalking.
Drugs and Alcohol. Volunteers and adults may not purchase, consume, possess, or be under the influence of
alcohol, recreational drugs/substances, prescription drugs, or over-the-counter medications which impair
performance or judgment while participating in Girl Scout–sanctioned activities, in the presence of Girl Scout
members, while conducting Girl Scout business, or in Girl Scout branded clothing. Alcohol or any substance which
may impair one’s judgment must never be used by volunteers, adult members, or any other adult in the presence of
a youth member, or immediately prior to a Girl Scout activity.
Alcoholic beverages may be served to and consumed by adults of legal age at Girl Scout events, when youth
members are not present, and when approved by the council’s Board of Directors or the council’s Chief Executive
Officer.
Youth members are not permitted to attend events where alcohol is being served and consumed. However, with
prior council approval, youth members may be permitted to attend functions at locations where alcohol is
incidentally being purchased by adults and then taken away to be consumed elsewhere, away from youth
members. For example, a council may approve an event taking place at an arena, stadium, theme park, movie
theater, or places where alcoholic beverages are sold at a concession stand and taken away to be consumed.
Firearms. Firearms and/or weapons are prohibited at any Girl Scout activity and on Girl Scout owned or leased
property except when in the possession of a sworn officer of the law, council-authorized property staff, a certified
instructor, licensed wildlife control personnel, and/or trained adult while conducting a council-approved Girl Scout
program activity. Volunteers and adults do not carry ammunition or firearms in the presence of Girl Scout
members, unless given special permission by your council for target sport activities.
Online Safety. Instruct all Girl Scout members never to put their full names, location, or contact information
online, engage in virtual conversations with strangers, or arrange in-person meetings with online contacts. On
group websites, publish first names only and never divulge members’ location or contact information. Teach
members the Girl Scout Internet Safety Pledge and ask them to read it, understand it, discuss it, and commit to
following it.
Money Earning Activities. Safety is an important consideration during money earning activities, including Girl
Scout Cookie Program sales and other council-sponsored product sales. During Girl Scout product programs, you
are responsible for the safety of Girl Scout members, money, and products. In addition, a wide variety of
organizations, causes, and fundraisers may appeal to Girl Scouts to serve as their labor force. When representing
Girl Scouts, members cannot raise money for other organizations, participate in money earning activities that
represent partisan politics, or are not Girl Scout-approved product sales and efforts. It is imperative that Girl
Scouts do not partake in anything that can be construed as unrelated business income. This is essential to protect

2024–2026 Safety Activity Checkpoints Page 14 of 226
our organization’s 501(c)(3) tax-exempt status. If there is a questionable circumstance, consult your Girl Scout
council.
Volunteer Essentials. A key resource for volunteers in Girl Scouting is Volunteer Essentials. While Safety Activity
Checkpoints focuses on safety guidance and parameters, Volunteer Essentials addresses an array of topics such as
Engaging Girls and Families, Troop Management, Product Program, Troop Finances, and the Leader’s Guide to
Success. All Girl Scout volunteers are instructed to review, understand, and practice the principles and standards in
both Volunteer Essentials and Safety Activity Checkpoints.
Understanding Which Activities Are Not Permitted
After being thoroughly investigated by Girl Scouts leadership, some activities are clearly classified as “not
permitted.” Each sport or activity on the “not permitted” list is evaluated annually with respect to safety factors,
council feedback, insurability, and accident history. These activities pose a high risk of bodily injury, require
extensive prior experience to safely participate, or may require a driver’s license, such as ATVs. Activities with a
poor accident history based on loss data gathered from various industries are not approved and therefore “not
permitted.” The purpose of prohibiting certain activities is first and foremost to protect Girl Scout members, but
also to safeguard the financial and reputational well-being of your council and the Girl Scout organization.
GSUSA does not approve, endorse, or provide safety checkpoints for “not permitted” activities.
The following activities are in the not permitted category:
• Bungee jumping
• Flying in privately owned planes, helicopters, or blimps
• Hang gliding
• Untethered hot air ballooning
• Hunting
• Snowmobiling
• Riding a motorbike
• Riding electric scooters
• Using outdoor trampolines
• Parachuting or skydiving
• Parasailing
• Paintball tagging
• Riding all-terrain vehicles (ATVs)
• Stunt skiing
• Zorbing
Bungee Jumping. Bungee jumping is not highly regulated for safety or consistent in terms of facilitation from one
place to the next. It is an activity that carries a significant risk of bodily injury. Most insurance companies that have
access to the accident history of bungee jumping have deemed this activity high risk and dangerous.
Hang Gliding, Parasailing, Zorbing, Parachuting/Skydiving, and Untethered Hot Air Ballooning. These sports
also have inconsistent safety regulations, inconsistency of facilitation, and specific insurance implications or
exclusions. These are activities that carry a significant risk of bodily injury. Insurance carriers with knowledge of
these activities, from a loss experience perspective, view them as a high safety risk, meaning they see frequent
and/or severe accidents associated with these sports.
Privately Owned Aircraft. Flying in a privately owned aircraft is a very clear exclusion under GSUSA and (most)
councils’ commercial general liability insurance policies. In the event of an incident involving an aircraft accident,

2024–2026 Safety Activity Checkpoints Page 15 of 226
your council would be financially liable for potential liability and resulting lawsuits. Even with a specific non-
owned aviation liability policy (if your council purchases this type of policy, which it may not), a private plane is a
separate and distinct insurable interest (compared to a professional chartered aircraft tour). In other words, even
under non-owned aviation insurance, privately owned and/or operated planes are often excluded.
Outdoor Trampolines. Outdoor trampolines, particularly those with stilted metal frames, pose a high risk of
injury. The activity can result in sprains and fractures of the arms or legs—as well as potentially serious head and
neck injuries. The risk of injury is so high in the case of children that the American Academy of Pediatrics strongly
discourages the use of trampolines at home. Outdoor trampoline park injuries also are an area of emerging
concern. Indoor trampolines in a confined, padded indoor facility with higher supervision are safer, but still not
recommended for children under six years old. For reference see: AAOS: American Academy of Orthopedic
Surgeons.
Paintball Tag. Paintball tag is offered in specialized parks where participants shoot pellets of paint at each other
throughout an obstacle course, woods, or maze. The pressure used in a paintball gun is quite strong. When hit by a
paintball pellet, a person is certain to experience some pain, swelling, and perhaps a bruise or welt for a couple of
days. Shooting someone with a paintball pellet is likely to cause a minor injury but has the potential to cause a
more serious injury to eyes, mouth, ears, and throat. For these reasons, paintball tag is prohibited. Target paintball
shooting, however, is permitted.
Hunting. Hunting is a sport that requires handling firearms in the wilderness, high maturity levels, and the
availability of expert guides. Shooting accidents are common during hunting trips.
Jet Skis, Motorbikes, ATVs, Snowmobiles, and Electric Scooters. Jet skiing, motor biking, and riding
snowmobiles, ATVs, and electronic scooters are prohibited due to the extremely high incidence of serious injury
involved. Most insurance carriers are not comfortable with these activities due to poor accident history. Insurance
companies require that an operator hold a valid driver’s license. Adults and children riding on the back of
motorbikes and jet skis as passengers are exposed to a high risk of serious injury with no active opportunity to
actually learn the skill.
Chartered Aircraft Trips and Aviation
Chartered small aircraft trips require prior council approval for every flight. This activity is permitted only
with trip-specific council prior approval. The safety factors involving chartered aircraft, equipment, and pilots are
transparent and readily verifiable, unlike private aircraft. Confirm with your council ahead of time that chartered
aviation participation is covered under your council’s general liability policy or non-owned aviation liability
insurance policy. Again, these policies will almost always exclude privately owned aircraft.
Your council will confirm that the aviation company has evidenced proper insurance showing at least one million
dollars aviation liability insurance and five million dollars umbrella. It is strongly recommended that your council
consult with their insurance broker and/or GSUSA Risk & Insurance for assistance when vetting insurance issues
and implications.
Tethered Hot Air Ballooning. Some outdoor parks may offer the opportunity to learn the skill of hot air
ballooning in a relatively safe and controlled environment utilizing a tethered hot air balloon. Consult with your
council so they can check their general liability insurance or non-owned aviation liability policy to determine if this
activity is covered. A hot air balloon is an aircraft and viewed the same as small planes or helicopters from an
aviation risk perspective. Therefore, the same standard applies—professionally chartered and tethered hot air
balloon rides will be considered. Private rides and untethered balloon rides are not permitted.
Other Actions Girl Scouts and Volunteers Should Not Take
For legal reasons, there are other activities that Girl Scout members and volunteers are not permitted to
participate in while representing Girl Scouts. Avoiding these will preserve the integrity of our organization. These
include:

2024–2026 Safety Activity Checkpoints Page 16 of 226
• Endorsement of commercial products or services.
• Solicitation of financial contributions for purposes other than Girl Scouting.
• Participation in political campaigns or legislative activities unless the legislative activity has been
specifically council approved.
First Aid
Make sure at least one adult who is certified in first aid/CPR accompanies the troop/group to all activities. See
required qualifications below.
What to Do if There Is an Accident
Although you hope the worst never happens, you must observe council procedures for handling accidents and
fatalities. If a Girl Scout needs emergency medical care as the result of an accident or injury, first contact
emergency medical services, and then follow council procedures for accidents and incidents.
At the scene of an accident, first provide all possible care for the injured person(s). Follow established council
procedures for obtaining medical assistance and immediately reporting the emergency. To do this, you must
always have on hand the names and telephone numbers of council staff, parents/caregivers, and emergency
services such as the police, fire department, or hospital. Check with your council for emergency contact
information and keep your emergency action plan current with the appropriate contact information.
Your council may either have specific emergency contact information, a 24-hour emergency number, or both. Be
sure to reach out to them for their preferred method of contact. You will need:
• The exact time and location of the incident
• A description of the incident
• The names of the people involved
• The names of any witnesses
After receiving a report of an accident, council staff will immediately arrange for additional assistance at the scene,
if needed, and will contact parents/caregivers, as appropriate. Your adherence to these procedures is critical,
especially with respect to notifying parents or legal guardians. If the media is involved, let council-designated staff
discuss the incident with media representatives.
In the event of a fatality or other serious accident, the police must be immediately notified. A responsible
volunteer must remain at the scene the entire time. In the case of a fatality, do not disturb the victim or
surroundings and follow police instructions. Do not share information about the accident with anyone but the
police, your council, and, if applicable, insurance representatives or legal counsel.
When Someone Needs Emergency Care
Girl Scout members need to receive proper instruction in how to care for themselves and others in emergencies.
They also need to learn the importance of reporting any accidents, illnesses, or unusual behaviors during Girl Scout
activities to adult volunteers. Make sure you know what you do and do not need to report. Reporting requirements
vary by council; check with your local council for specifics.
Be Prepared
Follow these steps (and any others specific to your region or circumstances) to be prepared in case accidents or
emergencies occur:
• Establish and practice procedures for weather emergencies.
• Know the type of extreme weather to expect in your area (tornadoes, hurricanes, and lightning). Consult
with your council for the most relevant information for you to share with Girl Scout members.

2024–2026 Safety Activity Checkpoints Page 17 of 226
• Establish and practice procedures for such circumstances as fire evacuation, lost persons, and building
security issues. Every Girl Scout member and adult volunteer must know how to act in these situations. For
example, you and your Girl Scout members, with the help of a fire department representative, should
design a fire evacuation plan for meeting places used by the group.
• Assemble a well-stocked first aid kit that is always accessible. First aid administered in the first few
minutes can make a significant difference in the severity of an injury. In an emergency, secure professional
medical assistance as soon as possible, normally by calling 911, and then administer first aid, if
appropriately trained.
First Aid/CPR
For many activities, Girl Scouts recommends that at least one adult volunteer be first aid/CPR certified. You can
take advantage of first aid/CPR training offered by organizations such as:
• American Red Cross
• National Safety Council
• EMP America
• American Heart Association
• American Safety and Health Institute (ASHI)
• Medic
• Other sponsoring organizations approved by your council
If through the American Red Cross, National Safety Council, EMP America, or American Heart Association you have
a chance to be fully trained in first aid and CPR, doing so may make your activity planning go a little more
smoothly.
First Aiders
General First Aider. A general first aider is an adult volunteer who has taken Girl Scout–approved first aid and
CPR training that includes specific instructions for adult and pediatric CPR, first aid, and AED (Automated External
Defibrillator) training that, minimally, includes face-to-face, hands-on skill checks for:
• Checking a conscious victim
• Checking an unconscious victim
• Adult and pediatric CPR
• Adult and pediatric conscious choking
• Controlling bleeding
• Sudden illness
Advanced First Aider. An advanced first aider is an adult with general first aid certification and additional health,
safety, or emergency response expertise. For example, a physician, physician’s assistant, nurse practitioner,
registered nurse, licensed practical nurse, paramedic, military medic, person with wilderness training, certified
lifeguard, or emergency medical technician (EMT) meets these requirements.
The individual activity’s safety activity checkpoints will always tell you when a first aider needs to be present.
Since activities can take place in a variety of locations, the presence of a first aider and the qualifications they must
have are based on the remoteness and scope of the activity, as specified in the following chart:
Access to EMS
Minimum Level of First Aid Required
Less than 30 minutes
General First Aid
More than 30 minutes*
Advanced First Aid or Wilderness First Aid (WFA) or
Wilderness First Responder (WFR)

2024–2026 Safety Activity Checkpoints Page 18 of 226
*Although a Wilderness First Responder is not required, it is strongly recommended when traveling with groups in
areas that are greater than 30 minutes from EMS.
It is important to understand the differences between a first aid course and a wilderness rated course. Although
standard first aid training provides basic incident response, wilderness rated courses include training on remote
assessment skills, as well as emergency first aid response, including evacuation techniques to use when EMS is not
readily available.
Note: The presence of an advanced first aider is required at sleepaway camp and other large gatherings. For large
events—200 people or more—there should be, in addition to a regular first aider(s), one advanced first aider for every
200 participants. The following healthcare providers may also serve as advanced first aiders for large groups:
physician, physician’s assistant, nurse practitioner, registered nurse, licensed practical nurse, paramedic, military
medic, and emergency medical technician.
First Aid Kit
Make sure a general first aid kit is available at your group meeting place and accompanies Girl Scout members on
any activity (including transportation to and from the activity). Please be aware that you may need to provide this
kit if one is not available at your meeting place. You can purchase a Girl Scout first aid kit, you can buy a
commercial kit, or you and the Girl Scouts can assemble a kit yourselves. The American Red Cross offers a list of
potential items in its Anatomy of a First Aid Kit (note that the American Red Cross’s suggested list includes aspirin,
which you will not be at liberty to provide without direct parent or guardian permission). You can also customize a
kit to cover your specific needs by including flares, treatments for frostbite or snake bites, and the like. Want to get
the troop involved? There’s a First Aid badge for all but the Daisy program level.
In addition to standard contents, all kits should contain council and emergency telephone numbers (which you can
get from your council contact). Girl Scout activity insurance forms, parent consent forms, and health histories may
also be included.
Overall Health, Well-Being, and Inclusivity
Health History Form. An annual health history form must be completed and signed by one parent/guardian for
every Girl Scout and kept on file with the troop leader.
Follow council guidelines to comply with this requirement. The form should reflect any significant medical
conditions, health issues, or allergies, and be updated each year. The form can also reflect any over-the-counter
medication that a Girl Scout is not permitted to take, if there are any.
If parents send medication on trips or activities, it should be in its original labeled container and controlled and
administered by one designated adult. Health history forms can be shared with the site camp physician or nurse
ahead of time.
Always keep a current and signed health history form for each Girl Scout member with you when traveling. Your
council may require an updated mid-year health history for overnight trips. For physically demanding activities,
such as water sports, horseback riding, or skiing, an additional current health history form may be obtained to
make sure all adults are aware of any current medical conditions or special needs. Councils will retain all health
history forms in accordance with state record retention requirements and laws.
Health Exams and Health Exam Forms. Some councils also require a health exam for any activity that is three
overnights or longer, which may include sleepaway camp. Again, follow your council’s guidelines with respect to
health exams. In most cases, the health exam needs to have been completed within one year of the last date of the
trip in order for Girl Scout members to participate. Your council may require a current health exam for adult
volunteers who participate in trips of three nights or more as well; be sure to ask your council about their health
exam policy. A health exam can be given by a licensed physician, a nurse practitioner, a physician’s assistant, or a
registered nurse. The medical provider must sign the health exam form.

2024–2026 Safety Activity Checkpoints Page 19 of 226
For large events or trips longer in duration, such as sleepaway camp or a weeklong trip to a ranch, the designated
health professional at the trip location is responsible for collecting all health exam forms and health history forms
for members and adults.
Health exam forms and health history forms are to be shared only with designated health professionals and council
staff responsible for coordinating them. All health and medical information are private (by law) and must not be
shared or publicly available, so keep forms safe and secure. Only share information on a need-to-know basis.
Councils will retain all health exam forms in accordance with individual state record retention requirements and
laws.
Vaccination and Immunization. Issues or questions with respect to vaccination exemption periodically arise with
activity and trip participation. Vaccine exemption laws vary by state and focus on public and private school
attendance more directly than they do for youth organizations. Therefore, it is best to obtain local and state legal
guidance and proceed in accordance with the state law as it applies to school attendance. A general overview of
state laws regarding school immunization exemption is provided and annually updated on the Centers for Disease
Control’s website.
If you have any questions about your obligation to communicate a Girl Scout member’s non-immunization with
other troop parents, contact your Girl Scout council for legal guidance as privacy laws may apply. Absent state laws
that speak directly to vaccines and communicating non-immunization with parents of youth groups, the guidance
is to follow the standard and protocol as it pertains to school attendance.
Mosquitoes, Ticks, and Lyme Disease Prevention. Mosquitoes, ticks, and insect bites are an inherent risk to any
warm weather outdoor activity. Ensure parents and caregivers are aware of the need to have their children
properly covered, preferably with closed shoes and light-colored clothing and socks. It is important to advise
families of this risk and the safety precautions they should take. The understanding that your troop or council
cannot be held responsible for tick bites can be reinforced with a waiver reference on a permission slip.
An excellent source for learning more is the CDC’s Lyme Disease web page.
To learn more about using insect repellent safely, visit the Environmental Protection Agency website at Repellents:
Protection against Mosquitoes, Ticks, and Other Arthropods. To learn more about safely using DEET directly on the
skin and on children, check out EPA DEET.
Emotional Safety. In Girl Scouts, emotional safety is just as important as physical safety. Adults are responsible for
making Girl Scouts a place where members feel comfortable, seen, and are able to be who they are. Protect their
emotional safety by creating a team agreement and coaching everyone to honor this agreement. Team agreements
typically encourage behaviors like respecting diverse opinions and feelings, resolving conflicts constructively,
avoiding physical and verbal bullying or clique behavior, practicing fairness, and showing positive, respectful, and
helpful communication with others.
Physical or Sexual Abuse. Physical, verbal, emotional, or sexual abuse of youth is forbidden. Sexual pressure,
sexual advances, improper touching, sexual communication, including text messaging, and sexual activity of any
kind with Girl Scout members is not tolerated. If you witness or experience any behavior of this nature, including
between youth, notify appropriate council staff immediately. Incidences of abuse of any kind will result in
immediate council intervention. Volunteers are responsible for following their council’s guidelines for reporting
any direct information or concern around physical, verbal, emotional, or sexual abuse with respect to members.
Youth Violence and Bullying. Youth violence or bullying is also not tolerated in Girl Scouts. Youth violence occurs
when young people intentionally use physical force or power to threaten or harm others. Bullying is a form of
youth violence. Volunteers should become familiar with the signs, risk factors, and preventive measures against
this type of behavior. If you witness or experience any behavior of this nature, notify the appropriate council staff
for guidance. The CDC provides excellent resources on this topic, including:
• CDC Youth Violence

2024–2026 Safety Activity Checkpoints Page 20 of 226
• CDC Bullying
• CDC Youth Violence Prevention
Child Abuse. All states, the District of Columbia, American Samoa, Guam, the Northern Mariana Islands, Puerto
Rico, and the U.S. Virgin Islands have specific laws which identify persons who are required to report suspected
child abuse to an appropriate agency. Therefore, if you witness or suspect child abuse or neglect, whether inside or
outside of Girl Scouting, always notify the appropriate council staff immediately and follow your council’s
guidelines for reporting your concerns to the proper agency within your state. For more information, please review
these available resources:
• Child Welfare Information Gateway about Child Abuse and Neglect
• How to Report Child Abuse and Neglect
• CDC Child Abuse and Neglect Prevention
Mental Health and Safety. As an adult volunteer overseeing the activities and behaviors of young people, you may
witness other signs of harmful tendencies such as self-harm. Self-harm can take a physical form such as cutting,
burning, bruising, excessive scratching, hair pulling, poisoning, or drug use. Other tendencies of self-harm are
suicidal ideations that can be expressed verbally or with the written word. Another harmful expression involves
harm to others which can be detected verbally or with physical aggression. If a situation of this nature is observed
or comes to your attention in any form, always notify an appropriate council staff member immediately and follow
your council guidelines with respect to next steps. The CDC provides informative guidance around identifying and
responding to harmful behaviors: Self-Directed Violence and Other Forms of Self-Injury and also a section on at-
risk youth, Adverse Childhood Experiences (ACEs) Youth at Risk. Encourage Girl Scouts to consider earning mental
wellness badges, found on the Mental Wellness and Inclusion page.
Accommodate All Members. Girl Scouts is committed to making reasonable accommodations for any physical or
cognitive conditions. Talk to Girl Scout members of all abilities and their caregivers; ask about needs and
accommodations. Always be sure to contact the location, facility, and/or instructors to ensure they are able to
accommodate all participants. For more information, visit Disabled World. Whenever possible, the individual
activity’s safety activity checkpoints will provide additional resources specific to that sport or activity. Our goal is
to include all who have a desire to participate.
Equity. Girl Scouts has a strong commitment to diversity, equity, and inclusion, and we welcome and embrace
individuals of all abilities and backgrounds into our sisterhood. For Girl Scouts, equity means that we ensure that
all Girl Scout members and their families feel comfortable and have access to whatever is needed to fully
participate in Girl Scouts. Follow the general guidance below, as well as any activity-specific recommendations in
those chapters.
Consider the history, culture, and past experiences of the Girl Scout members in your troop. What might affect their
participation in an activity, or how comfortable they feel on a field trip? What might get in the way of family
communications, or a troop member’s ability to access information? Work with members and families to
understand how an activity is perceived. Ensure that all Girl Scout members and their families feel comfortable and
have access to whatever is needed to fully participate, such as proper equipment, prior experiences, and the skills
needed to enjoy the activity.
• Some activities addressed here—from indoor skydiving to horseback riding to sailing—can be expensive
and out of reach for families. Girl Scouting—and the opportunity for participants to set goals, earn funds,
and make decisions—means that expensive or exclusive activities can be within reach. Make sure budget
plans include ways for all to participate. Clearly communicate any costs the family is expected to bear, and
identify tactics to discreetly support them. Has the troop budgeted funds for this? How about your council?
• Consider body size and ability as potential barriers to participation. Ask vendors such as horseback or
kayak outfitters about any weight or similar restrictions before booking to ensure that all can join in. If not,
choose a vendor with more inclusive equipment and resources.

2024–2026 Safety Activity Checkpoints Page 21 of 226
• Identify and communicate what gear is provided by the vendor, what is shared by all members of the troop,
and what must be brought by each individual.
• Required or recommended gear for many activities can be expensive or unfamiliar to families. Help Girl
Scouts find appropriate gear by borrowing, thrifting, or renting. Check your council office for items your
troop may be able to check out, or ask the vendor if they have extras. Show participants how to use any
equipment they are expected to bring. Make needs clear to parents/caregivers to ensure everyone is
prepared and confident.
• Provide progressive opportunities to build skills and confidence in new sports—especially aquatics. Water
sports are often accessible only to privileged communities. Contact your local YMCA or public pool for
swim lessons that will build comfort and success not only in the water, but on it.
• Meet all participants where they are. If your troop has different levels of experience, teach to the level of
the least experienced so no one gets left behind.
Transporting Girl Scouts
How parents decide to transport Girl Scouts between their homes and Girl Scout meeting places is each parent’s
individual decision and responsibility.
For planned Girl Scout field trips and other activities, in which a group will be transported in privately owned
vehicles, arrange qualified drivers and ensure:
• Every driver must be a registered, background-checked member (approved adult volunteer) at least 21
years old, and have a safe driving record, a valid license, and a registered/insured vehicle, and meets
council standards and policies for driving and transportation.
• Girl Scout youth members never drive other members to, from, or during activities or field trips.
• If a group is traveling in one vehicle, there must be at least two unrelated, registered background-checked
members (approved adult volunteers) in the vehicle, one of whom is female.
• If a group is traveling in more than one vehicle, the entire group must consist of at least two unrelated,
registered background-checked members (approved adult volunteers), one of whom is female.
Plan for Safe Driving
• Review and implement the standards in the Checklist for Drivers, later in this section. Share it with all
drivers, in advance. Build possible delays into your schedule. Allowing time for traffic or other delays will
help prevent urgency and stress, which can be dangerous when driving.
• Provide directions for each vehicle.
• For driving trips of more than a few hours, plan a stop where all cars can meet and gather. This will avoid
having drivers follow too closely or worry about being separated from the group.
• Anticipate stops every couple of hours for drivers to rest and refresh. Let drivers know they can stop more
often if needed.
• Arrange for relief drivers if drive time will last six hours or more.
• In each vehicle, there should be a first aid kit, and permission and health history forms for each person in
that car.
Borrowing or Renting Vehicles. When borrowing or renting vehicles, drivers may rent cars or minivans in their
own names without council staff signature. Make sure the car is adequately insured; consult the driver’s auto
insurance company. Know who is responsible for damage to, or loss of, the vehicle. Be sure the vehicle is used only
for Girl Scout purposes, as non-related use can compromise coverage. Contact GSGI for specifics and approval.
To avoid surprises, read rental agreements to be familiar with the terms of the agreement and to be sure you
comply with the terms. For example, in many cases the minimum age of drivers is 25, and the maximum age is
often under 70.

2024–2026 Safety Activity Checkpoints Page 22 of 226
Chartered Vehicles. Chartered vehicles, such as buses, are contracted, usually with the driver or operator, for a
group’s exclusive use. Volunteers may not sign contracts for charters even if there is no cost. Contact GSGI for
specifics and approval.
Taxis and ride-sharing services, including Uber and Lyft, may be used with these guidelines:
• An adult should ride in each vehicle with Girl Scouts when multiple vehicles are being used.
• Wait for your ride in a safe place. For taxis, when possible, call (or ask your hotel to call), rather than
hailing from the street. Use a taxi stand at airports. Stand away from traffic while waiting.
• For taxis, check that the taxi is appropriately marked.
• For ride-sharing services:
o Check that the vehicle’s license plate, make, and model match what is shown in the app.
o Compare the app’s photo with the driver. Ask for their name and be sure it matches the app.
o Ask, “Who are you here to pick up?” They should have your first name, but no other information
about you.
• If you feel uncomfortable for any reason, do not get into the vehicle. If you become uncomfortable, end
the ride. Report your experience to the taxi service or ride-sharing app.
• Send your in-town trip contact the name of the driver and your destination. Most apps have a sharing
feature for this purpose.
• Do not share information about the group or where you are staying with any strangers.
• Each passenger must wear a seat belt.
• Enter and exit curbside.
• In foreign countries, consult a local expert about how best to call for taxis or rides. Reputable practices
vary.
Recreational Vehicles, Campers, and Trailers. Whether privately owned or rented, these may be used if the
driver has the appropriate training and license for the vehicle. Passengers must use seat belts when the vehicle is
in motion and may not ride in a trailer or in the bed of a truck.
Vans Designed for 15 Passengers. Volunteers are not encouraged to operate 15-passenger vans as the design of
the vehicles makes them inherently unsafe for the average non-professional driver. School buses, minibuses, and
minivans are preferred. For atypical circumstances, when another option is impossible, make sure to follow this
checklist before driving Girl Scout members in a van designed for 15 passengers:
• Prior council approval must be obtained.
• The van was built in 2011 or later.
• Driver assistance technology has been installed:
o Electronic stability control
o Tire pressure monitoring
o Side curtain airbags
o Center aisle
• Insurance is valid. Check with the auto insurance company to confirm.
• All other safety measures are in place; see the Checklist for Drivers.
• No gear is loaded on top, or heavy gear in the back of the van.
• Van is not overloaded.
• Drive with headlights on, in the right-hand lane when possible.
• Inspect tire conditions and pressure before each trip.
• The driver has the appropriate license in the state(s) where the van will be driven. This type of van may
need a commercial driver’s license. Contact GSGI for specifics and approval.
Note: These rules do not apply to commercial or professionally operated services such as airport shuttles.
Professionally operated commercial vans designed for 15 passengers are permitted.

2024–2026 Safety Activity Checkpoints Page 23 of 226
Commercial and common-carrier transportation is available to the public. They include buses, trains, airlines,
ferries, and similar modes of transportation. In the United States, these are regulated and can be considered safe.
Keep it girl-led; members can compare fares and schedules and make decisions with adult support.
When traveling internationally, consider the transportation options available in the host country and determine
safety and accessibility specific to the location.
Checklist for Drivers
When driving a car, RV, or camper, take the following precautions and ask all other drivers to do the same:
• Ensure all volunteer drivers are at least 21 years old.
• Only adult volunteers transport Girl Scout members.
• Wear seat belts and insist that all passengers do the same. Each person must have their own, fixed seat belt.
• Anyone under 12 must ride in the back seats. Use car seats and boosters as required by your state.
• Never transport Girl Scout members in flatbed or panel trucks, in the bed of a pickup, or in a camper-trailer.
• Keep directions and a road map in the car, along with a first aid kit and a flashlight.
• Check your lights, signals, tires, windshield wipers, horns, and fluid levels before each trip, and recheck
them periodically on long trips.
• Load gear appropriately. Heavy objects and luggage can affect vehicle stability and handling. Avoid
overloading, especially on the top or back of any vehicle.
• Keep all necessary papers up to date including, but not limited to, your driver’s license, vehicle registration,
any state or local inspections, and insurance coverage.
• Follow the best driving safety practices:
o Keep at least a two-car-length distance between you and the car ahead of you.
o Do not talk or text on a cell phone or other device.
o Do not use ear buds or headphones.
o Turn your lights on when your windshield wipers are on.
• No caravaning (cars following closely together with the lead vehicle in charge) is allowed. Each driver must
have information about the route and destination in addition to the cell phone numbers of other drivers.
• Know what to do in case of breakdown or accident. It is smart to have reflectors, a flashlight, a few tools,
and a good spare tire.
• Take time to familiarize yourself with any new or rented vehicle.
• Take a break when you need it. The volunteer in charge of your trip will plan occasional stops, but it is okay
to pull over to a safe place whenever you are too tired to continue. Relief drivers should be planned for long
drives of six hours or more.
• Do NOT drive when you are tired or taking medication that makes you drowsy.
Contact GSGI for specific guidelines and requirements.
Troop Meeting Space
Always Choose a Safe Meeting Space. Consider the age range and the type of activities you want to engage in
when selecting a location or facility for your troop meetings. A meeting place needs to provide a safe, clean, and
secure environment that allows for the participation of all Girl Scout members. You might consider rooms at
schools, libraries, houses of worship, community buildings, childcare facilities, and local businesses for your
meeting location. For teens, you can also rotate meetings at coffee shops, bookstores, and other places they enjoy
spending time. Below are a few points to keep in mind as you consider meeting locations:
• Accessibility. Be sure the space can accommodate those with disabilities, including parents/caregivers.
Also consider transportation access, based on your troop’s needs: Is the meeting site close to public
transportation? Is there a safe place for Girl Scouts to get dropped off? Is there parking on site?

2024–2026 Safety Activity Checkpoints Page 24 of 226
• Allergen-free. Ensure pet dander, smoke, and other common allergens will not bother susceptible
members during meetings.
• Availability. Be sure the space is available for the day and the entire length of time of your troop meetings.
• Communication friendly. Be sure your cell phone works in the meeting space or there is a land line for
emergencies. Internet access is helpful.
• Cost. The space should be free to use. However, you may wish to develop a partnership with the facility and
provide them community service (e.g., flower planting in the spring at the entrance, or a clean-up day for
the grounds) or offer a donation toward maintenance or utilities.
• Facilities. Sanitary and accessible restrooms and toilets are critical.
• Resources. Determine what types of furnishings come with the room and ensure the lighting is adequate. A
bonus would be a cubby or closet where you can store supplies.
• Safety. Ensure the space is safe, secure, clean, properly ventilated, heated (or cooled, depending on
location), free from hazards, and has at least two exits that are well-marked and fully functional. Also check
to see if a first aid kit and equipment (e.g., portable defibrillator), smoke detectors, and a fire extinguisher
are on site.
• Size. Make sure the space is large enough to accommodate the whole group and all planned activities.
Can We Meet in a Private Home? Girl Scouts does not recommend holding troop meetings in private homes. If
you are considering meeting in a private home, check with your council to make sure it is permitted based on their
council policy. In addition to the above, remember to ensure these standards:
• Always obtain prior approval from your council.
• The private home must be the home of a registered, council-approved volunteer.
• Girl Scout members may not meet in a home where a registered sex offender resides.
• Some councils require membership and background checks for all adults living in the home. Contact your
council for specific guidelines.
• Troop members need to be able to focus without disruptions from other household members.
• Animals should be kept in a place that is separate from the meeting space.
• Homeowners should consider any personal insurance implications. The homeowner should ask their
personal homeowner’s insurance carrier if there are any insurance concerns with troop meetings in the
home. Also, volunteers should confirm with the council that troop meetings in the home are covered by the
council’s liability insurance carrier.
• Weapons must be out of view and in a locked space. Medication, cleaning products, or any poisonous
substances must be stored in a secure space, out of sight, and preferably locked.

2024–2026 Safety Activity Checkpoints Page 25 of 226
Activities at a Glance
Girl Scout activities require consideration by the safe and caring adults who guide Girl Scouts as they plan each activity. Awareness of the abilities of each
member and considering the progression of skills it takes from the easiest to the most difficult part of the activity is the role of the adults. Making sure the
complexity of an activity does not exceed an individual’s ability is why Girl Scouts safety activity checkpoints are based on progressive experience.
Certain activities have been rated by Girl Scouts’ national insurance company as high risk. High risk activities are those that, if practiced unsafely or in an
unsafe environment, could cause serious injury or death to a participant, could require crisis communication if an injury occurs, or if not handled
appropriately, could negatively impact the Girl Scout reputation or brand. High risk activities require prior council approval. A council can provide
approval for an activity in a manner that does not require approval every single time the troop practices an activity. However, a volunteer must confirm
that the activity is approved by your council prior to participation whenever Prior Council Approval is indicated as “Required.”
As you explore the many options to engage Girl Scout members in exciting activities, you will notice that there are recommendations for some activities
to start at an older grade level. These recommendations are based on progressive experience and have taken into consideration the emotional, physical,
and developmental stages of participants and are intended to guide you as you plan activities with them. Reach out to your council if you have specific
questions about progression in Girl Scouting. Guidelines may differ from state to state. The ultimate goal is for Girl Scout members to feel confident and
comfortable with each planned activity.
For every activity, always follow the adult-to-youth ratios listed in the
Introduction: Standard Safety Guidelines.
Activities at a Glance
Daisy
Brownie
Junior
Cadette
Senior
Ambassador
High Risk?
Prior
Council
Approval
Required?
Additional Comments and Required Instructor
Certifications, Experience, and Verification
Aerial Fitness
C
S
A
May Be
Required
Includes silks, hoops, trapeze.
Verify instructor experience and credentials.
Amusement Parks
D
B
J
C
S
A
May Be
Required
Animal Interaction and
Adventure
D
B
J
C
S
A
Not
Required

2024–2026 Safety Activity Checkpoints Page 26 of 226
Backpacking
*
*
J
C
S
A
X
Required
*Backpacking is not recommended for Daisies and
Brownies due to weight restrictions on their small frames
and the need, when backpacking, to be able to carry all their
needed supplies. For Daisies and Brownies, refer to Hiking
Activity Checkpoints.
Bicycling
D
B
J
C
S
A
May Be
Required
Council approval may be required for long rides or difficult
terrain.
Camping
D
B
J
C
S
A
Required
Ensure that at least one adult is trained for camping as
required by your council.
Climbing and Adventure Activities
Challenge Courses
D*
B*
J
C
S
A
X
Required
Instructor trained and certified by a verified agency who
demonstrates competence in equipment maintenance,
safety and rescue techniques, proper use of the course, and
hands-on training.*Daisies and Brownies may participate
only in activities that have been designed for their grade
levels and that have equipment that suits the size and
ability of each Girl Scout member. Outdoor high ropes and
high elements are only permitted for Juniors and older.
Climbing and Rappelling
D*
B*
J
C
S
A
X
Required
*Daisies and Brownies are permitted to boulder, slackline,
and do low challenge elements. Note that Daisies and
Brownies may participate only in activities designed for
their ages, with equipment suitable to the size and ability of
each Girl Scout member. *Brownies can participate in most
indoor climbing activities provided a minimum of one
facilitator and an additional adult are present, and
facilitators are skilled in selecting appropriate activities,
teaching, and supervising spotting and lowering techniques,
and modifying tasks to meet any specific needs. Outdoor
high ropes, high elements, and rappelling are only
permitted for Juniors and older.
Recreational Tree Climbing
J
C
S
A
X
Required
A certified instructor with documented experience in
leading and teaching tree climbing is required. In
recreational tree climbing, climbers use ropes, harnesses,
saddles, and climbing techniques to ascend into the crowns
of trees.
Zip Lining
D*
B*
J
C
S
A
X
Required
*Not permitted for Daisies, except for playground zip lines.
*Canopy tours are not permitted for Daisies or Brownies on
non-Girl Scout sites.

2024–2026 Safety Activity Checkpoints Page 27 of 226
Community Clean-Up
D
B
J
C
S
A
X
Required
Check grade-permission levels that apply to the individual
type of projects that are outlined in the Community Clean-up
Safety Activity Checkpoints. For example, beachfront,
waterways, parks, and roadsides.
Computer and Internet Use
D
B
J
C
S
A
Not
Required
All Girl Scout members, as well as their parents and
guardians, must read, agree to, and abide by the Girl Scout
Internet Safety Pledge when online.
Virtual Troop Meetings
D
B
J
C
S
A
May Be
Required
Adults check with their Girl Scout council if they have any
questions about which video conferencing service to use.
Councils may prefer to utilize only specific conferencing
services, or they may leave this entirely up to the volunteer.
Always follow the Virtual Meeting Activity Checkpoints.
Cookie and Product Programs
D
B
J
C
S
A
Not
Required
Adults must accompany Daisies, Brownies, and Juniors
when they are selling, taking orders, and delivering
products. Adults oversee Cadettes, Seniors, and
Ambassadors and must be aware of how, when, and where
they are when selling products.
Cross-Country Skiing
B
J
C
S
A
May Be
Required
First Aider has a current certificate in first aid including
adult and child CPR or CPR/AED and is prepared to handle
cases of frostbite, cold exposure, hypothermia, sprains, and
altitude sickness. *Not recommended for Daisies due to
complexity and strength.
Downhill Skiing and
Snowboarding
D
B
J
C
S
A
X
Required
Instructors are certified by the Professional Ski Instructors
of America (PSIA) and the American Association of
Snowboard Instructors (AASI) or possess equivalent
certification.
Fencing
B
J
C
S
A
May Be
Required
One adult is a certified fencing instructor or has equivalent
certification or documented experience according to your
council’s guidelines. Ensure there is a ratio of one instructor
for every ten fencers.
Fishing and Ice Fishing
D
B
J
C
S
A
May Be
Required
Adult or fishing instructor completes Girl Scouts small craft
safety training or has equivalent certification or
documented experience (competencies); the ratio of
instructor-to-participant is one-to-ten.
Geocaching
D*
B
J
C
S
A
Not
Required
*Daisies are permitted when working with older Girl Scout
members and adults as part of another outdoor activity.
Go-Karting
J*
C
S
A
X
Required
*Juniors may not independently drive go-karts unless on a
rail system.
Hayrides
D
B
J
C
S
A
Required
Qualified driver who is licensed to drive a motor vehicle, is
at least 21 years of age (25 and older preferred), and has

2024–2026 Safety Activity Checkpoints Page 28 of 226
experience hauling a trailer and driving the vehicle being
used.
Hiking
D
B
J
C
S
A
Not
Required
Horseback Riding
D*
B
J
C
S
A
X
Required
Riding instructors are adults (at least 18 years old) who
have current certification from an accredited horsemanship
instructor training organization, such as the Certified
Horsemanship Association and American Association for
Horsemanship Safety, or documented proof of a minimum
of three years’ experience successfully instructing in a
general horseback riding program. *Daisies are only
allowed on pony rides and hand-led horseback walks.
Ice Skating and Roller Skating
D
B
J
C
S
A
May Be
Required
Council approval may be required for natural bodies of
water.
Indoor Skydiving
J
C
S
A
X
Required
Instructor holds instructional flight certification from the
International Bodyflight Association or has council
approved equivalent certification or documented
experience and skill in teaching and/or supervising indoor
skydiving.
Indoor Trampoline
*D
B
J
C
S
A
May Be
Required
*Daisies under the age of six may not participate.
Inflatable Activities
Aquatic Bounces and Slides
B
J
C
S
A
May Be
Required
Aquatic bounce houses and inflatable bounce bubbles and
slides are approved for Brownies and above.
Aquatic Climbing Walls
J
C
S
A
May Be
Required
Aquatic climbing walls are not permitted for Daisies and
Brownies. Juniors and above may take part in aquatic
climbing wall activities when they are strong swimmers
and can swim in water deeper than five feet.
Bounce Houses
D*
B
J
C
S
A
Not
Required
*Daisies can only take part in bounce houses that are
specific for their age, height, and weight.
Log Rolling
B
J
C
S
A
May Be
Required
Log Rolling is not permitted for Daisies.
Bubble Soccer
J
C
S
A
May Be
Required
Bubble Soccer is not permitted for Daisies and Brownies.
Land Sports
See Miscellaneous Activities
Safety Activity Checkpoints.
D
B
J
C
S
A
Not
Required
Ensure adults are well versed in rules and aware of safety
concerns for the designated sport.

2024–2026 Safety Activity Checkpoints Page 29 of 226
Laser Tag
See Miscellaneous Activities
Safety Activity Checkpoints.
D
B
J
C
S
A
May Be
Required
Verify vendor is licensed and insured.
Offshore Water/Large
Passenger Vessels
D
B
J
C
S
A
X
Required
Large water vessels such as ferries, cruise ships, and whale-
watching boats must be licensed by the U.S. Coast Guard.
Orienteering
J
C
S
A
Not
Required
Orienteering is not recommended for Daisies and Brownies,
except when 1:1 with an adult, but they may be ready to
learn pre-orienteering activities such as map reading,
navigation, and map drawing.
Outdoor Cooking
D
B
J
C
S
A
Not
Required
Ensure that at least one adult is trained for outdoor cooking
as required by your council.
Paddle Sport Activities
Canoeing
D*
B
J
C
S
A
X
Required
Follow the Master Paddling Chart for instructor/expert
certification by water type. At least one adult instructor or
guide is currently certified by the American Canoe
Association, or other sponsoring organization approved by
your council. *Not recommended for Daisies except with an
experienced adult in each canoe on flat water.
Corcl Boats
B
J
C
S
A
Required
Follow the Master Paddling Chart for certification by water
type.
Kayaking
B*
J
C
S
A
X
Required
Follow the Master Paddling Chart for instructor/expert
certification by water type. *Flat water only for Brownies.
Packrafting
B
J
C
S
A
X
Required
Follow the Master Paddling Chart for instructor certification
by water type.
Row Boating
D*
B
J
C
S
A
Required
Follow the Master Paddling Chart for certification by water
type. *Daisies may use basic row boats only if they have an
adult in the boat with them.
Stand-Up Paddleboarding
J
C
S
A
X
Required
Follow the Master Paddling Chart for instructor/expert
certification by water type.
Whitewater Rafting
B*
J**
C
S
A
X
Required
Follow the Master Paddling Chart for instructor/expert
certification by water type, and for program grade levels
permitted to raft in various conditions.
Parades and Other Large Group
Gatherings
D
B
J
C
S
A
Not
Required
Pocket Knife and Jackknife
Safety
D*
B
J
C
S
A
May Be
Required
See Pocket Knife and Jackknife Activity Checkpoints for all
instructor requirements and grade-level recommendations.

2024–2026 Safety Activity Checkpoints Page 30 of 226
*Daisies can learn pocket knife and jackknife safety with
cardboard or wood examples.
Rocketry/Model Rocketry
J
C
S
A
Required
Daisies and Brownies are not ready to participate in model
rocketry as defined in this activity. Daisies and Brownies
can participate in simple science experiments like air-
powered drinking straw rockets, balloon rockets, stomp
rockets, or water-powered bicycle pump rockets. Daisies
and Brownies may observe model rocket launches at a safe
distance.
Sailing
B*
J
C
S
A
X
Required
Adult or sailing instructor is certified as a sailing instructor
or sailing counselor by U.S. Sailing, completes Girl Scouts
small craft safety training, or possesses equivalent
certification or documented experience according to your
council’s guidelines. The instructor-to-girl ratio is one to
four. *Thoroughly verify Brownie maturity level for sailing.
Scuba Diving
C
S
A
X
Required
Scuba diving teacher holds instructional certification from
Scuba Schools International (SSI), Professional Association
of Diving Instructors (PADI), the National Association of
Underwater Instructors (NAUI), or the YMCA. The
instructor-to-girl ratio is one to four.
Segway
See Miscellaneous Activities
Safety Activity Checkpoints.
S
A
May Be
Required
Vendor must be licensed and insured. Segway is only
permitted when used in a pedestrian environment, not on
public roads.
Skateboarding
See Miscellaneous Activities
Safety Activity Checkpoints.
B
J
C
S
A
Not
Required
Skate parks are for experienced skaters. Beginners should
not be in skate parks.
Sledding, Tobogganing, and
Snow Tubing
D
B
J
C
S
A
May Be
Required
Girl Scout members must go feet-first and helmets are
strongly recommended. Girl Scout members are not
permitted to be towed behind any vehicle, including
snowmobiles. No sledding near trees, buildings, or
roadways.

2024–2026 Safety Activity Checkpoints Page 31 of 226
Snorkeling
J
C
S
A
X
Required
Snorkeling instructor holds instructional certification from
Scuba Schools International (SSI) or the Professional
Association of Diving Instructors (PADI) or has equivalent
certification. If the instructor is not also a certified
lifeguard, you will need a lifeguard present. Lifeguards need
current American Red Cross Lifeguarding plus Waterfront
Module, or YMCA Waterfront Lifeguarding certification or
equivalent experience. One lifeguard is needed for every 25
swimmers.
Snowshoeing
D
B
J
C
S
A
Not
Required
Instruction is given by an adult with experience teaching
and/or supervising snowshoeing or has documented
experience.
Spelunking/Caving
J
C
S
A
X
Required
Instruction is given by an adult with experience teaching
and/or supervising spelunking or has documented
experience.
STEM, Arts, Crafts
See Miscellaneous Activities
Safety Activity Checkpoints.
D
B
J
C
S
A
Not
Required
Surfing
J
C
S
A
X
Required
Instructors should hold a certification from the National
Surf Schools and Instructors Association, the International
Surfing Association, or similar certification. Notify
lifeguards and point out location of other surfers. Ocean
lifeguard certifications, according to local and state norms
and standards, are required. The instructor-to-girl ratio is
one to four. Surfers must demonstrate appropriate swim
skill level.
Swimming
D
B
J
C
S
A
Required
Follow the lifeguard certification requirements and ratios
listed in Swimming Safety Activity Checkpoints.
Target Sport Activities
3-D Archery
C
S
A
X
Required
One adult is certified by the National Field Archery
Association, USA Archery, or Easton Foundation. In
addition, one adult to every ten Juniors, Cadettes, Seniors,
and Ambassadors is required.
Air/BB Guns
B
J
C
S
A
X
Required
One adult is a certified National Rifle Association range
safety officer or USA Shooting Sports instructor. In addition,
one adult to every five Brownies and one adult to every ten
Juniors, Cadettes, Seniors, and Ambassadors is required.

2024–2026 Safety Activity Checkpoints Page 32 of 226
Archery
B
J
C
S
A
X
Required
One adult has certification from the National Field
Archery Association, USA Archery, or Easton Foundation. In
addition, one adult to every five Brownies and one adult to
every ten Juniors, Cadettes, Seniors, and Ambassadors is
required unless on a Girl Scout site.
Ax/Hatchet Throwing
C
S
A
X
Required
One adult instructor trained in ax/hatchet form and
technique, safety, range rules, and emergency procedures.
In addition, one adult to every two Cadettes, Seniors, and
Ambassadors is required.
Knife Throwing
C
S
A
X
Required
One adult instructor trained in knife throwing form and
technique, safety, range rules, and emergency procedures.
In addition, one adult to every two Cadettes, Seniors, and
Ambassadors is required.
Muzzle Loading
C*
S
A
X
Required
*Must be 12 years or older to participate. One adult is a
certified National Rifle Association range safety officer or
USA Shooting Sports instructor. In addition, one adult to
every two Cadettes, Seniors, and Ambassadors is required.
Pistol
S*
A
X
Required
*Must be 14 years or older to participate. One adult is a
certified National Rifle Association range safety officer or
USA Shooting Sports instructor. In addition, one adult to
every four Cadettes, Seniors, and Ambassadors is required.
Rifle
C*
S
A
X
Required
*Must be 12 years old or older to participate. One adult is a
certified National Rifle Association range safety officer or
USA Shooting Sports instructor. In addition, one adult to
every eight Cadettes, Seniors, and Ambassadors is required.
Shotgun—Trap/Skeet Shooting
C*
S
A
X
Required
*Must be 12 years old or older to participate. One adult is a
certified National Rifle Association range safety officer or
USA Shooting Sports instructor. In addition, one adult to
every eight Cadettes, Seniors, and Ambassadors is required.
Slingshot
D
B
J
C
S
A
May Be
Required
One adult instructor trained in slingshot form and
technique, safety, range rules, and emergency procedures.
In addition, one adult to every five Daisies and Brownies
and one adult to every ten Juniors, Cadettes, Seniors, and
Ambassadors is required.
Target Paintball
B
J
C
S
A
May Be
Required
One adult is trained in paintball safety, range rules, and
emergency procedures. In addition, one adult to every five
Brownies and one adult to every ten Juniors, Cadettes,
Seniors, and Ambassadors is required.

2024–2026 Safety Activity Checkpoints Page 33 of 226
Tethered Balloon Rides
J
C
S
A
X
Required
Ensure operators have liability insurance and are licensed
through the Federal Aviation Administration. Pilots must be
currently licensed.
Tools—Hand and Power
D
B
J
C
S
A
May Be
Required
See the Tools—Hand and Power Safety Activity Checkpoints
for grade level permission and progression. Certain power
tools are not permitted for all grade levels. Adults must be
present to meet the adult-to-youth ratios listed in the
Introduction: Standard Safety Guidelines.
Travel/Trips
D
B
J
C
S
A
X
Required
See Travel/Trips Safety Activity Checkpoints for grade-level
trip and travel length recommendations.
Tubing
J
C
S
A
X
Required
One adult must complete Girl Scouts small craft safety
training or equivalent, and have experience teaching and
supervising tubing activities. If tubing behind a motorboat,
make sure the driver is an adult and has a valid license to
operate the motorboat. Girl Scout members are not
permitted to be towed by jet skis or wave runners. Follow
the lifeguard certification requirements and ratios listed in
Swimming Safety Activity Checkpoints. Adults must be
present to meet the adult-to-youth ratios listed in the
Waterskiing and Wakeboarding
J
C
S
A
X
Required
Ensure the adult or instructor is certified by USA Water Ski
or possesses equivalent certification or documented
experience according to your council’s guidelines. Confirm
the boat driver is an adult, has an appropriate license, and
is skilled in operating the watercraft. Follow the lifeguard
certification requirements and ratios listed in Swimming
Safety Activity Checkpoints.
Windsurfing
J
C
S
A
X
Required
In addition to a lifeguard, at least one adult present should
have Girl Scouts small craft safety training or equivalent.

2024–2026 Safety Activity Checkpoints Page 34 of 226
How to Use Safety Activity Checkpoints
On the following pages, you will find the individual safety activity checkpoints for Girl Scouts of the USA and Girl
Scouts of Greater Iowa’s approved activities.
As soon as the Troop/Group begins planning a particular trip or activity, adult volunteers and troop leaders should
always review:
• The Introduction: Standard Safety Guidelines section, which provides the standard safety guidelines that
apply to all Girl Scout activities, and
• The related individual activity’s safety activity checkpoints (e.g., Swimming, Backpacking, Camping)
Volunteers and troop leaders should then continue to refer to both the Introduction: Standard Safety Guidelines and
the individual activity’s safety activity checkpoints throughout the entire activity planning process to ensure all
proper precautions have been taken and all safety guidelines have been met before participating in the activity.
As part of your activity planning, be sure to pay particular attention to the following areas:
• When the adult-to-youth ratio or other safety parameters are stricter for a specific activity than in the
Standard Safety Guidelines, always follow the stricter parameters given in the individual activity’s safety
activity checkpoints.
• Where access and inclusion can be enhanced. See the Equity section in the document introduction, and
any specific recommendations in activity sections.
• Emergency Action Plan (EAP). Review and document your Emergency Action Plan (EAP) before starting
any activity and review it so all are prepared. Think through scenarios of what can go wrong such as an
accident, physical injury, missing person, sudden illness, or sudden weather or water emergencies.
When in doubt, contact your Girl Scout council for help and guidance in adhering to the safety standards set forth
in Girl Scouts Safety Activity Checkpoints.

2024–2026 Safety Activity Checkpoints Page 35 of 226
Aerial Fitness
Council Approval: May Be Required
Activity Permitted for: C, S, A
Includes:
• Silks
• Hoops
• Trapeze
About Aerial Fitness
Aerial fitness has a special focus on three-dimensional movement, conditioning, joint rotation, and mobility and is a
great way to move your body outside of a typical gym workout. It allows for different body types, personality types,
and levels of challenge for expression. More than just a fun activity, aerial fitness uses silks, hoops, and trapeze to
provide a wide range of health benefits that target physical strength and support a positive mental state by fusing
together a variety of activities and skills such as stretching, Pilates, cardio, strength training, and concentration.
Aerial fitness uses a variety of equipment to support and suspend the body and works with a range of body types
to use the effects of supported body weight and gravity to lengthen, strengthen, contract, and extend muscles,
improve posture, add gentle traction effects, optional inversions, and align joints.
Learn More
• American Circus Educators
• Circus Safety Strategies
Include Girl Scout Members with Disabilities. Talk to Girl Scout members with disabilities and their caregivers.
Ask about needs and accommodations. Always be sure to contact the location and/or the instructor in advance to
ensure they are able to accommodate those with disabilities. For more information, visit Aerial Yoga for
Wheelchair Users and Children with Special Needs Soar in the Circus.
Equity. Check with the vendor to determine if any size or weight restrictions might limit participation. Consider
the history, culture, and past experiences of the Girl Scout members in your troop that could affect their ability to
equally participate in an activity. Work with members and families to understand how an activity is perceived.
Ensure that all Girl Scout members and their families feel comfortable and have access to whatever is needed to
fully participate, such as proper equipment, prior experiences, and the skills needed to enjoy the activity. See the
Equity section of the Introduction to Safety Activity Checkpoints for general advice about expense, body size, ability,
gear, experience, and confidence.
Emergency Action Plan (EAP). Review and document your Emergency Action Plan (EAP) before starting any
activity and review it so all are prepared. Think through scenarios of what can go wrong such as an accident,
physical injury, missing person, sudden illness, or sudden weather or water emergencies.

2024–2026 Safety Activity Checkpoints Page 36 of 226
Aerial Fitness Checkpoints
Assess participants’ maturity level. Participants must be old enough to understand safety procedures and handle
equipment so as not to endanger themselves or others.
Verify instructor knowledge and experience. Instruction is to be given by an adult who has experience teaching
and/or supervising Aerial Fitness for the ages involved, has necessary certifications, or has substantial
documented experience. Ensure that the instructor has the appropriate qualifications and skills to undertake all
aspects of the course, that they are aware of their responsibilities, and that they are willing to comply with the
relevant legislation.
Select a safe site.
• Location and equipment are clean, sanitized, and free of debris and or odors.
• Care and storage should be taken for the proper maintenance of equipment in accordance with the
specifications set by the manufacturer.
• Any broken or damaged equipment should be removed immediately.
• Safety mats/nets are clean and placed appropriately under participants.
• All stations should have well maintained rigging and setup that is inspected by a certified person on a daily
basis as well as regularly scheduled inspections based on your local regulations.
• Enough information and guidance are provided to ensure the risks involved are minimized.
• Participants are taught how to use the equipment properly and safely.
• Ensure that no student can access the equipment without supervision.
• Ensure that when participating in activities that do not provide a harness, participants cannot be more than
6 feet from the ground.
• Facility should have enough ventilation and temperature control for the size of the space.
Contact the location regarding any physical concerns. Aerial fitness students with certain health conditions
and/or existing or previous injuries should contact the facility’s office prior to registration. Typically, anyone over
200 pounds should contact the facility’s office to discuss safety and other considerations.
Youth learn about and prepare for aerial fitness. Instructors teach a set of readiness instructions and
commands. All participants should use gentle muscle warm-up and stretching activities before beginning physical
activities. Instructors must describe the objectives, safety procedures, and hazards to the participants before
beginning an activity.
On the Day of the Activity
Dress appropriately. Make sure participants wear clothing that is comfortable, snug fitting, and covers the knees,
and that they have the appropriate footwear for the activity. Avoid wearing dangling earrings, bracelets, and
necklaces that may become entangled in equipment. Tie back long hair.
Ensure the instructor reviews the rules and operating procedures beforehand. The instructor covers safety
procedures, including:
• No gum or candy
• Drinking plenty of water and resting when tired
• Being aware of other participants
Safety and Required Gear
• Hoops, silks, or trapeze equipment
• Harnesses and safety nets for trapezing
• Harnesses potentially for silks

2024–2026 Safety Activity Checkpoints Page 37 of 226
Amusement Parks
Council Approval: May Be Required
Activity Permitted for: D B J C S A
Includes:
• Large theme parks
• Smaller amusement-type parks/Free-standing rides
• Carnivals/County Fairs
• Waterparks or facilities (more than a swimming pool)
• Themed adventure parks
• Controlled go-kart activities
About Amusement Parks
Amusement parks take a wide variety of forms depending on where they are geographically located and the
audience they are geared toward. These parks are commercially operated enterprises that offer rides, games,
activities, and other forms of entertainment. To ensure a safe park experience, it is important to look at the various
activities individually to ensure safety and compliance with Girl Scouts’ Safety Activity Checkpoints. For example,
some locations may have activities that are not permissible Girl Scout activities, such as bungee jumping. Be sure to
identify these prior to making final plans and communicate which activities may be restricted because of age,
height, and weight. Also, discuss ride and crowd safety, have a designated meeting space, and encourage Girl Scouts
to act responsibly.
Currently 44 of 50 states regulate amusement parks. The six without state oversight are Alabama, Mississippi,
Montana, Nevada, Wyoming, and Utah. These states contain few, if any, amusement parks. Amusement and other
types of adventure parks, as listed above, can be found in most states.
Learn More
• Saferparks Database
• Guide to U.S. Theme Parks
Include Girl Scout Members with Disabilities. Talk to Girl Scout members with disabilities and their caregivers.
Ask about needs and accommodations. Always be sure to contact the location in advance to understand the
accommodations for those with disabilities. Communicate this information with families.
Equity. Find out about age, height, or weight restrictions for park attractions. Communicate these with troop
members and their families. Discuss selecting rides or areas of the park that all members can engage in, as well as
identifying the rides that interest them. Consider the history, culture, and past experiences of the Girl Scout
members in your troop that could affect their ability to equally participate in an activity. Work with members and
families to understand how an activity is perceived. Ensure that all Girl Scout members and their families feel
comfortable and have access to whatever is needed to fully participate, such as proper equipment, prior
experiences, and the skills needed to enjoy the activity. See the Equity section of the Introduction to Safety Activity
Checkpoints for general advice about equity.
Emergency Action Plan (EAP). Review and document your Emergency Action Plan (EAP) before starting any
activity and review it so all are prepared. Think through scenarios of what can go wrong such as an accident,
physical injury, missing person, sudden illness, or sudden weather or water emergencies.

2024–2026 Safety Activity Checkpoints Page 38 of 226
Amusement Park Checkpoints
Connect with your Girl Scout council for approved sites or site suggestions to ensure the location is vetted.
If it is not, allow enough time to have the location approved.
Inquire about adequate insurance. The park you attend may or may not be able or willing to provide evidence of
one million dollars general liability insurance and instructor certifications upon request (depending on the size of
the group). It is best to at least inquire and have the conversation in order to verify credibility of the park’s
management.
Ensure safety of theme park rides. Obtain full information about the rides and other activities and evaluate them
for safety with a special focus on the age, height, and weight levels of riders.
Follow Swimming Safety Activity Checkpoints. Pay particular attention to water park safety rules. Ensure there
are certified lifeguards at each activity. A swim assessment is strongly recommended prior to the trip.
Follow Go-Karting Safety Activity Checkpoints. Note age restrictions.
Know where individuals are at all times. Keep track of whereabouts. Conduct a head count before and after
activities. Ensure everyone knows where to go and how to act when confronted by strangers.
Review plans upon arrival. Adults should obtain a copy of the park guide to facilitate the visit and gain important
information on park policies, as well as the location of restrooms and the first aid station. Plan the rides or events
to attend with predetermined groups.
Determine a meeting spot beforehand. Adults and Girl Scouts should discuss plans for the visit and set a place to
meet (home base spot) if they get separated from the group.
Verify first aid particulars. Know where the first aid station is located. Ensure the presence of a first aid kit and a
first aider (with a current certificate in first aid, including adult and child CPR or CPR/AED) who is prepared to
handle cases of abrasions, sprains, and fractures.

2024–2026 Safety Activity Checkpoints Page 39 of 226
Animal Interaction
Council Approval: Not Required
Activity Permitted for: D B J C S A
Includes:
• All animal tourism and interaction
• Farm animals and home pets
• Wild animals
• Rescue, shelter, and therapy animals
About Animal Interaction
Planned interaction with animals is a popular and desired activity for many Girl Scouts, from petting zoos to
therapy dogs and rescue animals. Through these activities they can learn about animals and have memorable
experiences.
Unplanned interaction with animals can occur during other activities, such as hiking. Prepare for those ahead so
girls know that not interacting with an animal will provide both safety and a valuable learning opportunity.
This activity primarily focuses on planned animal interaction under a controlled environment, including all
educational programs, wildlife tourism, and farm animals.
Learn More
• Child Safety Around Animals: HealthyChildren.org
Animal Safety and Health Reminders
• Partner with reputable organizations. Ensuring they have liability insurance helps credibility.
• Assess your group. Ensure they are mature enough to follow rules and exercise self-control. Do not allow
children under age five to interact with reptiles, amphibians, baby chicks, ducklings, or pet zoo animals (per
the Centers for Disease Control and Prevention).
• Control their interaction. Let everyone know that it is not okay to tease, hurt, or play roughly with any
animal.
• Keep it clean. Make sure hands are washed before and after contact with animals, animal bedding, or
waste.
• Be vigilant. Treat bites or scratches according to the first aider’s training to avoid infection. Report animal
aggression, bites, or other concerns to the authorities and to your council.
Include Girl Scout Members with Disabilities. Talk to Girl Scout members with disabilities and their caregivers. Ask
about needs and accommodations. Always be sure to contact the location and/or the instructors in advance to
ensure they are able to accommodate those with disabilities.
Equity. Consider the history, culture, and past experiences of the Girl Scout members in your troop that could
affect their ability to equally participate in an activity. Work with members and families to understand how an
activity is perceived. Ensure that all Girl Scout members and their families feel comfortable and have access to
whatever is needed to fully participate, such as proper equipment, prior experiences, and the skills needed to enjoy
the activity. Recognize that Girl Scouts may have various levels of exposure to and experience with animals. They
may also have different cultural or personal perspectives on the keeping of animals on farms, in zoos, or in other
facilities. Remind your troop that there should be no judgment as everyone learns together. See the Equity section
of the Introduction to Safety Activity Checkpoints for general advice about expense,

2024–2026 Safety Activity Checkpoints Page 40 of 226
Emergency Action Plan (EAP). Review and document your Emergency Action Plan (EAP) before starting any
activity and review it so all are prepared. Think through scenarios of what can go wrong such as an accident,
physical injury, missing person, sudden illness, or sudden weather or water emergencies.
Animal Interaction Checkpoints
Review basic rules for animal interaction:
• Do not pet or otherwise disturb an animal that is sleeping or eating.
• Stay away from an animal’s food.
• Do not tease or abuse an animal.
• Watch for warning signs like growling or hissing.
• Never pet an unfamiliar dog, cat, or other animal. If an animal is with its owner, ask first before petting.
• Be cautious about touching young animals, such as puppies and kittens, within view of their mother.
In addition, in the case of dogs for example, do not run when approached by an unfamiliar dog. Running may make
the dog anxious and aggressive. Instead, stay calm. Slowly back away, avoid sudden movements, and avoid direct
eye contact, but keep the dog within view.
Pets, Therapy Animals, and Rescue Shelters
• Protect participants as well as hosts’ house pets. This should be taken into consideration during
meetings, overnights, and activities. Secure all pets out of reach when Girl Scouts are present.
• Trained service animals, such as guide or hearing dogs, must be welcomed. When engaging with
service animals, be welcoming and follow the handler’s instructions regarding petting or engaging with
them.
• Follow the rules. These are often provided by the animal rescue facility or shelter.
• Supervise closely. Watch the group and practice the buddy system.
• Be clean. Take care to wash hands and sanitize footwear to protect participants from disease and to
prevent spreading disease from one animal to another.
• Make it a learning experience. Talk to the group and research the root causes that lead to animals being
in shelters. Brainstorm Take Action projects the troop might be able to do to help.
• Avoid these activities while at the rescue or shelter:
o Eating or drinking.
o Sitting or playing on the ground.
o Feeding the animals, unless supervised by shelter personnel and animal contact is controlled with
barriers.
o Contact with animals if you or the animal has an open wound.
o Contact with animal waste.
Petting Zoos and Animal Ambassadors
• Follow rules provided by the zoo.
• Take care to wash hands and sanitize footwear, as directed.
• Do not handle bedding, food, water, or manure unless trained to do so.
Drive-Through Zoos and Parks
• Drive vehicles with secure roofs and doors and windows that fully close.
• Keep windows rolled up.
• Do not get out of the vehicle.

2024–2026 Safety Activity Checkpoints Page 41 of 226
Swimming with Dolphins and Other Interactive Experiences
• Choose a safe and responsible animal organization. See the “Choosing a Partner Organization” section
below.
• Review safety management with the organization before visiting the site.
• Make sure predators are secured or separated from the group.
• Contact your council for specific approval and guidance for wolf, big cat, shark, or similar interactions.
• Follow any related safety activity checkpoints. For example, follow Swimming Safety Activity Checkpoints
when swimming with dolphins.
Farm Animals and Husbandry
• Ask permission before entering a farm or barnyard.
• Ask if there are areas to avoid.
• Get an orientation from an on-site expert. Learn and follow their safety rules.
• See Horseback Riding Safety Activity Checkpoints if you will work with or ride horses.
Wild Animals
• Learn about the animals that live in the area you frequent or will visit.
• Never approach wild animals. Generally, animals will not attack or bite if left alone.
• Back away if you come across baby animals and assume that there is a protective mother nearby. Backing
away protects you and the babies.
• Report animals that appear sick or behave strangely to the authorities.
• Take special care in snake country:
o Do not stick your hand or foot in places you can’t see.
o Wear closed-toed shoes.
o Use a flashlight when walking at night to avoid stepping on a snake.
o Do not handle snakes, even if you think they are dead.
o Back away slowly if you encounter a snake.
• Never feed wild animals.
• Store food away from tents or cabins and out of the reach of animals. If the site is in bear country, check
with local authorities on precautions to take, and ask if a bearproof canister is required for food.
Choosing Partner Organizations
Select partner organizations that have visitor safety and animal well-being as top priorities.
For visitor safety, look for organizations that:
• Provide handwashing stations.
• Provide an orientation or training on safety rules.
• Supervise visitors.
• Limit visits so animals do not get overwhelmed.
• Keep the environment clean, especially manure pick-up.
• Have food stations for visitors that are separate from animal enclosures.
For animal well-being, look for organizations that:
• Keep animals healthy and cared for with food, clean water, and a sheltered place to rest.
• Do not have animals that sway or pace in their enclosures, as these behaviors can be signs of stress.
• Keep exotic or wild animals only while they recover or because they can’t be reintroduced into the wild.
• Do not engage in the commercial trade of animals or animal parts.

2024–2026 Safety Activity Checkpoints Page 42 of 226
• Do not breed animals and have measures in place to prevent breeding unless the animals are part of an
authorized release program.
• Do not take in more animals than they can humanely handle.
• Do not use animals for entertainment or force animals to perform acts such as rides, shows, or tricks.
• Operate in the best interest of the animals, rather than for profit.
• Do not allow venomous animals to be handled.
Note: Be wary of places that claim to be sanctuaries, especially those overseas. They often operate for profit and are
likely to exploit animals. Wildlife tourism sites, including those that offer elephant rides, the opportunity to hold
newborn cubs, or the chance to pet tigers, are also potentially exploitive and dangerous. Investigate these beforehand
at the Global Federation of Animal Sanctuaries. Ethical tour operators can be found here.

2024–2026 Safety Activity Checkpoints Page 43 of 226
Backpacking
Council Approval: Required
Activity Permitted for: J C S A
Not Recommended for: Daisies and Brownies
About Backpacking
A backpacker’s primary mission is to explore on foot, while carrying all their gear in a backpack and being a good
steward of the land. These checkpoints focus on preparing for backpacking in remote areas, but the
recommendations can be used in urban areas too.
Backpacking is not recommended for Daisies and Brownies because of the equipment used in backpacking trips
(see below) and the longer duration of the activity. Hiking is recommended for Daisies and Brownies to prepare
them for the adventure of backpacking at the next grade level.
When choosing a destination, connect with your Girl Scout council for site suggestions, such as Girl Scout camps.
Learn More
• AmericanTrails.org
• Backpacker.com
• LeaveNoTrace.org
Include Girl Scout Members with Disabilities. Talk to Girl Scout members with disabilities and their caregivers.
Ask about needs and accommodations. Contact the location and/or local, state, or national parks to inquire about
their accommodations for people with disabilities. To learn about accessible trails, visit Trail Access Project; find
tips on gear selection and planning at Pack Your Tent.
Equity. Consider the history, culture, and past experiences of the Girl Scout members in your troop that could
affect their ability to equally participate in an activity. Work with members and families to understand how an
activity is perceived. Ensure that all Girl Scout members and their families feel comfortable and have access to
whatever is needed to fully participate, such as proper equipment, prior experiences, and the skills needed to enjoy
the activity. Check out Melanin Base Camp and Diversify Outdoors for resources and inspiration. See the Equity
section of the Introduction to Safety Activity Checkpoints for general advice about expense,
Emergency Action Plan (EAP). Review and document your Emergency Action Plan (EAP) before starting any
activity and review it so all are prepared. Think through scenarios of what can go wrong such as an accident,
physical injury, missing person, sudden illness, or sudden weather or water emergencies.

2024–2026 Safety Activity Checkpoints Page 44 of 226
Backpacking Checkpoints
Encourage resource sharing. Have your troop make a list of needed gear and supplies and determine which
items can be shared. This way your group is not bringing more supplies than you need. For communal items,
spread them across backpacks or have troop members rotate carrying them so the load is shared equitably.
Choose an appropriate backpacking route. The route chosen needs to be within the abilities of every person in
the group and the pace needs to be set by the slowest backpacker. Determine the length of the trip by the
backpackers’ grade levels, level of experience and ability, physical condition, nature of the terrain, and weight of
the load to be carried as well as the season and weather conditions, the water quantity and quality, and the
activities planned along the way.
Assess the safety of backpacking sites. The route needs to be known to at least one of the adults or a report
should be obtained in advance to assess potential hazards. Ensure that a land-management or similar agency is
contacted during the trip-planning stage to help with available routes and campsites, recommended group size,
information about water quantity and quality, and permits (if needed).
Assess backpack quality and do a trial run. Check the gear! Troop members should try on the clothes and shoes
they plan to bring to make sure it all fits. Ensure that backpacks and all equipment (including food and water)
weigh no more than 20 percent of each person’s body weight, with a maximum of 35 pounds. Guide troop members
in choosing backpacks, adjusting straps, and taking them on and off. Have them plan and conduct a series of hikes
to practice and build up endurance before the backpacking trip.
Ensure backpackers have a comprehensive understanding of the trip. Group members need to be trained to
be observant of the route, the surroundings, and the fatigue of individuals. Instruction should be given on the
safety rules for backpacking, such as staying together in a group, recognizing poisonous plants, biting or stinging
insects and ticks, respecting wild animals, and behaving effectively in emergencies. Ensure that hikers know how
to read maps, use a compass, navigate a route, and estimate distance.
Prepare for emergencies. Ensure the presence of a waterproof first aid kit and a first aider with a current
certificate in first aid (including adult and child CPR or CPR/AED), who is prepared for extremes of temperature,
such as heat exhaustion, heat stroke, frostbite, cold exposure, and hypothermia, as well as sprains, fractures, and
altitude sickness. Ensure that emergency transportation is available, if possible; if any part of the activity is located
30 minutes or more from emergency medical services, ensure the presence of a first aider with Wilderness First
Aid certification. The designated adult should have a working cell phone or satellite messenger for emergencies.
Take safety precautions. Create a trek/risk management plan with the group. Search and rescue procedures for
missing persons should be written out in advance, reviewed, and practiced by youth and adults. Methods of
communication with sources of emergency care, such as police, hospitals, and park and fire officials, should also be
arranged in advance. Write, review, and practice evacuation and emergency plans that cover any foreseeable
situation. File your plan with local authorities, a trusted contact at home, and troop families.
Practice safe backpacking. Progressively challenging treks build skill, experience, and endurance. Backpackers
should successfully complete entry-level hikes before moving on to the next difficulty level. Hiking after dusk is not
recommended. Off-trail hiking must be done with an experienced leader. The group must hike away from the edges
of waterfalls, rock ledges, and slopes with loose rocks. Girl Scouts are never allowed to go on high-altitude climbs.
Safety Gear. Backpacking requires various equipment dependent on the length of the trip, location, and weather,
such as:
• Lightweight, layered clothing and outerwear appropriate for weather conditions
• Water bottle or hydration pack (each person should carry at least one quart—or enough to get to the next
resupply point)
• Non-perishable, high-energy, lightweight foods such as dehydrated meals, fruits, and nuts

2024–2026 Safety Activity Checkpoints Page 45 of 226
• Whistle
• “Ten Essentials” emergency survival kit, including a flashlight, first aid kit, extra clothing (including a
waterproof jacket), snacks, tablets for purifying water, emergency shelter, matches in a waterproof
container, knife, map, compass or GPS, and a water bottle
• Backpack appropriate for size and experience of user
• Sturdy hiking/trail footwear with thick soles (optional: soft-soled shoes to wear at campsite after removing
hiking footwear). Wear socks designed for hiking; use either a liner with a thicker sock or high-tech socks
to keep moisture away from feet
• Map and compass or compass and GPS
• Sleeping bag, preferably a mummy or lightweight sleeping bag; closed cell sleeping pad.
• Potable water or water purification supplies (e.g., iodine tablets) to remove potential contaminants from
natural water sources; use water filters designed to remove Giardia Lamblia. See Outdoor Cooking Safety
Activity Checkpoints for purification tips.
• Unbreakable, lightweight knife/fork/spoon combo, with a bowl and cup
• Portable cook stove and fuel whenever possible (to reduce the use of firewood)
• Waste management supplies (toilet paper, garbage bag, plastic trowel to dig a cat hole, hand sanitizer)
• Food storage (check local regulations to find out if a bearproof canister is required)
• A working cell phone for emergencies (in the hands of an adult) or a specific backup plan.
• Hat or bandana

2024–2026 Safety Activity Checkpoints Page 46 of 226
Bicycling
Council Approval: May Be Required, especially for long trips
Activity Permitted for: D B J C S A
About Bicycling
Cycling is a fun activity that Girl Scouts can enjoy their entire lives. As with all activities, progression through skill
building and conditioning are very important. Long day cycling trips, mountain and road biking, and long-distance
cycling trips can be strenuous. The terrain may be difficult. Riders must also carry more gear and supplies than on
short day trips. For this type of cycling, it is essential to have opportunities to condition themselves beforehand.
When training for lengthy bicycle trips, set realistic goals for mileage. Plan to gradually increase the distance. For
instance, one week aim to ride 10 miles and strive for 15 the next.
Learn More
• The League of American Bicyclists
• People for Bikes
• International Mountain Bicycling Association
• NICA Teen Trail Corps
• Adventure Cycling Association
• USA Cycling
Find out about mountain bike trails in your area at MTBproject.com. Check with your local bicycle coalition or
mountain bike association for events that can help you learn. Contact local bike shops and ask if they will host a
maintenance clinic or guided ride for your group.
Include Girl Scout Members with Disabilities. Talk to Girl Scout members with disabilities and their caregivers.
Ask about needs and accommodations. Learn more about the resources and information that the National Center
on Health, Physical Activity and Disability provides for people with disabilities.
Equity. Consider the history, culture, and past experiences of the Girl Scout members in your troop that could
affect their ability to equally participate in an activity. Work with members and families to understand how an
activity is perceived. Ensure that all Girl Scout members and their families feel comfortable and have access to
whatever is needed to fully participate, such as proper equipment, prior experiences, and the skills needed to enjoy
the activity. Owning a bike is not a requirement to participate in biking; contact local bike shops and clubs about
bicycle rental or loan programs. Groups like Black Girls Do Bike offer supportive information and events; look for
similar resources that fit your riders’ needs. See the Equity section of the Introduction to Safety Activity Checkpoints
for general advice about expense,
Emergency Action Plan (EAP). Review and document your Emergency Action Plan (EAP) before starting any
activity and review it so all are prepared. Think through scenarios of what can go wrong such as an accident,
physical injury, missing person, sudden illness, or sudden weather or water emergencies.
Bicycling Checkpoints
Organize cycling groups. Participants should travel in groups of five or six, unless on a bike path, where more can
ride together. An adult must ride at the head and rear of every two groups. Groups should ride with at least 150

2024–2026 Safety Activity Checkpoints Page 47 of 226
feet (that’s about half the length of a soccer field) between them so that vehicles may pass. Each Girl Scout member
must have their own bike, unless riding tandem. Those riding tandem bikes must have their own seats.
Select a safe cycling site or route. A community bike park is an excellent place to evaluate and practice bike
handling skills. When selecting a trip route, use designated bicycle paths whenever possible. Avoid routes with
heavy traffic and observe all state and local biking rules.
Make careful plans for the type of road or trail to be traveled. For example, secondary roads are quiet, but may
have trees, curves, and hills that obstruct visibility. When planning to cycle on trails, check that trails are
authorized for cycling by contacting land managers or checking jurisdictional websites and maps. Notify
jurisdictional authorities about the group’s trip when necessary.
Know your surroundings. Check the location of emergency and medical services along the route.
Consider your riders. Ensure that the length and terrain of the route, the time of day, weather, and equipment are
appropriate for the riders’ experience levels and physical condition. Review the route together and practice map-
reading skills.
Check the ABCs:
• Air: Check tire pressure and ensure it meets the tire’s specific air requirement.
• Brakes: Check that pads and brakes are adjusted appropriately.
• Chain: Make sure the chain is engaged with gears and shifting smoothly.
Ride safely. Plan to ride only during daylight hours. Ride with the flow of traffic. Obey traffic regulations, signals,
lane markings, and local ordinances pertaining to bicycling. When on natural surface trails, cyclists yield to all
others on the trail, including hikers and those on horseback. Review trail etiquette guidelines.
Help riders learn to:
• Watch the road. Recognize and avoid common roadway hazards like drainage grates and utility access
hole covers, sand, gravel, glass, wet leaves, litter, and other road and trail hazards.
• Communicate and cooperate with other road and trail users.
• Ride defensively, not aggressively. Each person should stay aware of their surroundings and put
themselves in the best position for safety.
• Prepare for the unexpected.
• Pack light. In addition, cyclists should carry a load weight on practice rides that is similar to the load
weight they will carry on the planned, longer trip.
• Practice packing and storing gear. Light gear is stored in bicycle panniers (foldable carriers) or packs on
the back of the bike.
• Practice bike-riding skills in traffic. These include signaling, scanning ahead and behind (especially
before moving left), yielding to oncoming traffic, and making left turns. Riders should travel single file with
traffic but can ride side-by-side briefly in order to pass a slower rider.
• Keep a safe distance from the vehicle ahead.
• Be aware of hazards. Understand that motor vehicle traffic presents the greatest danger to cyclists. Other
hazards that can also cause cycling accidents include motor oil, wet leaves, parked cars, parked cars with
doors that open in front of a cyclist, and rocks.
• Brake early. Slow down and brake gradually and early, before necessary, especially on curves and when
going downhill. Practice braking under similar conditions before heading out.
• Stop fully. It is important to make a full stop and look left, right, and left again, especially at the end of a
driveway and before entering a street or roadway.
• Walk bikes across busy intersections. Signal properly. Use hand signals to let other cyclists and drivers
know when someone plans to turn and stop. Riders should also let other cyclists know when they plan to
pass before actually passing.

2024–2026 Safety Activity Checkpoints Page 48 of 226
• Use lights. Keep lights on to increase visibility.
• Make basic repairs. This should be based on what is age appropriate.
• Dress the right way. Dress in layers in cooler temperatures and shed layers as you get warmer. If possible,
avoid cotton and use synthetic fabrics instead because they wick sweat away from the skin. Wear reflective
or light-colored clothing when cycling at dusk and wear bright-colored or fluorescent clothing during the
day. On longer trips in cooler weather, carry extra clothing and rain gear. Remind riders that fancy clothing
isn’t required. Do not wear dangling earrings, bracelets, or necklaces that can tangle in equipment.
• Hydrate and fuel. Everyone needs to bring water (if available, attach a bottle cage to the bike) and energy
bars, trail mix, or other snacks that are light, portable, and easy to eat while at a pit stop.
• Learn emergency moves. Read about and practice the quick stop, rock dodge, and instant turn at Bike
League, which also provides tips for beginners.
On the Day of the Ride
• Stretch your muscles. Before cycling, always warm up. Try walking, jogging, or cycling slowly before going
faster. Gently stretch your hamstrings, quads, and calves, before and especially after riding.
• Be prepared in case of an emergency. Provide a detailed itinerary and plan to call and check in with
someone each day. Carry identification and a list of emergency phone numbers and contact information for
bike repair shops.
• Prepare for the long haul. Adjust bicycles frequently for comfort. Check handlebars after adjusting the
seat for proper leg extension. When stopping for the day, cool down gradually by walking around for a few
minutes—do not stop cycling abruptly. Watch riders so that they do not push beyond their endurance
levels.
Safety Gear. Safety gear needed will depend on the length of your trip, the location, and the weather.
Bicycles should be in good working order and appropriate for the type of ride planned. Seats should be adjusted to
the right height for each rider. Cyclists should have a slight bend in the knee when seated. A seat that is set too low
is a common problem and causes significant discomfort. Watch for seats set too high; a rider’s legs should never be
fully extended.
It is also important to have appropriate pedals for the experience level. Beginners should use flat pedals;
experienced riders may choose clip-in pedals. Protective bicycle helmets with properly fitted safety straps are
required. Helmets should fit comfortably but snugly, be worn level on the head, and not move in any direction
when the chin strap is securely fastened.
The helmet should meet the American Society for Testing and Materials (ASTM) F1163-88 requirements. Check the
helmet for a Safety Equipment Institute (SEI) seal.
If you’re not sure about these pieces of safety equipment, have your troop gather at a local bike shop so the experts
can get you all set up!
You will also need a cycling repair kit for each group. Each kit should contain:
• Tire pump
• Spare tubes of appropriate size
• A tire patch kit
• Tools, including tire irons, a screwdriver, an adjustable wrench, pliers, and hex-head (Allen) wrenches
• Lubricating fluid
Each rider should have:
• Front and rear lights, for visibility during the day and at dusk
• Bike bell

2024–2026 Safety Activity Checkpoints Page 49 of 226
• Reflectors
• Two water bottles or a hydration pack
• Day pack
• Appropriate clothing, such as bike shorts designed for cycling with wicking fabric
• Non-perishable, high-energy foods such as energy bars, fruits, and nuts
• Cycling gloves (for comfort; optional)
• Stiff-soled athletic shoes such as court shoes for beginners; shoes with clips for experienced riders using
clip-in pedals
• General map and/or bike route map or map app on a smartphone

2024–2026 Safety Activity Checkpoints Page 50 of 226
Camping
Council Approval: Required
Activity Permitted for: D B J C S A
Required: At least one adult must be trained in camping as required
by your council.
About Camping
Camping, a great Girl Scout tradition, is one of the very first activities that Girl Scouts’ founder Juliette Gordon Low
encouraged. The key to an enjoyable camping experience is being prepared—by packing just enough gear, supplies,
and weather-appropriate clothing. Girl Scouts advocate for the Leave No Trace method of camping, which involves
leaving a campground the way it exists in nature, free of garbage and human impact.
You can add to the experience with a camp kaper chart, dividing up cooking duties and getting creative when
preplanning outdoor meals. Also, be ready with camp entertainment. Before you go camping, read about camping
stories, songs, activities, and games.
Note: When planning activities to do while camping, remember that Girl Scouts are never allowed to hunt, go on high
altitude climbs, or ride all-terrain vehicles or motorized bikes.
For travel camping—camping as you travel—note the additional safety precautions listed.
Learn More
• American Camp Association
• Reserve America
• Leave No Trace
Camping with Daisies and Brownies
A Daisy troop may participate in an occasional overnight camping experience. Daisies who have completed
kindergarten may independently participate at day camp and in sleepaway camp experiences lasting up to three
nights. Daisies who have completed first grade may independently participate in sleepaway camp experiences
lasting four or more nights.
Travel camping is not recommended for Daisies and Brownies.
Know where to camp when camping with Daisies and Brownies, which includes Girl Scout camps; public, private,
state, and national parks; and sites deemed appropriate by local and state authorities.
Connect with your Girl Scout council for site suggestions and for information on using a non-council-owned site.
Search for campground locations at Reserve America.
Include Girl Scout Members with Disabilities. Talk to Girl Scout members with disabilities and their caregivers.
Ask about needs and accommodations. Always be sure to check with the location in advance to ensure they are
able to accommodate those with disabilities. Discover more about accessible campgrounds, services, and gear in
this REI article: Guide to Adaptive Camping.
Equity. Consider the history, culture, and past experiences of the Girl Scout members in your troop that could
affect their ability to equally participate in an activity. Work with members and families to understand how an
activity is perceived. Ensure that all Girl Scout members and their families feel comfortable and have access to

2024–2026 Safety Activity Checkpoints Page 51 of 226
whatever is needed to fully participate, such as proper equipment, prior experiences, and the skills needed to enjoy
the activity. See the Equity section of the Introduction to Safety Activity Checkpoints for general advice about
expense,
Emergency Action Plan (EAP). Review and document your Emergency Action Plan (EAP) before starting any
activity and review it so all are prepared. Think through scenarios of what can go wrong such as an accident,
physical injury, missing person, sudden illness, or sudden weather or water emergencies.
Camping Checkpoints
Safe camping locations. These are Girl Scout camps, public, private, state, and national parks, and sites deemed
appropriate by local and state authorities. Connect with your Girl Scout council for site suggestions and for
information on using a non-council-owned site. The campsite should be able to provide evidence of one million
dollars General Liability insurance and instructor certifications upon request.
Verify leader/instructor knowledge, experience, judgment, and maturity. Ensure that at least one adult is
trained or possesses knowledge, skills, and experience in the following areas:
• Outdoor program activities and leadership
• Emotional responses to trips, including homesickness
• Trip planning in a youth-led environment
• Safety management
• Program activities specific to the trip
• Group dynamics and management
• Outdoor cooking (if relevant)
Ensure that supervision of Girl Scouts and adults for travel camping includes at least two adults who are
additionally trained, or have documented experience, in the following areas:
• Participation in similar trips
• Familiarity with the area in which the trip is conducted
• Physical fitness and skills necessary to support the group
• Chosen mode(s) of transportation
• Site orientation
• Emergency procedures
• Minor maintenance for equipment and vehicles, as appropriate
If travel camping (using campsites as a means of accommodations), verify the following adult certifications and
standards:
• Review Transporting Girl Scouts.
• Share the Checklist for Drivers with drivers.
• For trips by small craft, one adult is currently certified as required by the safety activity checkpoints for any
vehicle or vessel being used (canoe or kayak, for instance).
• For trips that involve swimming, follow the Swimming Safety Activity Checkpoints.
• If a trailer is used, make sure it complies with all state, local, and federal regulations for the areas of travel.
The assigned driver is experienced in pulling a trailer. No one rides in the trailer.
• Ensure that participants receive information about first aid kit procedures, emergency and rescue
procedures, environmental awareness, and program plans for mode of travel and geographic area, as well
as operational procedures (water purification, food preparation, camping equipment, sanitation, and food
storage procedures).
For sites without electric lights and toilet facilities (otherwise known as primitive campsites):

2024–2026 Safety Activity Checkpoints Page 52 of 226
• Choose and set up your campsite well before dark.
• Use a previously established campsite if available.
• Make sure the campsite is level, below the tree line, and located at least 200 feet away from all water
sources.
• Avoid fragile mountain meadows and areas with wet soil.
• Avoid camping under dead tree limbs.
• Use existing fire rings if a fire is necessary.
• If a latrine is not available, use individual cat holes—holes for human waste that are at least 200 feet away
from the trail and known water sources—to dispose of human waste. Note: Cat holes are not permitted in
some areas, so follow local sanitary codes or alternative instructions in those areas.
• Wash dishes and do personal bathing at least 200 feet away from water sources.
• Store food in a secure location away from tents and out of reach of animals.
• Where necessary, use a bearproof container to store food or, if allowed or appropriate, hang food at least
10 feet off the ground from a rope that’s stretched between two trees. If the site is in bear country, check
with local authorities for additional precautions.
Sleeping Arrangements
Follow these Girl Scout standards around sleeping:
● Each participant has their own bed and sleeping bag. Parent/guardian permission must be obtained if Girl
Scouts are to share a bed.
● Girl Scouts and adults do not share a bed; however, some councils make exceptions for mothers and their
children.
● It is not mandatory that an adult sleep in the sleeping area (tent, cabin, or designated area) with the group,
but if an adult female does share the sleeping area, there should always be two unrelated adult females
present.
On trips where male volunteers are part of the group, it is not appropriate for them to sleep in the same space as
youth members. Men may participate only when separate sleeping quarters and bathrooms are available for their
use. In some circumstances, such as public venue (museum or mall) overnights, with hundreds of girls, this type of
accommodation may not be possible. If this is the case, men do not supervise youth in the sleeping area of the
event and the adult-to-youth ratio is adjusted accordingly.
Always avoid having men sleep in the same space as girls and women. An exception is made for family members during
events such as parent-daughter or family overnights where one family may sleep together in an area specifically
designated to accommodate families. If possible, men should have their own designated bathroom. If a unisex
bathroom is used, the door must have a working lock, or a system for notifying others that the bathroom is in use.
This system should be reviewed and understood by all participants.
Men should not have to walk through the troop members’ sleeping area to get to the bathroom. When camping in
tents or single room cabins, men should stay in a tent or a cabin that is separate from the Girl Scouts or female
adults.
During family or “he and me” events (in which youth share sleeping accommodations with men), ensure the
sleeping details are clearly explained in a parent/guardian permission slip.
More than one family may use a tent or single-room cabin during these events only if both families agree.
In public venue overnights, such as museums or at malls, ask if there are separate sleeping areas and bathrooms
for men. If no such areas exist, designate an area out of the way or off to the side so that men are not sleeping
alongside the girls.
Safety Gear

2024–2026 Safety Activity Checkpoints Page 53 of 226
• Clothing, including a rain jacket or poncho that can be layered and is appropriate for the weather
• Socks with sturdy shoes, hiking boots, or sneakers (no sandals, clogs, flip-flops, or bare feet)
• A sleeping bag that is rated for the anticipated temperature
• A flashlight and other battery-powered lights for indoor use (no candles, kerosene lamps, portable cook
stoves, heaters, or other open-flame devices are to be used inside tents)
• A first aid kit
• Sunscreen
• Insect repellent
• A hat or bandana
• A hat, gloves, and thermal underwear for cool temperatures
• Flame-resistant tents or tarp (no plastic tents)
• A map and either a compass or a GPS
• Mosquito netting, where necessary
• Cooking supplies (pots, pans, utensils, mess kit, dunk bag, etc.)
• A cooler for food storage
• Portable cook stoves and fuel whenever possible (to reduce the use of firewood)
• A flashlight or propane-fueled lantern (for outdoor use)
• A water purification kit

2024–2026 Safety Activity Checkpoints Page 54 of 226
Climbing and Adventure Sports—Master Progression Chart
Climbing Type
Grade Levels
Safety Standards and Gear
Additional Information
Slacklining
See Climbing and
Rappelling Safety
Activity Checkpoints.
D, B, J, C, S, A
• Sneakers
• Comfortable clothing
• Specific uniform or
costume
• Slackline
• Check anchors
• Slackline U.S.
Initiatives and Low
Rope Elements
Any element that has a
fall distance of 6 feet or
less.
D, B, J, C, S, A
• Sneakers
• Comfortable clothing
appropriate for weather
• Activity elements and
supplies
• Ultimate Camp Resource Team
Building
• Team Building and Low
Challenge Elements
High Elements
Any element that has a
fall distance of 6 feet or
more.
B, J, C, S, A
Brownies can
participate only
with indoor high
elements
specifically
designed for small
children.
• Climbing helmets
(Union of International
Alpine Association
approved)
• Belaying equipment:
ropes, webbing,
harnesses, hardware,
and helmets that are
designed, tested, and
manufactured for the
purpose of climbing and
size appropriate for
user
• Association for Challenge Course
Technology
Notes:
• If the hosting facility or
instructor indicates the use of
helmets is hazardous for belay,
follow those instructions. They
may not offer helmets for this
reason.
• When the hosting facility or
instructor indicates a helmet is
required, always opt for the
helmet.
Bouldering
Permissible on elements
that have a fall distance
of 6 feet or less.
D, B, J, C, S, A
• Comfortable clothing
• Sneakers
• Spotters
• What is Bouldering?
Artificial Climbing
Walls—Indoor and
Outdoor
B, J, C, S, A
No free climbing
above 6 feet.
Brownies on
indoor walls
designed
specifically for
small children
only.
• Auto belay/harnessed
indoor ropes
• Belaying equipment:
ropes, webbing,
harnesses, hardware,
and helmets that are
designed, tested, and
manufactured for the
purpose of climbing and
size appropriate for
user.
• Indoor Climbing Basics—REI
Notes:
• If the hosting facility or
instructor indicates the use of
helmets is hazardous for belay,
follow those instructions. They
may not offer helmets for this
reason.
• When the hosting facility or
instructor indicates a helmet is
required, always opt for the
helmet.
Recreational Tree-
Climbing
J, C, S, A
• Harnesses
• Helmets if climbing
above 6 feet
• Combining arboriculture,
climbing, and fun, this unique

2024–2026 Safety Activity Checkpoints Page 55 of 226
• Rope, webbing, and
hardware designed for
this purpose
activity is described by The Tree
Climbing Planet.
Zip Lining
D*, B*, J, C, S, A
• Harnesses
• Helmet
• Ropes, webbing, and
equipment designed for
this purpose
• Close-fitting clothing;
no dangling clothing or
jewelry
• Sneakers or other
athletic shoes
• *Canopy zipline tours are not
permitted for Daisies or
Brownies
• Daisies can only participate in
playground ziplines

2024–2026 Safety Activity Checkpoints Page 56 of 226
Challenge Courses
Council Approval: Required
Activity Permitted for: D B J C S A
For slacklining, see Climbing and Rappelling checkpoints.
About Challenge Courses
A challenge course is a set of structures that provide a setting for physical challenges designed to increase
participants’ self-confidence and physical coordination, to increase group cooperation, and to be fun.
Initiative games and low elements require the group to work together to accomplish mental or physical challenges;
spotters safeguard the movements of each member of the group. High ropes challenge courses involve components
for individual or group challenges that are 6 feet or more off the ground. A safety belay (a rope to secure a person
to an anchor point) is used with a harness and participants wear helmets unless the hosting facility or instructor
indicates the use of helmets is hazardous for belay. Spotters (participants who safeguard the movements of a
member of the group) provide support and protect the head and upper body of a climber in case of a fall.
Each participant must possess the physical strength and technical skills to use the equipment and understand the
safety procedures and consequences of their actions. Connect with your council for suggestions and site approval.
Note: Daisies and Brownies may participate only in activities designed for their ages, with equipment suitable to the
size and ability of each girl. Outdoor high ropes and high elements are only permitted for Juniors and older.
Learn More
• Association for Experiential Education
• Association for Challenge Course Technology (ACCT)
Include Girl Scout Members with Disabilities. Talk to Girl Scout members with disabilities and their caregivers.
Ask about needs and accommodations. Always be sure to contact the location and/or the instructor in advance to
ensure they are able to accommodate those with disabilities. Learn more about the resources and information that
the National Center on Health, Physical Activity and Disability provides for people with disabilities.
Equity. Consider the history, culture, and past experiences of the Girl Scout members in your troop that could
affect their ability to equally participate in an activity. Work with members and families to understand how an
activity is perceived. Ensure that all Girl Scout members and their families feel comfortable and have access to
whatever is needed to fully participate, such as proper equipment, prior experiences, and the skills needed to enjoy
the activity. Contact the course staff to discuss how to include all members, considering differences in physical
ability, body size, height, etc. See the Equity section of the Introduction to Safety Activity Checkpoints for general
advice about expense,
Emergency Action Plan (EAP). Review and document your Emergency Action Plan (EAP) before starting any
activity and review it so all are prepared. Think through scenarios of what can go wrong such as an accident,
physical injury, missing person, sudden illness, or sudden weather or water emergencies.
Challenge Course Checkpoints
Here are components to consider and evaluate before selecting a challenge course:
• It is critical to verify instructor knowledge, experience, and participation according to all of the
following criteria.

2024–2026 Safety Activity Checkpoints Page 57 of 226
• High ropes courses require an instructor trained and certified by a verified agency, such as ACCT, which
includes demonstrated competence in equipment maintenance, safety and rescue techniques, proper use of
the course, and hands-on training.
• Initiative games and low ropes courses require a trained and certified instructor or an instructor with
training and documented experience, according to your council guidelines.
• Written documentation of the completed training as well as proof of participation in routine instructor
review and updates should be provided to you.
• All instructors need to be skilled in selecting appropriate activities, teaching, and supervising spotting and
belaying techniques, and modifying tasks to provide an appropriate experience for the ages and skill levels
in the group.
• Before use, instructors should inspect all equipment, course components, and landing areas.
• A minimum of two instructors must be present.
• Instructor-to-participant ratios must meet the standard as identified by the course manufacturer or
installer and need to comply with industry best practice standards.
Climbing Type
Grade Levels
Safety Standards and Gear
Additional Information
Initiatives and Low
Rope Elements
Any element that has a
fall distance of 6 feet or
less.
D, B, J, C, S, A
• Sneakers
• Comfortable clothing
appropriate for
weather
• Activity elements and
supplies
• Ultimate Camp Resource Team
Building
• Team Building and Low
Challenge Elements
High Elements
Any element that has a
fall distance of 6 feet or
more.
B, J, C, S, A
Brownies can
participate only
with indoor high
elements
specifically
designed for
small children.
• Climbing helmets
(Union of International
Alpine Association
approved)
• Belaying equipment:
ropes, webbing,
harnesses, hardware,
and helmets that are
designed, tested, and
manufactured for the
purpose of climbing
and size appropriate
for user
• Association for Challenge
Course Technology
Notes:
• If the hosting facility or
instructor indicates the use of
helmets is hazardous for belay,
follow those instructions. They
may not offer helmets for this
reason.
• When the hosting facility or
instructor indicates a helmet is
required, always opt for the
helmet.
Ensure equipment is well-maintained. There needs to be a documented maintenance schedule and periodic
inspection by instructors and outside professionals of all artificial structures and equipment used in the activities.
A Use Log should be kept on all equipment that is subject to stress, wear, and deterioration. A written process for
equipment monitoring and retirement should be established and followed by the facility.
Participants learn about and prepare for challenge courses. Instructors teach a set of readiness and action
commands to all participants for climbing, spotting, and belaying. All participants should use gentle muscle warm-
up and stretching activities before beginning physical activities. Instructors must describe the objectives, safety
procedures, and hazards to the participants before beginning an activity.
Participants practice safe challenge course techniques. Spotting techniques are taught, demonstrated, and
practiced by participants prior to any challenge course activity. All activities are appropriately spotted. For
activities where partners are needed, instructors should match participants according to size and skill level, if

2024–2026 Safety Activity Checkpoints Page 58 of 226
appropriate. Instructors must supervise all tie-ins, belays, and climbs on high ropes courses and spotting on low
elements courses. Participants must not be stacked more than three levels high vertically (e.g., in a pyramid) at any
time. No one should stand on the middle of someone else’s back.
Safety Gear
Girl Scouts will need their own:
• Sturdy shoes
• Long pants or athletic leggings for activities that may lead to skin abrasions on legs
• Close-fitting clothing (avoid wearing loose clothing, especially around the head and neck)
Course must provide:
• Climbing helmets (with Union of International Alpine Association approved label) must be worn for all
climbing activities in which the participant is more than 6 feet off the ground and by participants standing
in the “fall zone” beneath a climbing element. Helmets are also required for belay, unless the hosting facility
or instructor indicates the use of helmets is hazardous for belay.
• Belaying equipment—including ropes, webbing, harnesses, hardware, and helmets—designed and tested
for this type of activity and appropriate for the size of the user
• A chest harness with seat harness or full-body harness for small-framed climbers

2024–2026 Safety Activity Checkpoints Page 59 of 226
Climbing and Rappelling
Includes bouldering and slacklining
Council Approval: Required
Activity Permitted for: D B J C S A
Notes:
• Daisies and Brownies can do bouldering, slacklining, and low-challenge elements.
• Daisies and Brownies may participate only in activities that are designed for their ages, with equipment
suitable to the size and ability of each girl.
• Outdoor high ropes, high elements, and rappelling are only permitted for Girl Scout Juniors and older.
About Climbing and Rappelling
Girl Scouts may participate in various types of climbing, rappelling, and rope adventures.
Bouldering. This sport involves climbing without a rope but at a height not greater than 6 feet off the ground.
Spotters (participants who safeguard the movements of a member of the group) provide support and protect the
head and upper body of a climber in case of a fall. Spotting is used when descending and ascending high elements
or climbing routes.
Top Roping. In this climbing method, the rope is anchored from the top of the climbing route, using belays (safety
ropes to secure a person to an anchor point). The belayer (person who controls the belay/safety line to prevent
long and dangerous falls) is set up at the bottom of the route with the other end of the rope tied to the climber.
Multi-Pitch Climbing. For experienced climbers only, this is a climb on a long route that requires several pitches
the length of a rope or less. (A “pitch” is the rope-length between belay stations). The group climbs to the top of the
first pitch; the lead climber climbs the next pitch, anchors in, and belays each remaining climber individually to the
anchor.
Free Climbing. This method, which involves climbing on rocks or walls without a belay system in place, is not
approved.
Slacklining. A sport and an art that can involve balance training, recreation, and moving meditation. It is similar, at
first glance, to tightrope walking and is accomplished by stretching and tensioning a 1-inch to 2-inch length of
nylon/polyester webbing between two anchor points, most often trees. It is a way of passing time while
maintaining concentration, fitness, core strength, and balance. It can be used as a team-building activity in which
spotters safeguard the movements of each member of the group. Slackliners must be belayed when the line is 6 feet
or higher.
Artificial climbing walls and harnessed indoor ropes are great learning options too.
Learn More
• International Mountaineering and Climbing Federation
• Climbing Magazine
• Indoor Climbing Basics—REI

2024–2026 Safety Activity Checkpoints Page 60 of 226
Include Girl Scout Members with Disabilities. Talk to Girl Scout members with disabilities and their caregivers.
Ask about needs and accommodations. Always be sure to contact the location and/or the instructor in advance to
ensure they are able to accommodate those with disabilities. For more information visit Adaptive Sports at Move
United.
Equity. Consider the history, culture, and past experiences of the Girl Scout members in your troop that could
affect their ability to equally participate in an activity. Work with members and families to understand how an
activity is perceived. Ensure that all Girl Scout members and their families feel comfortable and have access to
whatever is needed to fully participate, such as proper equipment, prior experiences, and the skills needed to enjoy
the activity. See the Equity section of the Introduction to Safety Activity Checkpoints for general advice about
expense,
Emergency Action Plan (EAP). Review and document your Emergency Action Plan (EAP) before starting any
activity and review it so all are prepared. Think through scenarios of what can go wrong such as an accident,
physical injury, missing person, sudden illness, or sudden weather or water emergencies.
Climbing and Rappelling Checkpoints
Verify instructor knowledge and experience.
For bouldering, top roping, and multi-pitch climbing:
• An instructor with documented experience—indicating competence in equipment use, safety and rescue
techniques, proper use of the course, and hands-on training (must provide certification) or documented
experience according to your council’s specific guidelines—directly supervises the group.
• Ensure that there is a regular process of review and update for all instructors.
• A minimum of two instructors needs to be present and instructors should be skilled in selecting
appropriate activities, teaching and supervising spotting and belaying techniques, and modifying tasks to
provide an appropriate experience for the ages and skill levels in the group.
• Before use, instructors must inspect all equipment, course components, and landing areas.
For indoor or outdoor artificial climbing walls and auto belay or harnessed indoor ropes courses:
• Facilitators should have experience, indicating competence in equipment maintenance, safety and rescue
techniques, proper use of the course, and hands-on training.
• A minimum of one facilitator and an additional adult must be present.
• Facilitators need to be skilled in selecting appropriate activities, teaching and supervising spotting and
lowering techniques, and modifying tasks to provide an appropriate experience for the ages and skill levels
in the group.
• Before use, facilitators should inspect all equipment, course components, and landing areas.
Indoor or outdoor artificial climbing walls and auto belay or harnessed indoor ropes courses:
• These activities do not incorporate an element of high risk and can be done by Brownies through
Ambassadors. However, all ages must have appropriately sized harnesses.
• If no harness properly fits a Girl Scout member, that person may not participate in climbing and/or
rappelling.
• Daisies are not permitted to participate in climbing and rappelling.
The instructor-to-participant ratios are:
• Bouldering and Top Roping: One instructor to ten participants.
• Multi-Pitch Climbing: One instructor (qualified lead climber) to three participants.

2024–2026 Safety Activity Checkpoints Page 61 of 226
Climbing Type
Grade Levels
Safety Standards and Gear
Additional Information
Slacklining
See Climbing and
Rappelling Safety
Activity Checkpoints.
D, B, J, C, S, A
• Sneakers
• Comfortable clothing
• Specific uniform or
costume
• Slackline
• Check anchors
• Slackline U.S.
Bouldering
Permissible on elements
that have a fall distance
of 6 feet or less.
D, B, J, C, S, A
• Comfortable clothing
• Sneakers
• Spotters
• What is Bouldering?
Artificial Climbing
Walls—Indoor and
Outdoor
B, J, C, S, A
No free climbing
above 6 feet.
Brownies on
indoor walls
designed
specifically for
small children
only.
• Auto belay/ harnessed
indoor ropes
• Belaying equipment:
ropes, webbing,
harnesses, hardware,
and helmets that are
designed, tested, and
manufactured for the
purpose of climbing
and size appropriate
for user.
• Indoor Climbing Basics—REI
Notes:
• If the hosting facility or
instructor indicates the use of
helmets is hazardous for belay,
follow those instructions. They
may not offer helmets for this
reason.
• When the hosting facility or
instructor indicates a helmet is
required, always opt for the
helmet.
Select a safe site. Permits and permission requests are filed as required for outdoor natural climbing sites and
facilities. All permanent structures and the belaying system are planned and constructed by experienced
individuals. Plans and procedures are established to avoid unauthorized use of the site, structures, and equipment.
The artificial climbing site must be posted to warn against unauthorized use.
Participants learn about and prepare for climbing and rappelling. Instructors teach a set of readiness and
action commands to all participants for climbing, spotting, and belaying. All participants take part in muscle warm-
up and stretching activities before beginning physical activities. Instructors describe the objectives, safety
procedures, and hazards to the participants before beginning an activity.
Participants practice safe climbing and rappelling techniques. Spotting techniques (if necessary) are taught,
demonstrated, and practiced by participants prior to any climbing or rappelling activity. All activities should be
appropriately spotted. For activities where partners are needed, instructors must match participants according to
size and skill level, if appropriate. Instructors should supervise all tie-ins, belays, and climbs on climbing sites and
spotting on bouldering sites.
Safety Gear
• Climbing helmets (with International Climbing and Mountaineering Federation (IAA)-approved label) worn
for all outdoor natural climbing situations where the participant is more than 6 feet off the ground and by
participants standing in the “fall zone” beneath a climbing element. Helmets are also required for belay,
unless the hosting facility or instructor indicates the use of helmets is hazardous for belay.
• A chest harness with a seat harness or a full-body harness, required for specific climbing or ropes activities
• Sturdy shoes
• Close-fitting clothing—loose clothing should be avoided, especially around the head and neck
• Potable drinking water

2024–2026 Safety Activity Checkpoints Page 62 of 226
• Raingear, as necessary
• Long pants or athletic leggings are strongly recommended for activities involving potential skin abrasions
on legs
All equipment used for belaying, such as ropes, webbing, harnesses, hardware, and helmets, should be designed and
tested for this type of activity and appropriate for the user’s size.

2024–2026 Safety Activity Checkpoints Page 63 of 226
Recreational Tree Climbing
Council Approval: Required
Activity Permitted for: J C S A
About Recreational Tree Climbing
In recreational tree climbing, climbers explore the beauty of living trees with guided facilitator support.
Recreational tree climbers use ropes, harnesses, saddles, and climbing techniques to ascend into the crowns of
trees and the canopies of forests. Care should be taken to keep climbers and trees safe.
Climbing may be done on branches that have at least 6 inches of living tissue. A full inspection of the health of the
tree and surrounding area must be made.
Leave No Trace
While climbing in natural areas, it is important to respect the environment. Read tips from the Leave No Trace
Center for Outdoor Ethics.
Learn More
• The Tree Climbing Planet offers courses and resources.
• The Global Organization of Tree Climbers has an interactive map to help you find tree-climbing programs.
Include Girl Scout Members with Disabilities. Talk to Girl Scout members with disabilities and their caregivers.
Ask about needs and accommodations. Always be sure to contact the location and/or the instructor in advance to
ensure they are able to accommodate those with disabilities. For more information, check out Move United to learn
about adaptive climbing.
Equity. Consider the history, culture, and past experiences of the Girl Scout members in your troop that could
affect their ability to equally participate in an activity. Work with members and families to understand how an
activity is perceived. Ensure that all Girl Scout members and their families feel comfortable and have access to
whatever is needed to fully participate, such as proper equipment, prior experiences, and the skills needed to enjoy
the activity. See the Equity section of the Introduction to Safety Activity Checkpoints for general advice about
expense,
Emergency Action Plan (EAP). Review and document your Emergency Action Plan (EAP) before starting any
activity and review it so all are prepared. Think through scenarios of what can go wrong such as an accident,
physical injury, missing person, sudden illness, or sudden weather or water emergencies.

2024–2026 Safety Activity Checkpoints Page 64 of 226
Recreational Tree Climbing Checkpoints
Choose a certified instructor. The facilitator needs to have documented experience in leading and teaching tree
climbing.
• Ensure the instructor climbs all routes before participants begin.
• Ensure only instructors clip participants in and out of the tie-in system.
• Ensure a process for managing safety and performing rescues is in place.
Climbing Type
Grade Levels
Safety Standards and Gear
Additional Information
Recreational Tree-
Climbing
J, C, S, A
• Harnesses
• Helmets if climbing
above 6 feet
• Rope, webbing, and
hardware designed for
this purpose
Combining arboriculture, climbing,
and fun, this unique activity is
described by The Tree Climbing
Planet.
Ensure helmet-only areas are clearly designated to protect participants and passersby from falling debris.
File required permits. Contact the park ranger or jurisdictional authority for guidance.
Inspect equipment. The instructor will inspect all equipment before each use. Equipment will be well-maintained.
A Use Log will track wear, stress, and deterioration of gear. Outside professionals should periodically inspect all
trees and equipment. A written process for equipment monitoring and retirement needs to be followed.
Get a weather report. On the morning of the activity, visit Weather.com to determine if conditions are
appropriate. Be prepared to alter the activity plan if weather conditions change. Participants must not climb when
trees or gear are wet. In a storm, take shelter away from all trees and other tall objects. Find the lowest point in an
open flat area. Squat low to the ground, on the balls of the feet, and place hands on knees with head between them.
Participants receive instruction. Instructors must describe the climb’s objectives, safety procedures, and hazards
to the participants. Climbers learn:
• Readiness and action commands.
• Muscle warm-up and stretching techniques.
• Safety procedures and site-specific hazards.
Safety Gear
• Climbing equipment—such as ropes, webbing, harnesses, hardware, and helmets—designed for this
purpose and appropriate for the size of the user
• Climbing helmets worn by all participants who will be more than 6 feet off the ground or on belay; helmets
must be approved by the International Climbing and Mountaineering Federation (UIAA)
• Sturdy shoes

2024–2026 Safety Activity Checkpoints Page 65 of 226
Zip Lining
Council Approval: Required
Activity Permitted for: *D *B J C S A
*Canopy Zip Line Tours are Not Permitted for Daisies and Brownies.
*Daisies can only participate in Playground Zip Lines.
About Zip Lining
A zip line consists of a pulley suspended on a cable, usually made of stainless steel, mounted on an incline. It is
designed to enable a user, propelled by gravity, to travel from the top to the bottom of the inclined cable by holding
on to, or attaching to, the freely moving pulley. The various types of zip lines include:
• Playground Zip Lines. These are short and low, intended for child’s play, and found at some playgrounds
and recreation venues. All Girl Scouts are permitted to use them.
• Zip Lines. These are launched from a platform usually accessed by a staircase, ladder, or climbing wall.
They are sometimes found as part of a challenge course. Participants must be able to walk short distances
and climb stairs or ladders. Check with the venue before arrival to determine its rules on age, height, and
weight restrictions. Communicate these restrictions clearly with the troop in advance of the activity.
• Canopy Zip Line Tours. These are guided aerial explorations or transits of the forest canopy, commonly
done by a series of zip lines or aerial walkways with platforms. Canopy tours are not permitted for Daisies
and Brownies. In addition, check with the venue before arrival as many have minimum age requirements as
well as height and weight restrictions. Communicate these restrictions clearly with the troop in advance. If
some cannot participate, consider another location.
Site Selection. Connect with your Girl Scout council for site suggestions. Girl Scouts should use a venue that has
professional accreditation by either the Professional Ropes Course Association (PRCA) or the Association for
Challenge Course Technology (ACCT) to ensure a regulated experience. Both organizations are accredited by the
American National Standards Institute (ANSI) to develop industry standards and regulations.
Note: Each venue sets its own rules regarding the age and weight of participants, and some states regulate zip lines as
amusement rides.
Learn More
• Association for Challenge Course Technology
• Specifications Amusement Ride Safety Act
Include Girl Scout Members with Disabilities. Talk to Girl Scout members with disabilities and their caregivers.
Ask about needs and accommodations. Always be sure to contact the location and/or the instructor in advance to
ensure they are able to accommodate those with disabilities. Some facilities may have specialized harnesses and a
ramp (instead of stairs, a tower, or a wall) for people who use wheelchairs. Ensure that a member of the facility’s
staff has training and experience helping people with disabilities participate in zip lining. Note: Some venues will
not allow participation if a person has recent or recurring injuries, or muscular or skeletal disorders.
Equity. Consider the history, culture, and past experiences of the Girl Scout members in your troop that could
affect their ability to equally participate in an activity. Work with members and families to understand how an
activity is perceived. Ensure that all Girl Scout members and their families feel comfortable and have access to
whatever is needed to fully participate, such as proper equipment, prior experiences, and the skills needed to enjoy

2024–2026 Safety Activity Checkpoints Page 66 of 226
the activity. See the Equity section of the Introduction to Safety Activity Checkpoints for general advice about
expense,
Emergency Action Plan (EAP). Review and document your Emergency Action Plan (EAP) before starting any
activity and review it so all are prepared. Think through scenarios of what can go wrong such as an accident,
physical injury, missing person, sudden illness, or sudden weather or water emergencies.
Zip Lining Checkpoints
Verify instructor knowledge and experience. An instructor with Association of Challenge Course Technology
(ACCT) certification, or similar documented experience, is expected to have knowledge and experience setting stop
ropes, tying required knots, assisting guests in proper harness and helmet fitting, demonstrating proper zipping
techniques, operating the zip line activity, braking guest’s speed upon incoming approach, performing retrievals
and rescues, inspecting equipment, and educating guests about the venue. Ensure that the instructor has provided
written documentation of completed training. In addition, note that there is a regular process of review and update
for all instructors.
Climbing Type
Grade Levels
Safety Standards and Gear
Additional Information
Zip Lining
D*, B*, J, C, S, A
• Harnesses
• Helmet
• Ropes, webbing, and
equipment designed
for this purpose
• Close-fitting clothing;
no dangling clothing or
jewelry
• Sneakers or other
athletic shoes
• Canopy zip line tours are not
permitted for Daisies or
Brownies
• Daisies can only participate in
playground zip lines
Dress appropriately for the activity. Wear long pants or biker shorts, sturdy closed-toe athletic shoes, a helmet,
and a close-fitting top with sleeves. Do not wear dress shoes, sandals, water shoes, flip-flops, skirts, regular shorts,
ponchos, or dangling jewelry of any kind. Leave backpacks, purses, or similar items in a car or locker; do not bring
anything on the zip line.
All participants may be weighed and have their height measured before being issued zip lining equipment.
Girl Scouts learn about and prepare for zip lining. Instructors need to teach a set of readiness and action
commands to all participants before beginning an activity. They must describe the objectives, safety procedures,
and hazards to the participants before beginning.
Prepare for landing. Zip line participants should be provided with a hands-on walk-through of what will happen
at the landing zone when under full speed. Volunteers must attend the orientation session (even if they will not
participate) along with riders and learn what to watch for in order to supervise those in their care.
Girl Scouts practice safe zip line course techniques. Zip line participants should be provided with an
explanation of what each piece of gear is used for. Harnesses are designed to support the human body from the
hips, and hanging upside down is not permitted.
Safety Gear
• Helmet, which must be supplied by the venue; never zip line without helmets
• Harness, which will be supplied by the venue

2024–2026 Safety Activity Checkpoints Page 67 of 226
Community Clean-Ups
Council Approval: Required
Activity Permitted for: See Specific Project Guidelines below.
About Community Clean-Ups
Community clean-ups can include Adopt-A-Highway programs, beach or river clean-ups, and park or natural area
clean-ups. They may be organized by the troop or be part of a community-wide service project. While doing this
type of community service, you must be aware of the hazards and educate everyone involved.
Note: Clean-ups that are part of a larger sustainable project may qualify as a Take Action project for Girl Scouts to
complete a Journey.
Community Clean-Ups: General Guidelines
• Always check to see if permission is required from the property owner or government agency.
• Hard-sole, closed-toe, and closed-heel shoes are required.
• If clean-up is done in an area of vegetation higher than your shoes, long pants and long-sleeved shirts are
required to protect against insects, hazardous plants, vegetation, etc.
• Adult watchers should have a communication plan using two-way radios or cell phones.
• All adult watchers must carry an emergency warning device, air horn, or whistle.
• An Emergency Action Plan must be created for the event to include communication plans, and all
participants should practice the plan before the clean-up.
• Clean-ups are planned during daylight hours, never at night. Light-reflective gear is helpful even during
daylight hours, particularly on overcast days.
• Clean-up projects require additional information, which is included on permission forms.
Parents/guardians must give expressed permission for the event after having received specific
instructions, including information on the location and environmental conditions.
• In the case of roadway clean-ups, the permission slip must also include how close to the roadway the group
will be working (for example, they will work no closer than within 10 feet of the roadway’s shoulder) as
well as the time duration.
Specific Project Guidelines
Beach Clean-Up (Daisies and above)
• Do not enter water deeper than 6 inches without an adult trained in American Red Cross Water Safety for
Parents and Caregivers or equivalent experience, or a lifeguard, present.
• Hard-sole, closed-toe, and closed-heel water shoes may be used in place of regular shoes.
Public Parks, Community Clean-Ups (Daisies and above)
• Call ahead to determine if any permissions or specific permits are necessary.
• Ensure the safety of the grounds and security of the area by choosing a location that is in a public space
with ample human activity (not remote).

2024–2026 Safety Activity Checkpoints Page 68 of 226
• Do not enter any bodies of water such as lakes or large ponds without a lifeguard present. See the Safety
Activity Checkpoints for Swimming.
River or Waterway Clean-Ups (Brownies and above)
• Do not enter the water on rivers or waterways due to potential unstable bank conditions without a
lifeguard present. See the Safety Activity Checkpoints for Swimming.
• Stay away from swift moving water.
Highway/Road Clean-Ups (Cadettes and above)
• Speed limits of the road where the clean-up is taking place cannot exceed 40 mph. Participants cannot work
in or around high-risk areas such as bridges, overpasses, medians, roundabouts, and steep slopes.
• Contact the owner or government agency (such as the State Department of Transportation) for permission.
Many states and local governments have specific guidelines and safety rules to follow. Some states have
safety videos for highway cleanups.
• All participants should work facing traffic.
• All participants must wear bright clothing or light-reflective gear.
• Stay away from rural and winding two-lane roads and highways.
• Adult watchers are safety observers at the event. They do not participate in cleaning the area; they observe
the roadway and participants to identify hazards and activate emergency warnings to avoid danger.
• An adult watcher should stand ahead of the group facing traffic to flag cars to slow down. At least one adult
watcher should be at the front and one at the back of the group. If the two adult watchers cannot keep each
other in sight, additional adult watchers are required. Use of air horns should be considered to activate an
emergency response.
• Adult watchers must carry an air horn as an emergency warning device.
• Use cones or large, bright signs to indicate a clean-up in progress.
Learn More
• Adopt-A-Highway: Contact your state’s Department of Transportation. Many have safety tips, rules
and regulations, or videos. If your state does not have specific laws concerning adopt-a-highway and
community clean-ups, reference another state. For example, Wisconsin Department of Transportation
Adopt-a-Highway Safety.
• Understand that waste products on the side of the road and in parks have the potential to be
hazardous or poisonous. Research what those may be. For an overview of safety guidelines, including
hazardous materials, view this Michigan Department of Transportation video.
Include Girl Scout Members with Disabilities. Talk to Girl Scout members with disabilities and their caregivers.
Ask about needs and accommodations. Ensure state laws that are specific to children with special needs are
adhered to. For example, the visual or hearing impaired may require very specific laws or guidelines. For more
information, visit Inclusion of Persons with Disabilities in Service Days and Events.
Equity. Consider the history, culture, and past experiences of the Girl Scout members in your troop that could
affect their ability to equally participate in an activity. Work with members and families to understand how an
activity is perceived. Ensure that all Girl Scout members and their families feel comfortable and have access to
whatever is needed to fully participate, such as proper equipment, prior experiences, and the skills needed to enjoy
the activity. See the Equity section of the Introduction to Safety Activity Checkpoints for general advice about
expense,
Emergency Action Plan (EAP). Review and document your Emergency Action Plan (EAP) in advance; review it so
all are prepared. Think through scenarios of what can go wrong such as an accident, physical injury, missing
person, sudden illness, or sudden weather or water emergencies.

2024–2026 Safety Activity Checkpoints Page 69 of 226
The emergency action plan should include:
• Communication plans.
• Adult-to-youth ratios apply for the number of participants.
• Required adult watchers are not included in the adult/girl ratio.
• Air horns are required for use as an emergency warning device on roadways.
• Whistles or air horns may be used as emergency warning devices on beaches, parks, waterways, and other
areas, not including roadways.
• All should know how to respond to an emergency warning device.
Community Clean-Up Checkpoints
Girl Scouts should plan the activity. Encourage them to plan the location, their desired outcome, safety
precautions, and how to deal with problems that may arise during the clean-up, such as:
• Traffic
• Public interference
• Stress from hot or cold weather
• UV radiation
• Severe weather
• Dangerous animals (snakes, foxes, alligators, jellyfish, etc.) depending on the area you will be working in
• Stinging/biting insects
• Poisonous/toxic plants—poison ivy, poison oak, poison sumac, wild parsnip
• Where collected trash will be discarded; arrangements or permissions may be required
Be sure participants have a good understanding of potentially hazardous waste they should not touch or
pick up. Discuss this with them. Explain that if they see something, they should say something to an adult. The
checklist below provides examples of hazardous or dangerous materials:
• Abandoned barrels
• Antifreeze
• Any container with a RADIOACTIVE label
• Any container with liquid, including soda bottles
• Broken automotive batteries
• Bulging or dented containers
• Chemical containers
• Containers leaking an unknown substance
• Containers of unidentifiable materials
• Dead animals, sea creatures
• Gas cans
• Hypodermic needles
• Unidentified liquids, powders, chemicals
• Narcotics
• Paint cans
• Pesticide/herbicide containers
• Propane or other fuel canisters
• Sharp objects
• Unidentifiable containers
• Used oil
• Weapons

2024–2026 Safety Activity Checkpoints Page 70 of 226
Prompt Girl Scouts to share resources. Encourage them to create a list of safety gear and supplies, and to
determine which resources can be shared.
Choose an appropriate area. Consider terrain, safety, and public access when choosing a location to clean up.
Work with local community groups that may offer clean-up days as part of a larger community beautification
project. Locations are restricted to a reasonable length as determined by age, nature of the terrain, physical
condition of the participants, disabilities, weather conditions, and time of day. The location should always
accommodate everyone interested.
Assess safety of the clean-up area. Safety is of utmost concern during a clean-up. Be aware of the members of the
public participants may encounter when cleaning up, traffic, and the potential hazards listed above. Consider extra
safety precautions for areas where driver vision is restricted, such as curves in roads. Avoid areas with steep drop-
offs. Do not work or stand within 10 feet of the shoulder of the road. Follow all state Adopt-a-Highway safety rules
when working along any roadsides. Ensure that the DOT (Department of Transportation) or a land management or
similar agency is contacted during the planning stage to determine any restricted areas or if any permits are
needed. First aider is required. If any part of the activity is located 30 minutes or more from emergency medical
services, ensure the presence of a first aider with Wilderness First Aid certification.
Ensure adults have a comprehensive understanding of the trip. Group members are trained to be observant of
the area, surroundings, and fatigue of individuals. Instruction is given on safety rules, such as staying together in a
group; recognizing poisonous plants, biting or stinging insects, and ticks; respecting wild animals; and behaving
effectively in emergencies. Ensure that Girl Scouts, based on their level, know the safety precautions.
Permission Slips. Clean-up projects require additional information included on permission slips.
Parents/guardians must give express permission for the event, including specific instructions on the location and
environmental conditions. In the case of roadway clean-ups, the permission slip must also include how close to the
roadway the group will be working (for example, youth will work no closer than within 10 feet of the roadway’s
shoulder).
Safety Gear. The gear you will need will depend on the clean-up project, location, and weather.
• A water bottle or hydration pack with enough water for each person, for the length of the clean-up
• Face mask
• Sturdy footwear
• Sturdy gloves
• Safety vests
• Bright clothing
• Garbage bags
• Tongs (pick-up tool)
• A working cell phone held by designated adult in case of emergencies.
• First aid kit
Additional Safety Gear: Roads and Highways
• Safety cones or triangles to warn drivers of workers along the road or highway
• Red flags for adult watchers at front and back of the group
• Air horn for each adult watcher

2024–2026 Safety Activity Checkpoints Page 71 of 226
Computer and Internet Use
Council Approval: Not Required
Activity Permitted for: D B J C S A
About Computer and Internet Use
Girl Scouts use the internet for a variety of reasons, including:
• Completing steps toward earning a badge or other similar award online.
• Research topics. Girl Scouts might research other council sites or Girl Scout topics, complete research
needed to earn a badge, or learn more about their community.
• Visit Girl Scouting sites. These can include the World Association of Girl Guides and Girl Scouts (WAGGGS)
website online or other WAGGGS member countries’ websites.
• Build a website. Members could create a static webpage on the internet (one that looks the same each
time users view it, with no commenting or posting capabilities) or set up a secure, password-protected
website with a calendar and information for troop members and families.
• Blog about Girl Scouting. Groups that are planning a Take Action project, road trip, or camping adventure
can consider documenting their plans and experiences on a council or national blog, and divide up the
documentation duties (e.g., photography, writing, editing) among the group.
• Participate in product programs. Girl Scouts may participate in online Girl Scout product programs.
Adults should monitor websites that youth view, ensuring that they are safe and actively controlled. No one acting
on behalf of members can conduct money-earning activities online with one exception: GSUSA-approved product
programs. For more information, see Cookie and Product Programs Safety Activity Checkpoints.
Most Girl Scouts will go online from their home computers and older girls may access the internet on mobile
phones. For those who cannot go online from home, confirm their ability to access a computer at school or at their
local library. If those are not options, check with your Girl Scout council for suggestions on sites where computers
are available for use.
When planning a group learning session, identify locations such as a library, a Girl Scout program center, a school
or college computer lab, a computer retail store with a training facility, or a museum that provide groups with
opportunities to use computers and access the internet.
Learn More
• Girl Scouts of the USA
• Stop, Think, Connect
Include all Girl Scout Members.
Talk to Girl Scout members with disabilities and their caregivers. Ask about needs and accommodations, such as
screen readers for Girl Scouts who are blind or visually impaired. Some members may need adult or peer support
to physically navigate the internet themselves.
Equity. Consider the history, culture, and past experiences of the Girl Scout members in your troop that could
affect their ability to equally participate in an activity. Work with members and families to understand how an
activity is perceived. Ensure that all Girl Scout members and their families feel comfortable and have access to
whatever is needed to fully participate, such as proper equipment, prior experiences, and the skills needed to enjoy

2024–2026 Safety Activity Checkpoints Page 72 of 226
the activity. See the Equity section of the Introduction to Safety Activity Checkpoints for general advice about
expense,
Emergency Action Plan (EAP). Review and document your Emergency Action Plan (EAP) before starting any
activity and review it so all are prepared. Think through scenarios of what can go wrong such as an accident,
physical injury, missing person, sudden illness, or sudden weather or water emergencies.
Computer and Internet Use Checkpoints
Copy and distribute the Girl Scout Internet Safety Pledge. All youth, as well as their parents/guardians, must
read, agree to, and abide by the Girl Scout Internet Safety Pledge when online.
Ensure Girl Scouts’ safety in website design. They must understand that the internet is an open means of
communication that anyone can access. As such, websites can often attract people other than their intended
audiences and users. It is therefore imperative that any information that could jeopardize the safety and security of
all Girl Scout members is not disclosed on a website. The following measures help to ensure Girl Scouts’ safety
while online:
• Use only first names; never include last names.
• Never post addresses, phone numbers, or email addresses of members.
• Always have a parent or guardian’s permission when using pictures of Girl Scouts on a website. This is
important for all youth, and special regulations apply for children younger than 13 years of age.
• Do not post addresses of group meeting places or dates and times of meetings, events, or trips. Instead, an
adult who wishes to communicate about upcoming events with troop members and families should send an
email or use a secure, password-protected website.
• Do not allow automatic posting of messages to their website. All postings on sites such as message boards
or guest books should have adult oversight and be screened prior to posting live.
• Ensure websites do not show personal email addresses of members but use a troop or group email or an
adult’s email address.
Be aware of shared content. When linking to other websites from your site, make sure site contents are in
keeping with Girl Scout principles and activities. Avoid linking to commercial sites selling merchandise to avoid
implied Girl Scout endorsement of the products they offer. Instead, seek out sites that support participation in Girl
Scouting. These sites should be tasteful and program-level appropriate. They should show diversity, be beneficial
to Girl Scout members, adults, and families, and be consistent with the mission of Girl Scouting. As a courtesy,
consider emailing the site’s webmaster for permission to link to the site. Use similar criteria to determine which
sites you support linking to your group’s website.
Respect copyrighted material. The basic principle is: If it’s not yours, don’t use it. A group’s website may not use
copyrighted designs, text, graphics, or trademarked symbols without specific permission from the copyright or
trademark holder.
Girl Scouts may use trademarks owned by GSUSA, which include the trefoil shape, Daisy and Brownie Girl Scout
pins, contemporary and traditional Girl Scout pins, the words Daisy Girl Scout, Brownie Girl Scout, Junior Girl
Scout, Cadette Girl Scout, Senior Girl Scout, Ambassador Girl Scout, Girl Scouting, Girl Scouts, Girl Scout Cookies,
Brownie Girl Scout Try-Its, Junior Girl Scout badges, all Cadette, Senior, and Ambassador Girl Scout interest project
awards, names, and symbols, and all Girl Scout Journey insignia. Information on the use of GSUSA trademarks can
be found under Terms and Conditions on the footer of each page of the national site.
Keep in mind that Girl Scout trademarks can be used only in accordance with guidelines for their use. The Girl
Scout trefoil, for example, may not be animated or used as wallpaper for a website. Check with your council for
complete graphic guidelines and approval information.

2024–2026 Safety Activity Checkpoints Page 73 of 226
Note, too, that some names (such as commercial products and cartoon characters) are trademarked and cannot be
incorporated on most websites. Permission is also required from the author or publisher for the use of videos and
music on websites—so don’t post words from copyrighted songs, poems, or books, as permission must be granted
from the record label, publisher, artist, poet, or author.
A troop/group social networking site may be set up by groups whose Girl Scouts are at least 13 years old
and who have obtained parental permission to do so. In addition, all social networking sites (such as Facebook,
Snapchat, TikTok, and Instagram) must be approved by the council and must meet age limits set by the provider—
usually 13 years or older in most cases, which is in accordance with the U.S. Child Online Privacy and Protection
Act (COPPA) and the Child Online Protection Act (COPA).
Any appearance in a Girl Scout–related online video or picture requires permission in writing from each
member’s parent or guardian, using the Girl Scout permission form or media release provided by your council.
These completed forms should be held by the adult and/or council.
For information on online product programs, see Cookie and Product Sales Safety Activity Checkpoints.
Other Girl Scout Programs
As part of Girl Scout programs, members may create their own unique website to highlight their program activities.
These program activity website links should only be shared with family, friends, and others the members know
firsthand.
To keep members safe when they use their own websites, keep in mind:
• Parents/caregivers must review and approve a Girl Scout’s website before it goes live.
• For youth under 13 years old, a parent or caregiver must manage their website and be responsible for all
content, communication, and information posted.
• Parents/caregivers must review and approve any pictures and videos before they are posted to the
website. If the youth is under 13 years old, a parent or caregiver must personally post the pictures and
videos to the website themselves—youth under 13 are not permitted to do this.

2024–2026 Safety Activity Checkpoints Page 74 of 226
Girl Scouts Computer Internet Safety Pledge
Girl Scouts Internet Safety Pledge for all Girl Scouts
On my honor I pledge that,
I will not give out personal information such as my address, telephone number(s), parents’ or guardians’ work
address/telephone number(s), and the name and location of my school without their permission.
I will tell an adult right away if I come across or receive any information that makes me feel uncomfortable.
I will always follow the rules of internet sites, including those rules that are based on age of use, parental approval
and knowledge, and public laws.
I will never agree to get together with someone I “meet” online without first checking with my parents or
guardians. If my parents or guardian agree to a meeting, I will arrange it in a public place and bring a parent or
guardian along.
I will never send a person my picture or anything else without first checking with my parent or guardian.
I will talk with my parent or guardian so that we can set up rules for going online. We will decide on the time of day
that I can be online, the length of time that I can be online, and appropriate areas for me to visit. I will not access
other areas or break these rules without their permission.
I will not use the internet to collect money for Girl Scout products other than what is specifically permitted and
outlined in the safety guidelines related to Girl Scout product sales.
I will practice online “netiquette” (good manners) at all times when online.
I will not spam or hack others.
I will not bully, nor will I tolerate bullying (and I will always tell a trusted adult if this is a problem).
I will not use bad language.
I will be guided by the Girl Scout Promise and Law in all that I do online.

2024–2026 Safety Activity Checkpoints Page 75 of 226
Virtual Troop Meetings
Council Approval: May Be Required
Activity Permitted for: D, B, J, C, S, A
About Virtual Troop Meetings
Holding virtual troop meetings creates an array of challenges and exciting
opportunities to deliver a powerful Girl Scout experience into the lives of
members. As with all the special experiences that Girl Scouts offers, meeting
virtually creates not only the ability for Girl Scouts to participate regardless of busy schedules, physical ability, lack
of childcare, distance, and other barriers to joining in.
There are so many ways to encourage Girl Scouts to learn and grow and experience life virtually. For every
adventure that can be done in person, there is another that can be shared, taught, and experienced virtually. Adult
volunteers will find it exciting and challenging to bring new experiences to participants through video troop
meetings. Whether it be community service projects, outdoor adventures, cookie sales, badge work, or STEM, there
is a way to meet Girl Scouts where they are and keep them connected.
Privacy and Safety
As with all aspects of technology, it is important to keep in mind that virtual troop meetings can be the target of
unwanted intruders. This can mean either directly by interrupting or lurking in a live virtual meeting or, more
covertly, using data behind the scenes in a manner that has not been authorized or made transparent. Do all that is
possible to learn about the platforms being used to host virtual troop meetings. Choose platforms that are publicly
recognized, reported on by others as favorable and/or transparent about the issues they (the provider) may have
experienced and the steps they are taking to protect users. Become knowledgeable about the terms of use and do
not choose a company that you are unsure about, for any reason, without consulting your council for advice.
It is imperative to personally protect both adult volunteers and youth while holding virtual meetings and
communications online.
• Maintain control of virtual troop meetings. Be ready to block intruders.
• Keep meetings set to private. Do not post meeting links or passwords publicly.
• Teach troop members to use first names only, and keep background space invisible or obscured, keeping
photos and images of members offscreen.
• Operate in a manner and with the knowledge that anything recorded or photographed or “saved” to a
particular site may be misused in the future. Stay away from that sort of situation by making educated
choices. More specific safety steps to follow are included below.
Tips for a Successful Troop Meeting
Make sure everyone can participate. You may have members in your troop or group who live in remote areas
without internet access, have limited access to technology, share devices with multiple family members, or other
circumstances. Make certain to accommodate and include all, regardless of their internet access, before moving
forward with plans to go virtual.
Ensure that your troop utilizes a video conferencing service that is accessible on all types of devices. For
example, you may need to stay away from FaceTime because it is only available to those with an Apple brand
device. Also, the video program should work the same on a cell phone as it does on a laptop or tablet, considering
that participants may or may not be using the same types of devices.

2024–2026 Safety Activity Checkpoints Page 76 of 226
Adults and volunteers are encouraged to prepare some fun and respectful protocols to agree upon when
meeting virtually. For example, you might agree to speak in turn and not speak over each other, or mute yourself
when there is background noise. You might also consider whether the group will use the chat feature. Think
through your meeting and prepare meeting and agenda notes for what you aim to accomplish during the virtual
meeting, as virtual meetings will flow differently than in-person meetings. Also consider the types of experiences
that happen during in-person meetings (such as group check-in, snack break, etc.) and how you can recreate those
in a virtual setting.
Consider if your Girl Scouts would like to dress a certain way to encourage and strengthen their sense of
belonging. Some troops may wear uniforms to their meetings, while others may not. You may want to suggest
having them wear their vests for the virtual meeting to reinforce their camaraderie or have them vote on how they
would like to show their Girl Scout pride when meeting online.
Consider the grade level and age groups of troop members when planning virtual meetings. Be mindful of
the meeting time(s) that are set or any other factors that may differentiate the context of a virtual meeting between
younger and older Girl Scouts.
Learn More
There are many choices when it comes to free video conferencing services and countless skills one can learn online
ranging from protecting your troop meeting to creating fun ways to interact with members. Explore blogs and
news articles to stay current and to enable you to make the best and safest selections for your virtual troop
meetings. If you are unsure about something, always consult your council. For more ideas for holding virtual
meetings, visit:
• Protect Your Zoom Meeting from Hackers
• The 7 Best Free Video Conferencing Platforms
• Tips for Video Chatting with Young Children
Include all Girl Scout members in a virtual setting. Hosting or leading virtual meetings provides a unique
opportunity to increase inclusion in new ways. The virtual setting can also present new challenges around access.
Recognize that everyone has things they need in order to participate in an online meeting, such as a device,
internet or data access, microphone, camera, and a quiet space. Some may also need closed captions, headphones,
or a screen reader to take in what others are saying during the meeting. Some may need a break from screens or
the ability to move around to stay present.
Talk to Girl Scout members and their caregivers. Ask about needs and accommodations. The goal is that everyone
can participate, as they are.
Once underway, virtual meetings can provide a way for all to have a voice and input into the meeting, potentially
drawing in those who are hesitant or less likely to either attend in person or speak up in a face-to-face meeting.
Some may enjoy reactions or the chat feature, for example, where they can become more comfortable expressing
themselves.
Equity. Consider the history, culture, and past experiences of the Girl Scout members in your troop that could
affect their ability to equally participate in an activity. Work with members and families to understand how an
activity is perceived. Ensure that all Girl Scout members and their families feel comfortable and have access to
whatever is needed to fully participate, such as proper equipment, prior experiences, and the skills needed to enjoy
the activity. See the Equity section of the Introduction to Safety Activity Checkpoints for general advice about
expense,
Emergency Action Plan (EAP). Review and document your Emergency Action Plan (EAP) before starting any
activity and review it so all are prepared. Think through scenarios of what can go wrong such as an accident,
physical injury, missing person, sudden illness, or sudden weather or water emergencies.

2024–2026 Safety Activity Checkpoints Page 77 of 226
Virtual Troop Meeting Checkpoints
Have Girl Scout members take the Girl Scout Internet Safety Pledge to teach, encourage, and support web
safety and respectful “net-iquette” while online. Review the Computer and Internet Use Safety Activity
Checkpoints and share with participants.
Make sure the adult volunteer troop leader(s) are still co-leading the virtual meeting and are the person(s)
initiating and doing the inviting to the virtual troop meeting. This is especially important for Girl Scouts under
the age of 13. However, this should always be practiced with all in Girl Scouts.
Be sure to research the video conference service when selecting and implementing an appropriate video
conference service provider as a virtual troop meeting host. Be sure to read and understand the terms of use
of the selected platform. Also learn about the privacy guidelines and precautions that are available concerning the
platform prior to implementing your virtual troop meeting.
Make sure the virtual lines are set to private so that only invitees can attend (not a public meeting space). Do
not share sign-up links so that anyone can join. Instead, invite participants individually.
Make sure there is nothing on the virtual stream that identifies someone personally or reveals a personal
address, home address, or a person’s physical location. To further protect privacy of personal space, there is
typically an option to obscure the background in the room. Participants can also pick fun nicknames to identify
themselves on the meeting attendee list or use their first name only. Let the group know about these options so
that they can learn about them.
Continue to adhere to the “two unrelated adult volunteers” rule when gathering with youth virtually. It is
important that everyone understands they are in the same safe Girl Scout space when in a virtual meeting as they
are when attending in-person meetings. They are cared for, and they still have two dedicated unrelated adults
whom they can count on.
Maintain control of images shared. Set meeting controls so that you can mute or disable screen sharing by any
participant. Make sure your co-leader knows how to do the same. If an unauthorized person enters your meeting
space, take action to remove them immediately.
Do not record troop meetings and ask that those in attendance do not record troop meetings. Virtual
meeting platforms may or may not offer a consent option for all attending prior to activating the recording feature.
However, most Girl Scout members are minors and not of age to legally consent. Because of this, recording of
regular recurring troop meetings is not permitted. If the group wants to prepare a special recording session, make
sure to obtain permission slips from each parent or legal guardian, as with any special activity, as well as council
staff approval to record the session. Also, please be aware that virtual meeting platforms may have the capability to
save, store, and can potentially reuse recordings on their technology.
Screen shots taken of the group, particularly when all involved are not aware that it is happening, are
strongly discouraged. Girl Scouts love to take pictures and share them on social media. When done in the right
manner, this is a fun and safe thing to do. However, parents, guardians, and caregivers have their own feelings and
personal rules in their homes about photographs and social media, particularly with younger children, so it is very
important to be respectful of that. Also, as with recording meetings, note that some virtual meeting applications
will save and can potentially reuse photographs taken on their technology.
When sharing any material developed by a third party, be mindful that third-party products and services
may have their own terms of use and privacy policy. The user should always read, understand, and abide by
third-party terms of use.
Be sure that any member emails are not available to anyone but the troop leader. It is important to protect
against unauthorized, uncleared individuals having access to a youth’s email or be able to contact them outside of
the meeting in any manner.

2024–2026 Safety Activity Checkpoints Page 78 of 226
Remain up-to-date on developments related to online meeting safety from your council and from the meeting
platform you choose.

2024–2026 Safety Activity Checkpoints Page 79 of 226
Cookie and Product Programs
Council Approval: Not Required
Activity Permitted for: D B J C S A
About the Cookie Program
The Girl Scout Cookie Program is the largest girl-led business in the United States. Through the Girl Scout Cookie
Program, members develop five essential skills: goal setting, decision making, money management, people skills,
and business ethics. Girl Scout council–sponsored product sales—which include products from official Girl Scout
Cookie, magazine, and nut vendors—give members proven opportunities to earn money and/or credits for their
Girl Scout program activities, while contributing significantly to their local councils and communities through Take
Action projects.
Learn More
• About Girl Scout Cookies: Girl Scouts of the USA.
• Selected companies are licensed by Girl Scouts of the USA to produce official Girl Scout products to sell.
These companies are selected by councils and contracted for one or more years. They include: Little
Brownie Bakers and ABC Bakers for cookies and Ashdon Farms and Trophy Nut for Fall Product.
• The company approved by GSUSA to offer magazine subscription programs is M2 Media Group. M2 Media
Group provides online tools and activities, and magazine selection and sales take place online—check with
your council for more details.
Equity. Product programs often involve more family participation because Girl Scouts cannot market products on
their own. Be mindful that caregivers in your troop may have different bandwidth to participate. How can you
support all Girl Scouts in having a fulfilling, successful experience? Can Girl Scouts sell in teams? Or can adults
rotate being chaperones for booths? Consider the history, culture, and past experiences of the Girl Scout members
in your troop that could affect their ability to equally participate in an activity. Work with members and families to
understand how an activity is perceived. Ensure that all Girl Scout members and their families feel comfortable and
have access to whatever is needed to fully participate, such as proper equipment, prior experiences, and the skills
needed to enjoy the activity. See the Equity section of the Introduction to Safety Activity Checkpoints for general
advice about expense,
Emergency Action Plan (EAP). Review and document your Emergency Action Plan (EAP) before starting any
activity and review it so all are prepared. Think through scenarios of what can go wrong such as an accident,
physical injury, missing person, sudden illness, or sudden weather or water emergencies.

2024–2026 Safety Activity Checkpoints Page 80 of 226
Cookie and Product Program Checkpoints
Sell in designated area(s). Girl Scouts should observe their council’s jurisdiction (by zip code) when marketing
and selling products in person or at a cookie booth. With the Digital Cookie® platform, Girl Scouts may market and
sell to family and friends beyond their council’s jurisdiction. Prospects that are beyond their delivery area should
be referred to GSUSA’s Cookie Finder. Girl Scouts should observe council jurisdictions when selling cookies at a
parent’s or caregiver’s workplace, unless other arrangements are made to accommodate all Girl Scout families
connected to that workplace.
For cookie booth sales, all booth locations are designated and approved by the council or their designee. In
addition, all council guidelines regarding booth set-up and takedown and staffing booth must be followed.
Arrange for adult supervision. Adults should provide supervision and guidance for all program levels, and must
accompany Daisies, Brownies, and Juniors when they are selling, taking orders, and delivering products. Adults
oversee Cadettes, Seniors, and Ambassadors and must be aware of how, when, and where they marketing products.
In addition, an adult must be readily accessible to them when they are participating in product programs. This can
be accomplished by an adult being present with them or by having the adult and Girl Scouts exchange telephone
numbers. Girl Scouts should never sell or deliver cookies alone. Parents, guardians, or caregivers must approve all
member-delivered online orders and supervise all communications and product delivery.
Adults must be present at booth activities with members of any program level.
• For each troop cookie booth, a minimum of two adults (at least one of whom is a registered Girl Scout
volunteer with the required background check) and one Girl Scout should be present at all times.
• Certain locations may be inappropriate for younger Girl Scouts based on the standards of your local
community, may negatively impact the cookie program experience for Girl Scouts and/or may negatively
impact our brand in the community. For additional clarity, Girl Scout should not sell in or in front of
establishments that they themselves cannot legally patronize.
• Additionally, with respect to marijuana dispensaries, we have been steadfastly combating the unauthorized
uses of the Girl Scout trademark by the cannabis community, which has been marketing—without
authorization—certain cannabis products under our youth-appealing brand. We are continuing to
aggressively fight these unauthorized uses of the Girl Scout brand and hope that our councils and
volunteers will join GSUSA’s efforts by discouraging cookie booths at such locations.
• Retail sales without Girl Scouts present are not approved by GSUSA. Councils, troops, and Girl Scouts may
not sell cookies in a retail space where Girl Scouts cannot be present to market, manage inventory, collect,
and process payments for cookies. Store employees and/or adults cannot sell cookies on behalf of a Girl
Scout or troop.
Girl Scouts learn and practice personal protection skills such as:
• Working with adults. The Girl Scout Cookie Program is a youth/adult partnership. Adults should oversee
customer communications.
• Not sharing personal information like address, school, or last name.
• Protecting personal identity by never using direct messaging with people they don’t know online or
through social media platforms.
• Never sharing personal location information, including booth locations.
• Never giving out their phone numbers or personal email addresses.
• Always using the secure sales link from product program vendors for orders.
• Ensuring a first aid kit is available at a booth or a troop “walk-about.”
• Ensuring immediate telephone access to an adult and/or 911 as part of the emergency plan for Cadettes,
Seniors, and Ambassadors.

2024–2026 Safety Activity Checkpoints Page 81 of 226
Prepare for cookie and product programs with Daisies. Daisies participate in product programs but always
under the direct supervision of an adult. Materials provided by GSUSA for Daisies focus on engaging them in selling
to their circle of friends—only people they know—including neighbors, social groups, and family.
Respect Girl Scout trademarks. “Girl Scout Cookies” and “Girl Scouts” are trademarked by Girl Scouts of the USA
and cannot be used to endorse others’ products or services. Any questions regarding the use of these terms must
be addressed to the council or [email protected]g.
Remember, the Girl Scout name and other terms trademarked by GSUSA, as well as pictures of Girl Scout Cookie
packages or cookies themselves, can be used only by councils and members in conjunction with a Girl Scout
program (e.g., product program). These rights are not transferable to customers or businesses purchasing cookies
for use with gifting or promotional activities. Councils, troops, and members may not use GSUSA’s intellectual
property as part of a vanity URL.
Know what’s in the cookie. Read nutritional and health information on product description sheets provided by
the vendors annually or check GSUSA’s website. Girl Scouts should be able to discuss serving size, nutritional
makeup, and allergen information. Read additional nutrition information at Girl Scout Cookies. Additionally,
recycling information is provided on product containers.
On the Day of a Sale
• Wear a membership pin, uniform, or Girl Scout clothing (e.g., Girl Scout T-shirt) to clearly identify
themselves as Girl Scouts.
• Girl Scouts and accompanying adults should be familiar with the areas and neighborhoods where selling
takes place. Avoid alleys.
• Participate in door-to-door sales during daylight hours only, unless accompanied by an adult.
• When Girl Scouts operate a cookie booth in a public place, adults must be present regardless of the age of
the Girl Scout. When planning booths, follow council guidelines for additional information about setting up
a booth and safety and security suggestions and assistance.
• Use safe pedestrian practices, especially when crossing at busy intersections. Be aware of traffic when
unloading products and passengers from vehicles.
• Never enter someone’s home or vehicle. Only approach vehicles at designated drive-thru cookie booths.
• Do not carry large amounts of money and ensure provisions have been made for safeguarding the money in
advance.
With booth sales, ensure:
• You have adequate space at the booth for tables, products, and troop members that allows for safe
passage by pedestrians, bikes, and cars.
• You maintain a safe distance from cars. If possible, set up a safety barrier between cars and the booth.
• The booth does not block a store entrance or exit.
• When Girl Scouts receive cash from buyers and make change, they hand the money to the adult for
safekeeping. It is important that cash is kept safe and out of sight. This can be accomplished by:
o Keeping the cash box against a wall or behind a barrier.
o Having an adult keep the money by securing it in a front-facing pouch.
o Depositing cash as soon as possible to prevent potential thefts or break-ins of vehicles.
Safe Online Marketing. Girl Scouts may use the internet to share their Cookie Program sales links, stories, and
learnings with the following guidelines.
• Girl Scouts should partner with their troop and their families to learn how to safely run their online
business. They should have a hands-on role in marketing their product program businesses.
• Together, they should review the Digital Marketing Tips for Cookie Entrepreneurs and Their Families.

2024–2026 Safety Activity Checkpoints Page 82 of 226
• Girl Scouts, volunteers, and caregivers must review and adhere to the Girl Scout Internet Safety Pledge and
Safety Activity Checkpoints for Computer and Internet Use.
• Girl Scouts participating in the product programs may call, text, and send email messages to alert friends
and family to product programs and accept customer commitments via email, text, or telephone.
• Posting sales links to online resale sites is prohibited (eBay, Facebook Marketplace, craigslist). Be aware
posts on Facebook containing the use of a dollar sign ($) may automatically move the post to Facebook
Marketplace. To prevent this, the posting party must disable the automated function.
• Social media ads should not be purchased or donated to promote sales links.
• Girl Scouts may not use the internet to share their fall product links beyond friends and family.
• Parents/caregivers should do the posting for youth under the age of 13. Youth who are 13 or older may use
social networking sites to market products but must follow council and GSUSA guidelines.
• Parents/caregivers must review and approve a Girl Scout’s website before it goes live.
• Parents/caregivers must review and approve any pictures or videos before they are posted to their
website. If the youth is under 13 years old, a parent or caregiver must personally post the pictures and
videos to their website themselves—youth under 13 are not permitted to do this.
• When they are marketing online, they should only use their first names, their troop/group number or
name, and their council’s name.
• Personal emails or street addresses of members should never be used for contacting or responding to
customers. Instead, use one of the following:
o A blind return address account hosted on a secure site, such as that provided by the product
program vendors, where their names and personal email addresses are not revealed to customers.
o A group account monitored by an adult.
o An adult email account supervised by an adult.
• Parents, Girl Scouts, and volunteers should contact and collaborate with their councils and GSUSA in
advance of any national news media opportunities tied to Girl Scouts’ online marketing and sales efforts.
Digital Cookie® Platform. Keep the following also in mind when selling cookies online.
• GSUSA reserves the right to remove or disable product program links for any reason, including violation of
guidance, inventory fulfillment issues, safety issues, or if sales and marketing activity goes viral or
otherwise creates unanticipated disruption.
• Girl Scouts must have their caregiver’s permission to participate in all online activities.
• Read and abide by the Girl Scout Digital Cookie Pledge, GSUSA Internet Safety Pledge, and the Girl Scout
Digital Cookie Pledge.
• Read, understand, and comply with Computer and Internet Use Safety Activity Checkpoints.

2024–2026 Safety Activity Checkpoints Page 83 of 226
Cross-Country Skiing
Council Approval: May Be Required
Activity Permitted for: B J C S A
Activity Not Recommended for: Daisies
About Cross-Country Skiing
Also referred to as Nordic and XC skiing, cross-country is a form of skiing where skiers rely on their own
locomotion to move across snow-covered terrain, rather than using ski lifts or other forms of assistance. Unlike
downhill skiing, in which the entire boot is attached to the ski, only the toe of the cross-country boot is attached to
the ski.
*Cross-country skiing is not recommended for Daisies due to the complex nature of the cross-country ski and the
fact that young children will typically not learn with ski poles, which means it may be far more difficult for an adult
volunteer to corral and manage a group of Daisies for this activity. Daisies may find it too labor intensive and not
enjoyable, which is why it is not recommended. However, while cross-country skiing is not recommended for
Daisies, it is permitted. So councils located in regions where cross-country skiing with young children is common
and typical may choose to allow this activity.
Know where to cross-country ski: Designated cross-country ski trails are recommended. Connect with your Girl
Scout council for site suggestions and approval. Also, Cross Country Ski Areas Association provides information
about cross-country skiing trails.
Include Girl Scout Members with Disabilities. Talk to Girl Scout members with disabilities and their caregivers.
Ask about needs and accommodations. Always be sure to contact the ski instructor and location and/or the
instructor in advance to ensure they are able to accommodate those with disabilities. Find tips and inspiration
from a disabled XC skier, and learn more at Move United.
Equity. Consider the history, culture, and past experiences of the Girl Scout members in your troop that could
affect their ability to equally participate in an activity. Work with members and families to understand how an
activity is perceived. Ensure that all Girl Scout members and their families feel comfortable and have access to
whatever is needed to fully participate, such as proper equipment, prior experiences, and the skills needed to enjoy
the activity. See the Equity section of the Introduction to Safety Activity Checkpoints for general advice about
expense,
Emergency Action Plan (EAP). Review and document your Emergency Action Plan (EAP) before starting any
activity and review it so all are prepared. Think through scenarios of what can go wrong such as an accident,
physical injury, missing person, sudden illness, or sudden weather or water emergencies.

2024–2026 Safety Activity Checkpoints Page 84 of 226
Cross-Country Skiing Checkpoints
Verify instructor knowledge and experience. Instruction is given by an adult with experience teaching and/or
supervising cross-country skiing for the ages involved, or has documented experience, according to your council’s
guidelines.
Select a safe site. Girl Scouts are encouraged to plan trip details and include adequate rest periods with
opportunities to replenish fluids and eat high-energy foods (such as fruits and nuts). The nature of the terrain,
potential hazards (such as an avalanche or frozen lake), mileage, and approximate cross-country skiing time should
be known to all group members. When a latrine is not available, individual cat holes located at least 200 feet away
from water sources should be used to dispose of human waste.
Map the course. The route should be marked on a map.
Designate a meeting spot. Before skiing, designate a meeting place where skiers can contact a supervising adult.
Recover from a fall. The act of hoisting back up while wearing skis can be a cumbersome process. Have members
learn how to get back up on their skis prior to beginning the route.
Prepare for emergencies. Ensure the presence of a waterproof first aid kit and a first aider with a current
certificate in first aid, including adult and child CPR or CPR/AED, who is prepared for cases of frostbite, cold
exposure, hypothermia, sprains, fractures, and altitude sickness. Emergency transportation should be available. If
any part of the activity is located 30 minutes or more from emergency medical services, ensure the presence of a
first aider with Wilderness First Aid certification. Participants must be trained in winter survival (such as snow-
cave building, whiteouts, and avalanche avoidance), as needed. Search and rescue procedures are written out in
advance and arrangements are made for medical emergencies and evacuation procedures.
Follow cross-country skiing safety standards. Ski area rules are explained and observed:
• Ski under control to avoid other skiers and objects.
• Yield the right-of-way to those already on the trail. They step to the side to let the faster skier pass. A
descending skier has the right of way.
• A faster skier should indicate the desire to pass by calling “track, please.”
• Never ski close to the edge of an embankment or a cliff.
• Do not walk on ski trails.
Safety and Required Gear
• Skis and ski poles
• Boots
• Water-resistant gloves or mittens
• Heavy insulating socks
• Winter hat
• Thermal underwear or long underwear (as necessary)
• Sunglasses or ski goggles to protect eyes from glare
• Water bottle
• High-energy food (such as fruits and nuts)
• A daypack to carry personal belongings

2024–2026 Safety Activity Checkpoints Page 85 of 226
Downhill Skiing and Snowboarding
Council Approval: Required
Activity Permitted for: *D B J C S A
*With the appropriate instructors, equipment, and hills/levels, Daisies are
permitted to participate in skiing and snowboarding.
About Downhill Skiing and Snowboarding
Whether Girl Scouts are participating in snowboarding or traditional downhill, slalom, super-G, or other types of
skiing, participants use trails and slopes matched to their abilities.
Note: Even experienced skiers are not permitted to do aerial tricks on skis or snowboards when skiing or riding as
part of a Girl Scout activity.
Learn More
• Professional Ski Instructors of America (PSIA) and American Association of Snowboard Instructors (AASI):
The Snow Pros
• National Ski Patrol
• U.S. Ski and Snowboard
• Locate ski resorts by region: ABC of Snowboarding
Include Girl Scout Members with Disabilities. Talk to Girl Scout members with disabilities and their caregivers.
Ask about needs and accommodations. Always be sure to call ahead to the ski and snowboard resort to ensure they
are able to accommodate those with disabilities—most are extremely accommodating and offer specialized
instructors and trails for athletes who are blind, deaf or hard of hearing, paraplegic, or who have other conditions.
Ask to speak to an instructor ahead of time, if appropriate. See Move United’s Skiing and Snowboarding articles.
Equity. Consider the history, culture, and past experiences of the Girl Scout members in your troop that could
affect their ability to equally participate in an activity. Work with members and families to understand how an
activity is perceived. Ensure that all Girl Scout members and their families feel comfortable and have access to
whatever is needed to fully participate, such as proper equipment, prior experiences, and the skills needed to enjoy
the activity. See the Equity section of the Introduction to Safety Activity Checkpoints for general advice about
expense,
Emergency Action Plan (EAP). Review and document your Emergency Action Plan (EAP) before starting any
activity and review it so all are prepared. Think through scenarios of what can go wrong such as an accident,
physical injury, missing person, sudden illness, or sudden weather or water emergencies.
Downhill Skiing and Snowboarding Checkpoints
Prepare for physical activity. Skiing and snowboarding might look like standing still, but they require muscle
strength, balance, and aerobic fitness (as in, healthy lungs and heart)! It takes endurance to stay on the mountain
for several hours. Encourage participants to get in condition by stretching and exercising before the skiing or
snowboarding trip.
Learn how to ride ski lifts. This includes line courtesy, loading and unloading, and emergency procedures.
Observe the basics. Ski and snowboard under control. Participants should ski responsibly, and not beyond their
ability level. All rules of the ski area must be explained, learned, and followed.
Stay on trails. Do not ski off-trail or in an unmarked or closed area.

2024–2026 Safety Activity Checkpoints Page 86 of 226
Be aware of terrain. Avoid objects and obstacles, such as trees, rocks, growth coming up under thin snow
coverage, and melted snow and puddles, which can occur in spring or during fluctuating weather.
Understand right-of-way protocol. Make others aware before you turn. Yield the right-of-way to those already
on the slope. Do not cross the path of other skiers or snowboarders.
Prepare for falls. Move quickly to the side of the trail or slope after falling, unless injured. Plan for how the adults
will accompany Girl Scouts (for instance, one in front and another in back), so that a Girl Scout who falls has
support to put their skis back on, if needed, and is not left behind.
Summon the Ski Patrol if a skier is injured. They are usually dressed in red.
Know the slopes. Ski Slope Ratings Explained details trail ratings, which include green circle as the easiest, blue
square as intermediate, and black diamond for expert skiers and snowboarders. Review the trail maps before
hitting the slopes.
Know where the Medical Clinic at the ski resort (mountain) is located.
Verify instructor knowledge and experience. Instructors are certified by the Professional Ski Instructors of
America (PSIA) and the American Association of Snowboard Instructors (AASI) or possess equivalent certification
or documented experience according to your council’s guidelines. Instructors have experience teaching and/or
supervising downhill skiing/snowboarding for the ages involved.
Select a safe downhill skiing and/or snowboarding site. Ensure that terrain and potential hazards are known to
all participants.
Prepare for emergencies. Ensure the presence of a waterproof first aid kit and a first aider with a current
certificate in first aid, including adult and child CPR or CPR/AED, who is prepared to manage cases of frostbite, cold
exposure, hypothermia, sprains, fractures, and altitude sickness.
Ensure emergency transportation. Make sure emergency transportation is available; if any part of the activity is
located 30 minutes or more from emergency medical services, ensure the presence of a first aider with cold
weather/winter wilderness first aid experience.
Safety and Required Gear
• Protective helmet with properly fitting safety harness that meets the Snell Memorial Foundation’s RS-98 or
S-98 standards or the American Society for Testing and Materials (ASTM) F2040 requirements (or both)
and displays the Safety Equipment Institute (SEI) seal
• Ski or snowboarding boots
• Skis or snowboards with bindings
• Ski poles (not needed for snowboarding)
• Sunglasses or ski goggles to protect eyes from glare
• Insulated water-resistant gloves or mittens
• Insulating socks and thermal underwear
• Sunscreen with an SPF of at least 15 and lip balm for snow glare protection
• Windproof and waterproof ski jacket and pants

2024–2026 Safety Activity Checkpoints Page 87 of 226
Fencing
Council Approval: May Be Required
Activity Permitted for: B J C S A
About Fencing
Derived from the word “defense,” fencing is a sport and martial art that involves using swords called foils (practice
swords), sabers, and épées (a fencing sword with a bowl-shaped hand guard). The objective of fencing is to touch
the opponent with the tip of a sword without getting hit by the opponent’s sword. A fencing game (or bout) is
typically three minutes—the first fencer to score five touches (or hits) wins; if neither reaches five within the
designated time, the participant with the most touches wins. If performed correctly and with the proper
equipment, fencing is a safe activity with a low injury rate. Most fencing clubs provide students with a full kit of
equipment.
Daisies can learn about fencing games and the rules of fencing but should use only foam (mock) swords, as the
balance and hand/eye coordination needed to fence are not sufficiently developed at this age.
Learn More
• USA Fencing
• U.S. Fencing Coaches Association: USFCA
• International Fencing Federation
Include Girl Scout Members with Disabilities. Talk to Girl Scout members with disabilities and their caregivers.
Ask about needs and accommodations. Always be sure to contact the location and/or the instructor in advance to
ensure they are able to accommodate those with disabilities. For more information, visit Move United.
Equity. Fencing is unfamiliar in many areas, so find a club or school program that will support new participants
and meet the group at their level. Check with the provider to ensure adequate, right-sized equipment is available to
use. Consider the history, culture, and past experiences of the Girl Scout members in your troop that could affect
their ability to equally participate in an activity. Work with members and families to understand how an activity is
perceived. Ensure that all Girl Scout members and their families feel comfortable and have access to whatever is
needed to fully participate, such as proper equipment, prior experiences, and the skills needed to enjoy the activity.
See the Equity section of the Introduction to Safety Activity Checkpoints for general advice about expense,
Emergency Action Plan (EAP). Review and document your Emergency Action Plan (EAP) before starting any
activity and review it so all are prepared. Think through scenarios of what can go wrong such as an accident,
physical injury, missing person, sudden illness, or sudden weather or water emergencies.
Fencing Checkpoints
Verify instructor knowledge and experience. One adult needs to be a certified fencing instructor or have
equivalent certification, or documented experience, in accordance with your council’s guidelines. Ensure that there
is a ratio of one instructor for every ten youth. Fencing is always well supervised and appropriate to age, skill level,
and endurance.

2024–2026 Safety Activity Checkpoints Page 88 of 226
Note: The instructor-to-participant ratio is different from the adult-to-youth ratio in the Introduction: Standard
Safety Guidelines. Both ratios should be complied with when participating in fencing.
Assess participants’ maturity level. Participants must be old enough to understand safety procedures and handle
equipment so as not to endanger themselves or others. Ensure that swords are appropriate to the age, size,
strength, and ability of the group.
Select a safe site. Check with council staff to see if an approved vendor list is offered. If the council does not have
an approved vendor list, look for organized fencing companies or organizations. Call the facility ahead of time to
determine accommodations for children, and what ages they have experience with.
Always keep the sword pointed in a safe direction. This is an important rule of fencing. A safe direction means
that the sword is pointed away from yourself and other persons, leaning it downward when walking or resting, or
anytime when not jousting. Maintain control of the sword, always.
Ensure the equipment to be used is in good condition. Make sure that the equipment is clean and in good
working order and that nothing is broken or loose. Check that the épée or foil handles and/or wrist and arm guards
are in good repair.
Dress appropriately for the activity. Make sure that all participants avoid wearing dangling earrings, bracelets,
and necklaces that may become entangled in equipment. Also, make sure long hair is tied back and always wear
closed-toed shoes.
Review rules and expectations. The instructor reviews the rules and operating procedures beforehand.
Safety and Required Gear
• Foils, sabers, or épées
• Fencing glove
• Plastron (underarm protector worn on fencing arm)
• Fencing jacket
• Fencing knickers or pants that cover knees
• Long socks that go up to knees (soccer socks are recommended)
• Sneakers or court shoes

2024–2026 Safety Activity Checkpoints Page 89 of 226
Fishing and Ice Fishing
Council Approval: May Be Required
Activity Permitted for: D B J C S A
About Fishing and Ice Fishing
Fishing (also referred to as “angling”) is a sport, a leisurely activity, and a major food industry, depending on whom
you ask. In the United States, freshwater fishing is more popular than saltwater fishing, and varieties include fly
fishing, ice fishing, and match fishing. The best times of day to fish depend on a variety of factors, such as amount of
sunlight, temperature, depth of water, and wind. In general, however, the best times are early in the morning or
mid-evening.
Ice fishing, the practice of fishing through a hole cut in the ice of a body of water, is a relaxing wintertime activity—
particularly in northern U.S. states. Ice anglers often sit on stools inside small ice shanties, which provide shelter
and warmth in cold temperatures. Shanties are typically made of wood or plastic and are rented from sport-fishing
outlets or made at home. Overall, lakes and ponds tend to be best. Connect with your Girl Scout council for site
suggestions. Consult state ice angler associations for information about ice fishing events and resources.
Fishing teaches respect for fish and wildlife. Whenever possible, use barbless hooks, and return live fish to water.
Learn More
• All things fishing: Take Me Fishing
• American Sportfishing Association
• U.S. Fish and Wildlife Service
• International Game Fish Association
• U.S. Coast Guard’s Boating Safety Division
• Leave No Trace
• Video about ice fishing: YouTube
• Minimizing fishing’s impact on the environment: Seafood Watch
Include Girl Scout Members with Disabilities. Talk to Girl Scout members with disabilities and their caregivers.
Ask about needs and accommodations. Always be sure to contact the location and/or the instructor in advance to
ensure they are able to accommodate those with disabilities. For more information and resources, visit Fishing Has
No Boundaries, and learn about water safety for children with special needs.
Equity. Consider troop members’ confidence on or around water. Swimming ability can greatly impact participant
comfort in aquatic settings. Check in with families and help build progressive experiences or options to support
participation. Consider the history, culture, and past experiences of the Girl Scout members in your troop that
could affect their ability to equally participate in an activity. Work with members and families to understand how
an activity is perceived. Ensure that all Girl Scout members and their families feel comfortable and have access to
whatever is needed to fully participate, such as proper equipment, prior experiences, and the skills needed to enjoy
the activity. See the Equity section of the Introduction to Safety Activity Checkpoints for general advice about
expense,
Emergency Action Plan (EAP). Review and document your Emergency Action Plan (EAP) before starting any
activity and review it so all are prepared. Think through scenarios of what can go wrong such as an accident,
physical injury, missing person, sudden illness, or sudden weather or water emergencies.
Fishing and Ice Fishing Checkpoints

2024–2026 Safety Activity Checkpoints Page 90 of 226
See Offshore Water Vessel Safety Activity Checkpoints for deep sea fishing trips or any chartered boat fishing trips.
Make sure you have the right life jackets. If wading in water more than knee-deep or fishing from a boat, ensure
that participants wear a U.S. Coast Guard–approved life jacket (Type III recommended) that fits according to
weight and height specifications. Inspect life jackets to ensure they are in good condition and contain no tears.
Read the U.S. Coast Guard’s Life Jacket Wear/Wearing Your Life Jacket for more information.
Verify instructor knowledge and experience. Ensure the adult or fishing instructor holds American Red Cross
Water Safety for Parents and Caregivers, or possesses equivalent certification or documented experience
(competencies); the ratio of instructor to participant is 1:10. Consider additional adult watchers for groups that are
more scattered and/or not clearly visible at all times.
Observe fishing and environmental regulations. When selecting a fishing location, follow local, state, and
federal fishing regulations and obtain fishing licenses, where required. Use the correct type of bait and fishing gear
permitted in that area, and learn about limits on the number, size, and kind of fish that you can keep.
Verify safety of ice-fishing location. Ensure that ice is solid and thick enough to support the ice fishers’ weight.
Opinions vary about the appropriate thickness of ice for fishing. Generally, the thickness should be between 4 and
6 inches. Your local department of natural resources can provide help. The Department of Natural Resources of the
State of Minnesota also provides guidelines for ice thickness. Once arriving at a lake, check the ice thickness,
keeping in mind that temperature, snow cover, currents, springs, and rough fish all affect the relative safety of ice.
Also, ice is seldom the same thickness over a single body of water and can be 2 feet thick in one place and 1 inch
thick a few yards away. Assess the ice depth at least every 150 feet. Read more on ice-fishing safety.
Know where to find first aid. If any part of the activity is located 30 minutes or more from emergency medical
services, ensure the presence of a first aider with Wilderness First Aid certification. Basic ice rescue techniques
should be practiced. Appropriate rescue equipment needs to be on hand (for example: ring buoy, rope, throw bag,
pole, ladder, and—where necessary—boat).
Safety requirements for various fishing locations:
• From a dock. Fishing from a dock requires the presence of a first aider with American Red Cross water
safety training. The ratio of adult watchers to participants is one to ten, except for Daisies where the ratio is
one to six. Additional adult watchers are necessary for groups that are spread out or out of direct sight.
• Wading above the knee. Fishing while wading above knee-deep: adult(s) overseeing youth should
complete the American Red Cross Water Safety for Parents and Caregivers training or have equivalent
experience. Ensure that all wear a U.S. Coast Guard–approved life jacket (Type III). The ratio of adult
watchers to participants is one to ten, except for Daisies where the ratio is one to six. Additional adult
watchers are necessary for groups that are spread out or out of direct sight.
• Wading below the knee. When fishing from a shoreline or while wading up to knee-deep, the presence of
a first aider with American Red Cross water safety training is recommended, but not required. However,
Coast Guard–approved personal flotation devices or other water rescue equipment must be provided. The
ratio of adult watchers to participants is one to ten, except for Daisies where the ratio is one to six.
Additional adult watchers are necessary for groups that are spread out or out of direct sight.
• Fishing from small craft. Completes Girl Scouts small craft safety training; the ratio of adult watchers to
participants is one to ten, except for Daisies, where the ratio is one to six. Additional adult watchers are
necessary for groups that are spread out or out of direct sight. See the Safety Activity Checkpoints for the
type of craft being used.
Select appropriate boats for water and passengers. Make sure craft weight and capacity are not exceeded
(some watercrafts will clearly display maximum capacity). Consider weather and water conditions, weight of
passengers, and equipment.

2024–2026 Safety Activity Checkpoints Page 91 of 226
File a float plan for extensive boat trips. If going on an extended boat fishing trip, file a float plan with a
dependable person who will notify local authorities should your group not return on time. Float plans must include
the names of people on board, destination, craft description, times of departure and return, and additional details
about routes and marine communications. The Coast Guard provides an electronic, printable form.
Remove fishing gear, bait, and any dead fish at the end of the fishing activity.
Safety Gear for General Fishing
• Fishing rod appropriate to the type of fishing
• Fishing tackle (and tackle box) appropriate for the size and skill level of the participants and the type of fish
to be caught
• If wading in water more than knee-deep or fishing from a boat, ensure that each Girl Scout and adult wears
a U.S. Coast Guard–approved life jacket (Type III).
• Tools for removing hooks and cutting lines
• Layered, non-cotton clothing that is easily changeable depending on temperatures (waterproof jacket
recommended)
• Boat shoes, closed-toe and non-slip hiking/sport sandals with heel strap, water socks, or shoes (no flip-
flops)
• Cooler and ice for keeping fish cool and avoiding spoilage (if intended for consumption)
• If fishing from a boat, at least one graspable and throwable Coast Guard–approved personal flotation device
(Type IV buoyant cushion or ring buoy or equivalent) immediately available for each group on the water
• Fishing net
Safety Gear for Ice Fishing
• Snowsuit, warm coat, hat, and mittens
• Lightweight rubber gloves or hunting/fishing gloves
• Waterproof boots that protect against cold temperatures
• Fishing rod (1- to 3-foot rods are most common)
• Fishing tackle (and tackle box) appropriate for the size and skill level of the participants and the type of fish
to be caught
• Tools for removing hooks and cutting lines
• Ice auger (ice saw or chisel); read about augers and other equipment
• Jigging rod/pole or tip-up to catch fish
• Ice bucket and scoop
• At least one graspable and throwable Coast Guard–approved personal flotation device (Type IV buoyant
cushion or ring buoy or equivalent) immediately available for each group on the water
• Flashlight and lantern
• Cooler for storing fish (if intended for consumption)
• Shanty (optional)
• Ice sled for pulling equipment (optional)
• First aid kit

2024–2026 Safety Activity Checkpoints Page 92 of 226
Ice Safety Quiz
Please read information from both the Minnesota and Wisconsin Departments of Natural Resources’ websites on
ice safety. Then take the quiz below with your troop to check your knowledge!
• Ice Safety—MN Department of Natural Resources
• Ice Safety—WI Department of Natural Resources
True or False
1. Booming and cracking ice is very dangerous.
2. Ice freezes uniformly. If the ice is 12 inches thick in one area of the lake, then it is 12 inches thick
everywhere else.
3. New clear ice is the safest, strongest ice.
4. If you fall through, you should remove your winter clothes immediately in the water to help keep you
afloat.
5. Ice 6 inches thick can support a pickup truck.
6. A ladder can be used to assist someone who has fallen through the ice.
7. Ice claws are simple to make at home and a very convenient tool to help yourself get out of the water.
8. If you were to fall through, you should swim away from where you came from, since that ice must be very
thin.
9. It is recommended to wear a life jacket underneath a winter coat while on the ice.
10. Cold blood can linger in your arms and legs and suddenly rush to your heart and cause cardiac distress.
Short Answer
1. Where can you find information about lake conditions?
2. What are some ways to measure the thickness of the ice?
3. What are some items that you should always bring with you out onto the ice?
4. What five ways can you assist someone exiting the lake after breaking through?
5. After someone falls through and they successfully exit the water, how would you treat them for
hypothermia?

2024–2026 Safety Activity Checkpoints Page 93 of 226
Geocaching
Council Approval: Not Required
Activity Permitted for: *D B J C S A
*Daisies are permitted when working with older girls and adults as
part of another outdoor activity.
About Geocaching
Geocaching is a recreational outdoor activity that centers on the use of a global positioning system (GPS) device
and maps. Geocachers seek out caches (waterproof containers containing logbooks and/or trinkets) that have been
hidden just about anywhere in the world, whether in urban areas, in the wilderness, in tree roots, and so on. As
treasure hunters in an international game of hide-and-seek, participants use geocaching to select cache locations
and communicate with other geocachers.
Connect with your council to see if there are caches on council sites. When on private or government property,
follow all posted rules, guidelines, and etiquette. Geocaching routes should outline locations that are prohibited for
placing a cache, so check for those.
“Cache in, trash out” is the motto when practicing Leave No Trace—geocachers are encouraged to leave caching
sites cleaner than they found them and pick up garbage left by others. Geocachers are invited to participate in
International Cache In, Trash Out events, which are worldwide cleanup efforts.
Girl Scouts develop skills about GPS use, latitude, longitude, and reading maps based on grade level. Ideally, each
member uses their own smartphone or GPS device, or two to three cachers can share one. When more than three
participants share a device, it becomes more difficult for everyone to actively participate in the geocaching activity.
Keep in mind that a GPS device provides a direct line measurement from the starting point to a destination; a GPS
does not include the distance around path obstructions such as bodies of water.
Finding a benchmark is key to geocaching. Visit Geocaching.com to learn more. Using a smartphone, GPS device, or
directions provided by the National Oceanic and Atmospheric Administration’s National Geodetic Survey (NGS),
you can seek out NGS survey markers and other items that have been marked in the United States.
Learn More
• Join Geocaching.com
• Terracaching
Include Girl Scout Members with Disabilities. Talk to Girl Scout members with disabilities and their caregivers.
Ask about needs and accommodations. Always be sure to contact the location and/or the instructor in advance to
ensure they are able to accommodate those with disabilities. See HandiCaching.com to find out about geocaching
for people of all abilities.
Equity. Geocaching requires a smartphone or GPS device. Be mindful about ways to make it more accessible.
Encourage Girl Scouts to share resources, such as by working in small groups, renting from a library, etc. Consider
the history, culture, and past experiences of the Girl Scout members in your troop that could affect their ability to
equally participate in an activity. Work with members and families to understand how an activity is perceived.
Ensure that all Girl Scout members and their families feel comfortable and have access to whatever is needed to
fully participate, such as proper equipment, prior experiences, and the skills needed to enjoy the activity. See the
Equity section of the Introduction to Safety Activity Checkpoints for general advice about expense,

2024–2026 Safety Activity Checkpoints Page 94 of 226
Emergency Action Plan (EAP). Review and document your Emergency Action Plan (EAP) before starting any
activity and review it so all are prepared. Think through scenarios of what can go wrong such as an accident,
physical injury, missing person, sudden illness, or sudden weather or water emergencies.
Geocaching Checkpoints
Cachers should learn and understand terrain difficulty ratings. As appropriate for their grade level, Girl Scouts
can plan and have input about where to cache and which caches to locate by reading descriptions of the caches as
well as ratings about difficulty and terrain. Explain about the terrain of a geocaching site by learning about the
Difficulty/Terrain (D/T) Rating ahead of time. The ratings, which range from 1/1 to 5/5, measure the level of
difficulty for finding a cache and for navigating the terrain to the cache. A terrain rating of one typically means the
cache is accessible for people with disabilities.
Dress appropriately for the activity. Avoid wearing dangling earrings, bracelets, and necklaces that may become
entangled in underbrush in wilderness areas. Make sure footwear is appropriate to the location(s) in which you
will be geocaching; closed-toed shoes are required.
Be on the lookout for sharp edges, branches, cliffs, animals, insects, or anything else that may pose a safety
hazard or detour for the group. Be sure to practice Leave No Trace while geocaching so as not to disturb wildlife,
trample vegetation, or cross onto private property. Remove all garbage and discard, as appropriate.
Practice safe geocaching. To prevent injury when searching for caches, inspect areas with care before trekking
into potentially dangerous locations or placing hands into unknown nooks and crannies such as ground holes,
ponds, creeks, or urban buildings and structures.
Safety Gear. The gear you will need depends on the length of your trip, the location, and weather.
• Smartphone with geocaching app, or GPS device
• Compass (for emergencies if going to an unknown or wilderness area)
• Map (for emergencies if going to an unknown or wilderness area)
• Cache coordinates/details uploaded to the GPS device or written out
• First aid kit
• A working cell phone for emergencies (carried by an adult) or a specific backup plan
• Whistle for wilderness areas
• Clothing appropriate for the activity and weather
• Reusable water bottle
• Swag (or “stuff we all get”), which are the items that geocachers place into caches—usually small plastic
toys, key chains, sunglasses—for other geocachers to take once they’ve located a cache
• Topographical and/or standard map of geocaching area if going to an unknown area
• Daypack to carry personal belongings
• Hiking boots for wilderness areas or comfortable and sturdy walking shoes for urban environments

2024–2026 Safety Activity Checkpoints Page 95 of 226
Go-Karting
Council Approval: Required
Activity Permitted for: J C S A
Note: Go-karts that are privately owned or used for racing are not
permitted.
About Go-Karting
This checkpoint applies to “concession” go-karts, which are those found at amusement parks or other public
facilities with one driver and no more than one passenger. Girl Scouts may participate in go-kart activities that are
on a rail or curb system that helps keep the kart on the track (such as those that are an amusement park ride).
They must follow the weight and height restrictions set by the facility. Go-karts that are privately owned or used
for racing are not permitted.
Currently 44 out of 50 states regulate amusement parks. The six without state oversight are Alabama, Mississippi,
Montana, Nevada, Wyoming, and Utah. These states contain few, if any, amusement parks.
Include Girl Scout Members with Disabilities. Talk to Girl Scout members with disabilities and their caregivers.
Ask about needs and accommodations. Always be sure to contact the location and/or the instructor in advance to
ensure they are able to accommodate those with disabilities.
Equity. Find out height and weight restrictions and communicate the information with troop families. If someone
will not be able to participate, find another vendor that provides access to all. Consider the history, culture, and
past experiences of the Girl Scout members in your troop that could affect their ability to equally participate in an
activity. Work with members and families to understand how an activity is perceived. Ensure that all Girl Scout
members and their families feel comfortable and have access to whatever is needed to fully participate, such as
proper equipment, prior experiences, and the skills needed to enjoy the activity. See the Equity section of the
Introduction to Safety Activity Checkpoints for general advice about expense,
Emergency Action Plan (EAP). Review and document your Emergency Action Plan (EAP) before starting any
activity and review it so all are prepared. Think through scenarios of what can go wrong such as an accident,
physical injury, missing person, sudden illness, or sudden weather or water emergencies.

2024–2026 Safety Activity Checkpoints Page 96 of 226
Go-Karting Checkpoints
Select a safe site. Choose locations deemed legal and safe by state and local authorities and that meet council
approval.
Verify that all of the facility’s go-karts with two seats have them arranged side-by-side with separate safety belts
for each seat and that all go-karts are built and maintained to manufacturer’s specifications.
All karts must have:
• Passenger padding in place, with everything in good condition (seat bottom, seat back, steering wheel,
headrest, steering column)
• A speed governor to limit speed to no more than 25 miles per hour
• Rollover protection
• Chain and/or belt guards
• Properly guarded/shielded hot and/or moving parts
• Gas caps and all components in place and in proper working condition
• Fuel tanks properly secured with no leaks
• No fiberglass laceration hazards
Safety, warning, and instructional signage must be highly visible, in good repair, and appropriately placed, and
must note exposure risk. In addition, a maintenance program should be in effect for the go-karts, a minimum of two
attendants should be on the track during operations, and no bumping or reckless driving shall be permitted.
Tracks must have:
• A continuous containment system around the entire track except for the pit entrance and exit
• Minimum of a 10-pound BC-rated fire extinguisher, properly mounted, marked, charged, and easily
accessible to the pit attendants
• Within 70 feet of any point on the track, a minimum of a 10-pound BC-rated fire extinguisher must be
properly mounted, marked, charged, and accessible
• Entire perimeter restricts unauthorized access to track area
• Brake and gas controls return automatically and are properly labeled or color coded
Safety Gear
• Protective helmet with properly fitting safety harness that meets the American Society for Testing and
Materials (ASTM) F2416 or F1492 requirements, displaying the Safety Equipment Institute (SEI) seal
• Sneakers or sturdy shoes
• Any loose articles of clothing secured
• Long hair tied back or secured
On the Day of Go-Karting
• Dress appropriately. Avoid wearing dangling earrings, bracelets, and necklaces that may become
entangled in equipment.
• Practice safe go-kart procedures. Do not ram or bump into other go-karts.

2024–2026 Safety Activity Checkpoints Page 97 of 226
Hayrides
Council Approval: Required
Activity Permitted for: D B J C S A
About Hayrides
A hayride, also known as a hayrack ride, is a traditional activity in the U.S. and Canada consisting of a recreational
ride in a wagon or cart pulled by a tractor, horses, or truck that has been loaded with hay or straw for comfortable
seating. Hayrides originated with farm workers, including children, who rode loaded hay wagons back to barns for
unloading. It was one of the few times during the frenetic days of the haying season that workers could stop to rest.
Hayrides are a fun and enjoyable activity for all ages who are visiting a farm and the rides are often part of other
autumn festivities such as apple or pumpkin picking. Hayrides on Halloween are often dubbed “haunted hayrides.”
These hayrides sometimes incorporate special effects and actors portraying ghosts, monsters, and other spooky
creatures to attract thrill seekers and capitalize on the Halloween season.
Although hayrides are typically regarded as a safe and lighthearted activity, there have been incidents where
hayrides have flipped or veered off the road, resulting in terrible consequences. Therefore, it is very important to
follow the safety precautions and learn as much as you can about hayride safety ahead of time.
Learn More
• On farm and dairy hayride safety and hayride safety checklist: Safe Agritourism
Include Girl Scout Members with Disabilities. Talk to Girl Scout members with disabilities and their caregivers.
Ask about needs and accommodations. Always be sure to contact the location and/or the instructor in advance to
ensure they are able to accommodate those with disabilities.
Equity. Consider the history, culture, and past experiences of the Girl Scout members in your troop that could
affect their ability to equally participate in an activity. Work with members and families to understand how an
activity is perceived. Ensure that all Girl Scout members and their families feel comfortable and have access to
whatever is needed to fully participate, such as proper equipment, prior experiences, and the skills needed to enjoy
the activity. See the Equity section of the Introduction to Safety Activity Checkpoints for general advice about
expense,
Emergency Action Plan (EAP). Review and document your Emergency Action Plan (EAP) before starting any
activity and review it so all are prepared. Think through scenarios of what can go wrong such as an accident,
physical injury, missing person, sudden illness, or sudden weather or water emergencies.
Hayride Checkpoints
Consider the location. The hayride must take place on sectioned off property (such as fields) intended for hayride
use at a maximum speed of 10 miles per hour. Public roads and highways are not used or crossed.
Make sure the farm has adequate commercial insurance that covers the hayrides for hire in the amount of no
less than one million dollars auto liability insurance.

2024–2026 Safety Activity Checkpoints Page 98 of 226
Evaluate the wagon. Ensure that the wagon has sturdy steps and handrails for easy loading and unloading of
passengers. The wagon should have railings and seating. The cab walls should be three to four feet high.
The hauled vehicle is in good working order. It must meet all state and local safety requirements and display
proper identification showing these conditions have been met. The hauled vehicle has protective sides and rear
fencing or gates, as well as rear lights in working order. Any coupling of a trailer to a vehicle is appropriate to the
load and has a safety chain.
Evaluate the driver. A qualified adult driver who is licensed to drive a vehicle in the jurisdiction and is an adult at
least 21 years of age. Legal adult age is 18; however, based on the experience and maturity level needed for this
activity, 21 years of age is required (and 25 years old is preferred) to provide enough years of driving experience,
controlling the vehicle with child passengers, and hauling a trailer.
Assess the safety of the hayride site. Before participating in a hayride, ensure that hayride equipment
(tractor/truck, bales of hay) are secure, that vehicle weight limitations and seating capacities are not exceeded, and
that paths and trails are free of obstructions. Also, ensure that all are responsible riders who stay seated during the
hayride.
Learn and practice safe hayrides. For example, do not ride in the hauling vehicle. The hauled vehicle meets all
state and local safety requirements and displays proper identification showing these conditions have been met.
The hay or straw is properly stacked to prevent slipping. Sufficient seating space is allowed for each person. Riders
remain seated during the ride with no leaning over the edges, and legs and arms do not hang over the trailer.
Remain securely seated.
Do not ride in or on the tractor. The tractor or vehicle pulling the hay wagon must weigh more than the gross
weight of the heaviest wagon in tow, which is necessary for adequate traction and braking.
Adults accompany Girl Scouts on the hayride to meet the grade level–specific adult-to-youth ratios.

2024–2026 Safety Activity Checkpoints Page 99 of 226
Hiking
Council Approval: Not Required
Activity Permitted for: D B J C S A
About Hiking
Unlike short walks, hiking may involve lengthy, back-country walking trips and often requires sturdy boots to
provide traction on rocks and uneven trail beds. When practicing Leave No Trace while hiking, it is important for
hikers to leave trails as—or better than—they found them. Although the action of one hiker may not strongly affect
the environment, the effects of large groups of hikers can degrade trails.
Hiking is the ideal opportunity to learn and practice map and compass skills. Before heading out on a lengthy hike,
learn how to read a map and use a compass. Look at a map to understand where you started and where you plan to
finish. You can always check with your local, state, or national park for interesting and exciting trail ideas.
Note: For overnight hiking experiences, follow the guidance in Backpacking Safety Activity Checkpoints, Travel/Trips
Safety Activity Checkpoint, and Camping Safety Activity Checkpoints.
Learn More
• Make an emergency survival kit: REI—The Ten Essentials
• Locate hiking areas near U.S. metropolitan areas: All Trails
• American Hiking Society
• Leave No Trace
Include Girl Scout Members with Disabilities. Talk to Girl Scout members with disabilities and their caregivers.
Ask about needs and accommodations. Always be sure to contact the location and/or the instructor in advance to
ensure they are able to accommodate those with disabilities. For more information, visit Move United to find out
more about hiking for people of all abilities.
Equity. Consider the history, culture, and past experiences of the Girl Scout members in your troop that could
affect their ability to equally participate in an activity. Work with members and families to understand how an
activity is perceived. Ensure that all Girl Scout members and their families feel comfortable and have access to
whatever is needed to fully participate, such as proper equipment, prior experiences, and the skills needed to enjoy
the activity. See the Equity section of the Introduction to Safety Activity Checkpoints for general advice about
expense,
Emergency Action Plan (EAP). Review and document your Emergency Action Plan (EAP) before starting any
activity and review it so all are prepared. Think through scenarios of what can go wrong such as an accident,
physical injury, missing person, sudden illness, or sudden weather or water emergencies.

2024–2026 Safety Activity Checkpoints Page 100 of 226
Hiking Checkpoints
Keep it Girl Scout–led: youth should plan the activity. Encourage them to plan routes, activities, and guidelines
for dealing with problems that may arise with other groups of hikers.
Prompt Girl Scouts to share resources. Encourage hikers to distribute a list of hiking gear and supplies, and to
determine which resources can be shared. Gear does not need to be high-tech. Safety and comfort are the most
important considerations. Be sure all participants have a good understanding of how to practice the Leave No
Trace principles on the hike.
Choose an appropriate hiking route. Terrain, mileage, and hiking time should be known to the hikers in advance.
Hikes are restricted to a reasonable length as determined by age, level of experience, nature of the terrain, physical
condition of the hikers, disabilities, weather conditions, and time of day. The hiking pace must always
accommodate the slowest hiker.
Assess safety of hiking routes. The route needs to be known to at least one of the adults or a report is obtained in
advance to assess potential hazards, such as poisonous plants, dangerous animals, unsafe drinking water, cliffs, and
drop-offs. Ensure that a land management or similar agency is contacted during the trip planning stage to
determine available routes, recommended group size, water quantity and quality, and which permits are needed.
Ensure hikers have a comprehensive understanding of the trip. Group members are trained to be observant of
the route, surroundings, and fatigue of individuals. Instruction is given on the safety rules for hiking, such as
staying together in a group, recognizing poisonous plants and biting or stinging insects and ticks, respecting wild
animals, practicing Leave No Trace, and behaving effectively in emergencies. Ensure that Girl Scouts, based on their
level, know how to read maps, use a compass, navigate a route, and estimate distance.
Respect the environment and keep trails clean. Use the principles of Leave No Trace. Carry out food and all
trash. Hike on established trails. Do not remove natural materials, such as leaves or branches. In addition, avoid
eating wild foods, walking on or uprooting plants, interfering with or feeding wild animals, and littering.
Practice safe hiking. Instructions should be given on the safety rules for hiking, which include forbidding hiking
off the trail and after dusk. Stay on the pathway to avoid trampling trailside plants and causing erosion. In addition,
be sure to take adequate rest periods with time to replenish fluids and eat high-energy food (such as fruits and
nuts). Take proper precautions in areas where poisonous plants, snakes, or ticks are prevalent.
Safety Gear. The gear you will need will depend on the length of your trip, the location, and weather.
• A water bottle or hydration pack with enough water for each girl for the length of the hike
• Sturdy footwear based on the type of trails and length of the hike
• Map and compass or GPS device
• Flashlight, whistle, pocket knife
• A working cell phone held by designated adult for emergencies
• An emergency survival kit

2024–2026 Safety Activity Checkpoints Page 101 of 226
Horseback Riding
Council Approval: Required
Activity Permitted for: *D B J C S A
*Daisies are only permitted for pony rides and hand-led horseback walks.
About Horseback Riding
Horseback riding teaches responsibility, patience, discipline, understanding, empathy, compassion, problem
solving, and self-control. It allows Girl Scouts to see the world from a different perspective (on top of a horse!) and
can build their confidence and self-esteem. Important aspects of horseback riding include showing respect for
horses and learning to better understand communication between humans and animals.
The purpose of these checkpoints is to provide tips for trail riding and ring or corral riding. Some activities, such as
vaulting, pack trips, driving, and games, may require special equipment, as well as horses and instructors with
specialized training.
Learn More
• American Camp Association
• Certified Horsemanship Association
• Horse Illustrated
Include Girl Scout Members with Disabilities. Talk to Girl Scout members with disabilities and their caregivers.
Ask about needs and accommodations. Always be sure to contact the location and/or the instructor in advance to
ensure they are able to accommodate those with disabilities. For more information, visit Move United to learn
more about equipment, adaptations, and finding a program near you.
Equity. Consider the history, culture, and past experiences of the Girl Scout members in your troop that could
affect their ability to equally participate in an activity. Work with members and families to understand how an
activity is perceived. Ensure that all Girl Scout members and their families feel comfortable and have access to
whatever is needed to fully participate, such as proper equipment, prior experiences, and the skills needed to enjoy
the activity. See the Equity section of the Introduction to Safety Activity Checkpoints for general advice about
expense,
Emergency Action Plan (EAP). Review and document your Emergency Action Plan (EAP) before starting any
activity and review it so all are prepared. Think through scenarios of what can go wrong such as an accident,
physical injury, missing person, sudden illness, or sudden weather or water emergencies.

2024–2026 Safety Activity Checkpoints Page 102 of 226
Horseback Riding Checkpoints
Verify instructor knowledge and experience. Riding instructors are adults (at least 18 years old) who have
current certification from an accredited horsemanship instructor training organization, such as the Certified
Horsemanship Association and American Association for Horsemanship Safety, or documented proof of a minimum
of three years’ experience successfully instructing in a general horseback riding program. Assistant riding
instructors are at least 16 years old and are certified by an accredited horsemanship instructor training
organization or have documented proof of at least one year experience successfully instructing in a general
horseback riding program.
Instructors or assistant instructors supervise riders when in the proximity of horses, whether mounted or not.
For ring or corral riding and trail riding, at least one instructor and one assistant instructor supervise a group of
ten or fewer riders. For ring and corral riding, one additional instructor is required for every five additional riders.
For beginners and younger riders, or for difficult trails, more instructors may be needed.
Connect with your Girl Scout council for approved sites or site suggestions. The stable operator should be
able to confirm one million dollars general liability insurance and instructor certifications upon request. It is
recommended that you request a certificate of insurance to document evidence of insurance coverage; most
facilities will accommodate this request if they are able to administratively.
Assess participants’ maturity level. Riders must possess sufficient physical coordination and balance to
participate in riding. They need to be old enough to understand and practice safety procedures, to use good
judgment in reacting to situations, and to take responsibility for themselves and their horses. Stables may have
weight limits for rider eligibility, so check with the stable when making reservations.
Select a safe site. Check with council staff to see if an approved vendor list is offered. If the council does not have
an approved vendor list, call the facility to determine the following safety information in order to select a safe site.
• Check the condition of the facility. For both Girl Scout council–owned and non–Girl Scout riding facilities,
the riding area is away from outside distractions and free of debris; the barn and riding areas do not have
exposed barbed wire fencing; the instructional rings, corrals, paddocks, and stables have clearly posted
rules and regulations; the horses are properly cared for; and the stables, corrals, and barns are clean and
uncluttered. Tack (e.g., saddles, bridles, stirrups, girth) is clean and in good condition.
• Talk to the staff. Communicate with the horseback riding organization about any specifics such as
experience levels, age, height, and weight. Ask questions so that the stable manager can help choose the
best horses for your group.
Dress appropriately for the activity. Avoid wearing dangling earrings, bracelets, and necklaces. Riders may not
ride barefoot or in sandals. They should wear boots or closed-toe shoes with a smooth sole and at least a half-inch
heel to prevent feet from sliding through stirrups. Riders should not wear backpacks, day packs, or fanny packs.
Learn about safe horseback riding. A pre-ride demonstration should be given to first-time riders, including
mounting, dismounting, starting, stopping, steering, and maintaining a balanced body position. Avoid changing
clothing, such as putting on raingear, while mounted on the horse, because it may scare the horse; instead,
dismount for clothing changes or adjustments.
Test and classify riders according to riding ability. The horse and the riding area are assigned according to the
rider’s ability. Beginning riders should attend an introductory safety lesson, including information on horse
psychology and behavior and approaching, handling, and leading a horse. Before trail riding, all riders should
warm up in a ring or corral to ensure that they are well suited to their horses and can control the gait and function
required during the trail ride. Ensure that riders feel confident and demonstrate basic skills in controlling the
horse (stop, start, steer) and maintaining proper distance.
Follow basic horseback safety standards. To ensure gear fits properly and/or is properly adjusted, an instructor
should make a safety check of each rider’s clothing, footwear, helmet, and saddle. He or she needs to check stirrup

2024–2026 Safety Activity Checkpoints Page 103 of 226
length to ensure that riders can raise their behinds off the saddle about one hand’s depth. Front and rear cinches
are checked for tightness, twigs, folds, and bends. The instructor should also check the safety of the riding area
before each session. Only one rider is allowed on a horse at any time, and there should be no eating or drinking
while riding. Riders should dismount before going through small gates.
Respect ring and corral standards. The trainer should continuously watch each horse and rider, always. The ring
has good footing for the horses and is free of dangerous obstructions. The fencing must be at least 42 inches high,
visible, and well maintained. Gates to the ring should remain shut.
Inspect and do not spook horses. Horses displaying uncomfortable or abnormal behaviors should be dismounted
and checked for injuries and poor equipment fitting and may need to be walked back to the stable on foot. If a
horse gets loose, do not chase it; instead, have an adult calmly attempt to retrieve the horse.
Respect trail-riding standards. The length of the trail ride and the gait of the horses should be geared to the
ability of the least experienced rider. Riding trails should have good footing and be free of dangerous obstructions,
such as low hanging branches. Trails are marked, mapped, regularly inspected, and maintained. The participants
should ride single file, one full horse length apart, with an instructor at the head and at the rear of the group. Riders
must have control of horses, maintain the spacing between horses, and increase distances between horses when
the horses’ speed increases. Horses are to be walked (not ridden) up and down hills and should be walked for the
final ten minutes of any riding period to cool down.
Avoid public roads and highways whenever possible. If a group must cross a road, the instructor should first
halt the group in a line well before the road, check for traffic, and then signal the group to cross. At the signal, all
horses are to be turned to face the highway and all cross at the same time.
Safety Gear
• Protective headgear with a properly fitting safety harness that meets the American Society for Testing and
Materials (ASTM) F1163-88 requirements, displaying the Safety Equipment Institute (SEI) seal
• Long pants and appropriate protective clothing that is not too loose, to prevent tangling with the saddle
• Boots or closed-toe shoes with a smooth sole and at least a half-inch heel to prevent feet from sliding
through stirrups (no steel-toe shoes, which could bend in stirrups)
• A saddle (sized appropriately for each rider), which the facility will provide
• Extra halter/lead ropes carried by instructor, which the facility will provide
• Cell phone or walkie-talkies to communicate need for emergency services
• Tapaderos (pieces of heavy leather around the front of the stirrup of a stock or range saddle to protect the
rider’s foot and to keep the foot from sliding through the stirrup). If the saddle does not have tapaderos, the
rider should have riding boots with at least a 1-inch heel to prevent the foot from slipping.
• Well-fitting gloves to protect hands from blisters, rope burns, and cuts
• Saddlebag for lengthy trail rides, to carry items such as a water bottle, clothing layers, and lunch

2024–2026 Safety Activity Checkpoints Page 104 of 226
Ice Skating and Roller Skating
Council Approval:
Not Required for indoor/rink skating.
May Be Required for skating on frozen lakes.
Activity Permitted for: D, B, J, C, S, A
About Skating
Roller and ice skating are much loved Girl Scout activities. They are also a very common activity for injuries and
insurance claims, so always plan ahead and stress the importance of safety. Indoor skating, whether ice skating or
roller skating, will most likely not require a helmet. If the facility offers safety gear, including helmets or wrist
guards, always opt to take the safety gear. Always check with your council for prior approval when planning to ice
skate on frozen lakes.
Know where to skate. Connect with your Girl Scout council for site suggestions. Skate at night only in well-lit
areas. For skating on frozen lakes, always select a site designated for skating and confirm temperature and ice
conditions are safe for skating. Prior approval from your council may be required for skating on frozen lakes.
Learn More
• Recreational Ice Skating
• Roller Skating Association International
• Minnesota Department of Natural Resources’ Ice Thickness Guide
Include Girl Scout Members with Disabilities. Talk to Girl Scout members with disabilities and their caregivers.
Ask about needs and accommodations. Always be sure to contact the location and/or the instructor in advance to
ensure they are able to accommodate those with disabilities. For more information, visit Inclusive Skating.
Equity. Consider the history, culture, and past experiences of the Girl Scout members in your troop that could
affect their ability to equally participate in an activity. Work with members and families to understand how an
activity is perceived. Ensure that all Girl Scout members and their families feel comfortable and have access to
whatever is needed to fully participate, such as proper equipment, prior experiences, and the skills needed to enjoy
the activity. See the Equity section of the Introduction to Safety Activity Checkpoints for general advice about
expense,
Emergency Action Plan (EAP). Review and document your Emergency Action Plan (EAP) before starting any
activity and review it so all are prepared. Think through scenarios of what can go wrong such as an accident,
physical injury, missing person, sudden illness, or sudden weather or water emergencies.

2024–2026 Safety Activity Checkpoints Page 105 of 226
Ice Skating and Roller Skating Checkpoints
Select a safe site. Obtain council guidance in selecting the skating site. Ensure the rink has a smooth skating
surface free of debris. The rink manager is called in advance to arrange for large groups or for practice sessions.
The rink is adequately staffed to monitor the size of the crowd. Local ordinances or parks offices are checked to see
whether skating is permitted on bike paths or in city parks.
Select proper-fitting skates. Participants receive instruction in selecting the proper skate size. Skates are
properly fitted, securely laced, and properly tied. Skate wheels, boots, and plates are kept clean and in good
condition and are inspected. Never skate with broken or missing laces. No dangling decorations are attached to the
laces.
Prepare for emergencies. Ensure the presence of a first aid kit and a first aider with a current certificate in first
aid, including adult and child CPR or CPR/AED, who is prepared for cases of injury from falls, especially abrasions.
If any part of the activity is located 30 minutes or more from emergency medical services, ensure the presence of a
first aider with Wilderness First Aid certification.
Practice safe outdoor skating. Outdoors, skate in areas where traffic or pedestrians will not interfere. Check local
ordinances for any restrictions. Skate in the street or in a parking lot only if it is closed to traffic. When skating on a
walkway, yield to pedestrians. Skate on the right side, pass on the left.
Follow basic inline and roller-skating safety standards. Respect safety rules, such as:
• Everyone skates in the same direction.
• Do not stop in the main skating area (when skating in a rink).
• Skaters yield the right-of-way to those already in the rink.
• Skaters do not cut across the paths of other skaters.
• Skaters do not push, shove, or race.
• A falling skater does not grab hold of another skater.
• A fallen skater rises quickly, unless injured.
• Never skate faster than your ability to stop.
• Skaters do not wear headphones while skating.
• Loose or sharp articles, such as handbags, combs, and keys, are not carried onto the rink.
• Keep skates in top shape. Avoid water, sand, and debris, which damage wheel bearings.
• Learn how to brake and stop. Before skating, read about the safest ways to stop. Moves include the wall
stop, the brake-pad, and the snowplow.
Safety Gear (for skating outdoors and inline skating)
• Bike helmet or other helmet with the American National Standards Institute or SNELL Memorial
Foundation seal, or both (helmets must be as snug as possible and be worn low over the forehead,
approximately 1 inch above the eyebrows)
• Wrist guards that fit like gloves
• Clothing that allows freedom of movement
• Long-sleeve shirt to help prevent scrapes
• Snug-fitting elbow pads and kneepads
For frozen lake skating, take the Ice Safety Quiz (also used for Ice Fishing) on the next page.

2024–2026 Safety Activity Checkpoints Page 106 of 226
Ice Safety Quiz
Please read information from both the Minnesota and Wisconsin Departments of Natural Resources’ websites on
ice safety. Then take the quiz below with your troop to check your knowledge!
• Ice Safety—MN Department of Natural Resources
• Ice Safety—WI Department of Natural Resources
True or False
1. Booming and cracking ice is very dangerous.
2. Ice freezes uniformly. If the ice is 12 inches thick in one area of the lake, then it is 12 inches thick
everywhere else.
3. New clear ice is the safest, strongest ice.
4. If you fall through, you should remove your winter clothes immediately in the water to help keep you
afloat.
5. Ice 6 inches thick can support a pickup truck.
6. A ladder can be used to assist someone who has fallen through the ice.
7. Ice claws are simple to make at home and a very convenient tool to help yourself get out of the water.
8. If you were to fall through, you should swim away from where you came from, since that ice must be very
thin.
9. It is recommended to wear a life jacket underneath a winter coat while on the ice.
10. Cold blood can linger in your arms and legs and suddenly rush to your heart and cause cardiac distress.
Short Answer
1. Where can you find information about lake conditions?
2. What are some ways to measure the thickness of the ice?
3. What are some items that you should always bring with you out onto the ice?
4. What five ways can you assist someone exiting the lake after breaking through?
5. After someone falls through and they successfully exit the water, how would you treat them for
hypothermia?

2024–2026 Safety Activity Checkpoints Page 107 of 226
Indoor Skydiving
Council Approval: Required
Activity Permitted for: D B J C S A
About Indoor Skydiving
Indoor skydiving takes place in a vertical wind tunnel (a wind tunnel that moves air in an upward column) to
simulate the experience of skydiving without planes or parachutes. The force of the wind generated in the tunnel is
based on the size (height and weight), skill level, and needs of the “skydiver.” Each participant “flies” within a
column of wind created by the wind tunnel—and the skydiver floats 3 to 6 feet above a trampoline-like net, so if
the fan fails, the participant falls into the net and is caught. There are many facilities in the United States that
operate vertical wind tunnels for recreation and training; only those facilities with indoor vertical wind tunnels are
permitted for use by Girl Scouts.
With this activity, Girl Scouts get to simulate actual (outdoor) skydiving, including learning about and wearing
skydiving gear such as a jumpsuit, goggles, a helmet, eye protection, and earplugs (for the noise).
Learn More
• Explanation of indoor skydiving: iFLY
• Indoor Skydiving World
Include Girl Scout Members with Disabilities. Talk to Girl Scout members with disabilities and their caregivers.
Ask about needs and accommodations. Always be sure to contact the location and/or the instructor in advance to
ensure they are able to accommodate those with disabilities. Also note that even without disability, indoor
skydiving is not safe for some bodies; refer to the Physical Restrictions on the next page. Discuss these restrictions
with Girl Scout members and their caregivers. Consider alternate plans if everyone can’t participate.
Equity. Communicate any height, weight, or other restrictions to families in advance. Consider the history, culture,
and past experiences of the Girl Scout members in your troop that could affect their ability to equally participate in
an activity. Work with members and families to understand how an activity is perceived. Ensure that all Girl Scout
members and their families feel comfortable and have access to whatever is needed to fully participate, such as
proper equipment, prior experiences, and the skills needed to enjoy the activity. See the Equity section of the
Introduction to Safety Activity Checkpoints for general advice about expense,
Emergency Action Plan (EAP). Review and document your Emergency Action Plan (EAP) before starting any
activity and review it so all are prepared. Think through scenarios of what can go wrong such as an accident,
physical injury, missing person, sudden illness, or sudden weather or water emergencies.

2024–2026 Safety Activity Checkpoints Page 108 of 226
Indoor Skydiving Checkpoints
Learn ahead of time. Ensure that all first-time participants will be given instruction in how to properly wear and
adjust gear and how to float and move in the vertical wind tunnel. All legitimate centers provide instruction.
Practice before flying. With guidance from your instructor, practice body positions ahead of time.
Fall with style. There are several maneuvers skydivers can do while in the wind tunnel including flips, spins, and
turns. First-time skydivers will not likely perform or learn any of these maneuvers. This depends on skill level, the
instructor, and council guidelines.
Size up gear. Ensure the appropriate sizes of helmets, flight suits, and goggles are available, and make sure
helmets and goggles fit faces securely and comfortably. Make certain that members with glasses or contacts have
goggles that properly accommodate them.
Safeguard valuables. Do not leave personal belongings and valuables unattended in a public place. Most indoor
skydiving facilities provide a locker area for personal belongings. Check with the facility ahead of time about cost
and availability of the facility’s storage options.
Verify instructor knowledge and experience. Ensure the instructor holds instructional certification from the
International Bodyflight Association or has council-approved equivalent certification or documented experience
and skill in teaching and/or supervising indoor skydiving. If you have questions about certification or instructor
knowledge, contact the International Bodyflight Association.
Ensure youth stay with an adult. Confirm that the instructor will lead fliers to the flight chamber, be with them
during the flight experience, and spot them the entire time. The instructor should also lead participants out of the
flight chamber.
Physical Restrictions
• This activity is not recommended for those with a history of heart trouble.
• Because the body must be in an arched position with hips forward, people with back issues that prevent
this body position should avoid flying.
• It is recommended that people with prior shoulder dislocations do not fly, due to a significant amount of
wind on shoulders.
• Those who are pregnant should not fly.
• Participants must weigh less than 250 pounds.
• Verify height and weight restrictions at each location.
• Any other serious health issues should be cleared by a physician prior to flying. Check with specific
locations for their restrictions before booking a flight.
Safety Gear. These items are provided by the facility:
• Helmet (full face or open face)
• Goggles
• Flight suit

2024–2026 Safety Activity Checkpoints Page 109 of 226
Indoor Trampoline
Council Approval: May Be Required
Activity Permitted for: *D B J C S A
Activity Not Permitted for: *Daisies younger than six years old
About Indoor Trampolines
Indoor trampolines make for a fun and exciting activity. Indoor trampolines are typically offered in an enclosed
gymnasium-like space with several different trampolines of varying sizes and shapes. Sometimes a facility is
equipped to connect trampolines and turn an entire room into one massive trampoline. Indoor trampoline courts
are contained, low-impact, and adjustable to the size and skill level of participants.
Indoor trampoline parks have padded walls and soft (sometimes foam) pits and landing areas and feature huge
trampolines divided into sections for individual bouncers. Most offer other activities, such as pits filled with foam
cubes to jump into and trampoline basketball courts.
There should always be a trained staff member around to monitor the group size and ages to make sure proper
grade levels are kept where they belong. Trained staff members will also monitor the safe behavior and overall
well-being of participants. If possible, visit the facility ahead of time to determine that the facility maintains clean
and sanitary equipment, particularly equipment used regularly and often by young children.
The American Academy of Orthopedic Surgeons specifically states that trampoline jumping is unsafe for the
skeletal frame of children younger than six years old. For this reason, Daisies may not be permitted to participate
in indoor trampoline activities, depending on their age. Also, there are a high number of incidents and significant
injuries associated with outdoor or makeshift trampolines that are set up on temporary stilts or a metal frame. For
this reason, both outdoor trampolines and personally owned trampolines are not permitted.
Include Girl Scout Members with Disabilities. Talk to Girl Scout members with disabilities and their caregivers.
Ask about needs and accommodations. Always be sure to contact the location and/or the instructor in advance to
ensure they are able to accommodate those with disabilities.
Equity. Consider the history, culture, and past experiences of the Girl Scout members in your troop that could
affect their ability to equally participate in an activity. Work with members and families to understand how an
activity is perceived. Ensure that all Girl Scout members and their families feel comfortable and have access to
whatever is needed to fully participate, such as proper equipment, prior experiences, and the skills needed to enjoy
the activity. See the Equity section of the Introduction to Safety Activity Checkpoints for general advice about
expense,
Emergency Action Plan (EAP). Review and document your Emergency Action Plan (EAP) before starting any
activity and review it so all are prepared. Think through scenarios of what can go wrong such as an accident,
physical injury, missing person, sudden illness, or sudden weather or water emergencies.

2024–2026 Safety Activity Checkpoints Page 110 of 226
Indoor Trampoline Checkpoints
Safeguard valuables. Don’t leave personal belongings and valuables unattended in a public place. Check with the
facility ahead of time about cost and availability of the facility’s storage amenities.
Ensure Girl Scouts learn how to trampoline safely. All participants will be given instruction in safety and
jumping rules. All legitimate centers provide instruction; it is up to the adult organizing the activity to ensure it
takes place. The operator must ensure that each participant receives instruction (in-person or video training)
about potential risks and safety guidelines. Participants/guardians will sign a waiver that they have received the
training.
Obey rules. There should be clearly posted rules that prohibit roughhousing, double bouncing (when two jumpers
land close to each other at the same time), clothing that could be dangerous (such as belt buckles and studs), and
loose objects like key chains.
Check equipment. Padding should completely cover all trampoline springs. There should be a system of nets
below the trampolines. If the park has a foam pit, it should have a trampoline bed underneath it.
Learn and follow common safety rules for indoor trampolines:
• Nothing (including gum or candy) should be in mouths while on the trampoline court.
• Pockets should be emptied entirely.
• Do not sit or lie on the court. To rest, exit the court.
• No pushing, running, racing, or horseplay of any kind.
• No touching or hanging on the top pads on the court.
• Be in control of your body, always.
• Jumpers should be separated by size to the greatest degree possible.
• Be aware of those around you and jump with people of similar size.

2024–2026 Safety Activity Checkpoints Page 111 of 226
Inflatables
Council Approval: May Be Required
Activity Permitted for: *D *B J C S A
Includes:
• Aquatic inflatables
• Bounce houses and land inflatables
• Bubble soccer
• Log rolling (with synthetic logs)
• Amusement/theme parks with inflatables
*Daisies may not participate in aquatic bounce houses.
*Daisies and Brownies may not participate in aquatic climbing walls.
*Daisies may only participate in bounce houses that are specific for their age, height, and/or weight.
*Daisies and Brownies may not participate in bubble soccer.
About Inflatables
Most inflatables can be found at events and in public facilities and parks, and some commercial ones may be
available to rent. Verify with your council on specific information needed for renting commercial inflatables. Verify
with your council if any additional approvals need to be made in addition to checking with local governing agencies
to ensure all safety guidelines are being followed.
Aquatic climbing walls, slides, bounce platforms, and obstacle courses are made from a variety of
materials and placed in the deep end of a pool or lake.
Bounce houses, closed inflatable trampolines, bouncy houses, bouncy castles, moon bounces,
moonwalks, jumpers, and other land inflatables are temporary inflatable structures and buildings used for
recreational purposes, particularly for children.
Bubble soccer is an exciting twist on the traditional game of soccer. Players are wrapped in a giant, soft
inflatable bubble ball with shoulder harnesses and handles inside.
Log rolling with synthetic logs can be done in a pool or lake and for all ages.
Learn More
• International Association of Amusement Parks and Attractions
Include Girl Scout Members with Disabilities. Talk to Girl Scout members with disabilities and their caregivers.
Ask about needs and accommodations. Always be sure to contact the location and/or the instructor in advance to
ensure they are able to accommodate those with disabilities. Information on accommodations for inflatable parks
are similar to amusement parks. Learn about water safety for children with special needs.
Equity. Consider the history, culture, and past experiences of the Girl Scout members in your troop that could
affect their ability to equally participate in an activity. Work with members and families to understand how an
activity is perceived. Ensure that all Girl Scout members and their families feel comfortable and have access to
whatever is needed to fully participate, such as proper equipment, prior experiences, and the skills needed to enjoy
the activity. See the Equity section of the Introduction to Safety Activity Checkpoints for general advice about
expense,
Emergency Action Plan (EAP). Review and document your Emergency Action Plan (EAP) before starting any
activity and review it so all are prepared. Think through scenarios of what can go wrong such as an accident,
physical injury, missing person, sudden illness, or sudden weather or water emergencies.

2024–2026 Safety Activity Checkpoints Page 112 of 226
Inflatables Checkpoints
Connect with your Girl Scout council for approved sites or site suggestions to confirm the location is vetted.
Allow enough time to have the location approved.
Select a safe site. Ensure that sites or rented inflatables follow applicable safety precautions:
• Aquatic climbing walls, slides, bounce platforms, and obstacle courses are placed in the deep end of
the pool, or a lake. Participants need to be strong swimmers who can swim in water deeper than 5 feet.
Non-strong swimmers need to wear a life vest, properly fitted and appropriate to their weight. Sufficient
lifeguards, with clear view of all areas, are on duty.
• Bounce houses and other land inflatables are properly secured to the ground, especially in windy
weather. Ensure the number of participants in a bounce house at a time does not exceed manufacturer
recommendations for safety. On inflatable slides, obstacle courses, etc., take turns and wait for the person
ahead to exit before going in.
• Bubble soccer should be played on a flat area that is free of obstacles, pillars, trees, stumps, rocks, and
roots. Only one person in a ball at a time. No rolling down hills while wearing a ball. Bubble should be fully
covering at least 8 inches above the head to allow for rollovers and head protection. Players should not run
full speed and should only bump into players with light to moderate speed. Players should not bend down
when bumping another player, instead using the sides of the bubble, not the top, for impact with other
players. Players should not lift the bubbleball via the handles except to get up.
• Log rolling with synthetic logs needs to be done in water that is at least 2 feet deep. Log needs to be at
least 10 feet from any obstructions, e.g., walls, rocks, trees, beach, etc. Log should be aligned perpendicular
(as a T) to dock, pool edge, hard objects, etc. Beginners should have someone holding log as they get on.
Non-strong swimmers should wear a life vest, properly fitted and appropriate to their weight, if the water
is above their knees. Beginners should use “trainers” to slow the log down.
Inquire about adequate insurance. The park you attend may or may not be able or willing to provide a certificate
of insurance as evidence of one million dollars general liability insurance and instructor certifications upon
request, depending on the size of the group. It’s best to inquire and have the conversation in order to verify
credibility of the park’s management.
For water parks, follow Swimming Safety Activity Checkpoints. Pay particular attention to water park safety rules.
Ensure there are certified lifeguards at each activity. A swim assessment is highly recommended prior to the trip—
or before starting inflatable use—to evaluate ability. Swimmers who are not proficient should wear a life vest.
Know where participants are at all times. Keep track of whereabouts. Conduct a head count before and after
activities. Ensure participants know where to go and how to act when confronted by strangers or intruders.
Review plans upon arrival. Adults should obtain a copy of the park guide to facilitate the visit and gain important
information on park policies and the location of restrooms and the first aid station.
Have a predetermined meeting spot. Adults should discuss plans for the visit with youth and set a place to meet
in case the group gets separated.
Know where the first aid station is located. Ensure the presence of a first aid kit and a first aider with a current
certificate in first aid, including adult and child CPR or CPR/AED, who is prepared to handle cases of abrasions,
sprains, and fractures.

2024–2026 Safety Activity Checkpoints Page 113 of 226
Miscellaneous Activities
Council Approval: May Be Required
Activities Permitted for: See Activities at a Glance for
grade level permissions.
Includes:
• STEM, Arts, Crafts
• Land sports
• Skateboarding
• Laser tag
• Segway
About Miscellaneous Activities
STEM, Arts, Crafts. From crafting and the arts to STEM projects, Girl Scouts create, develop, and engage in a
variety of projects. The activities are broad and varied and can include painting, pottery, beading, sewing,
astronomy exploration, and engineering design and investigation, to name just a few.
Land Sports. Depending on location, these sports can be played year-round or during a specific time of year,
indoors or outdoors. The category is intended to include all land sports, including soccer, basketball, flag football,
softball, hockey, basketball, tennis, and more.
Laser Tag. This popular activity usually takes place at an indoor venue but can be done outdoors as well. This tag
game is played by using laser guns with infrared beams. Laser tag vests or other types of specific clothing may be
used and, if so, are available at the facility. This is a fun and exciting way to learn teamwork and good
sportsmanship as well as healthy camaraderie!
Segway. A Segway is a personal transportation device that has become very popular in tourist areas. It is an
automated standing cartlike machine with two wheels and a steering bar. Not quite driving, but close to it. Helmets
are worn for Segway and this activity is recommended only for Seniors and Ambassadors.
Skateboards. Skateboarding is a land activity in which a person can ride in a standing or crouching position using
a variety of boards and wheels and propelling themselves by occasionally pushing one foot against the ground.
Helmets and wrist guards are required.
Equity. Consider the history, culture, and past experiences of the Girl Scout members in your troop that could
affect their ability to equally participate in an activity. Work with members and families to understand how an
activity is perceived. Ensure that all Girl Scout members and their families feel comfortable and have access to
whatever is needed to fully participate, such as proper equipment, prior experiences, and the skills needed to enjoy
the activity. See the Equity section of the Introduction to Safety Activity Checkpoints for general advice about
expense,
Emergency Action Plan (EAP). Review and document your Emergency Action Plan (EAP) before starting any
activity and review it so all are prepared. Think through scenarios of what can go wrong, such as an accident,
physical injury, missing person, sudden illness, or sudden weather or water emergencies.

2024–2026 Safety Activity Checkpoints Page 114 of 226
Offshore Water Vessels
Council Approval: *Required
*Council prior approval is not required for commercial transportation
such as ferries.
Activity Permitted for: D B J C S A
Large Passenger Vessels, includes:
• Ferries / Cruise ships
• Chartered fishing boats
• Airboats
• Pontoons
• Whale watching / Tour boats
About Offshore/Large Passenger Water Vessels
Large passenger water vessels include ferries, cruise ships, tour boats, sport-fishing boats, airboats, whale-
watching boats, airboats, pontoons, and privately owned boats and yachts. They can be either commercial or
recreational vessels.
Amphibious boats known as duck boats are not recommended due to the hybrid (land to sea) nature of these
vehicles, the notable lack of regulation around safety and evacuation protocols, and the severity of loss with recent
duck boat accidents.
Note: Small craft, such as canoes, kayaks, row boats, small sailboats, and waterski or wakeboard boats are not
considered offshore / large passenger water vessels. If you plan to use these types of small craft, see the individual
activity’s safety activity checkpoints for the type of small craft you will be using.
Learn More
• Free basic boating safety courses for each state and where to borrow life jackets in all 50 states: Boat U.S.
Foundation
• Resources, regulations, and statistics: U.S. Coast Guard*
*The United States Coast Guard app (iOS and Android) provides state boating information, a checklist of required
safety equipment, and a way to report hazards, pollution, or suspicious situations.
Include Girl Scout Members with Disabilities. Talk to Girl Scout members with disabilities and their caregivers.
Ask about needs and accommodations. Always be sure to contact the ship or boat operator to determine any access
or safety steps that need to be arranged in advance. For more information visit the United States Access Board for
information on ADA Passenger Vessels Accessibility Guidelines.
Equity. Consider troop members’ confidence on or around water. Swimming ability can greatly impact participant
comfort in aquatic settings. Check in with families and help build progressive experiences or options to support
participation. Consider the history, culture, and past experiences of the Girl Scout members in your troop that
could affect their ability to equally participate in an activity. Work with members and families to understand how
an activity is perceived. Ensure that all Girl Scout members and their families feel comfortable and have access to
whatever is needed to fully participate, such as proper equipment, prior experiences, and the skills needed to enjoy
the activity. See the Equity section of the Introduction to Safety Activity Checkpoints for general advice about
expense,
Emergency Action Plan (EAP). Review and document your Emergency Action Plan (EAP) before starting any
activity and review it so all are prepared. Think through scenarios of what can go wrong such as an accident,
physical injury, missing person, sudden illness, or sudden weather or water emergencies.

2024–2026 Safety Activity Checkpoints Page 115 of 226
Offshore Water Vehicles / Large Passenger Vessels Checkpoints
Teach Girl Scout members these general safety rules:
• Do not run at any time while on the vessel, dock, or near the water.
• Listen to the orientation and follow the rules noted.
• Use the buddy system.
• Follow instructions in an emergency.
• Find out what to do if someone falls overboard or if other accidents occur.
Select a qualified operator. Commercial vessel operators are licensed through the U.S. Coast Guard. In foreign
waters, the “flag of the ship” (the country under which it is registered) dictates the training and licensing required.
These standards can vary widely. In the United States, passenger vessels (ferries, cruise ships, and whale-watching
boats) that carry more than six passengers are licensed by the U.S. Coast Guard. The Coast Guard examines
operator training and certification, vessel condition, and safety equipment. Federal laws and regulations are
supplemented by state laws and international navigation standards.
All Vessels: Carbon Monoxide Warning. Never allow “teak surfing,” swim platform dragging, or bodysurfing
behind any vessel. Do not operate a motor or generator while anyone is on or holding onto a swim platform, swim
deck, swim step, or swim ladder, except for a very brief amount of time when docking or entering/exiting the
vessel. Carbon monoxide emitted at the stern (back) of the boat can cause death in these situations.
Passenger Vessel with a Commercial License. In the United States, you can expect a passenger vessel with a
commercial license to:
• Give a basic safety orientation, possibly through a loudspeaker. The orientation should cover the location of
life jackets and other critical information. On cruise ships, an evacuation drill may be held.
• Have a professional, licensed crew that has training and experience in handling emergency situations.
• Possess current liability insurance.
• Be a well-maintained vessel being used as it was designed to be used.
• Know about state and federal regulations for life jackets. If you are instructed to use a life jacket, you must
do so.
Privately Owned Recreational Vessels. In the United States, privately owned recreational vessels (yachts) are
governed by Coast Guide requirements and by state training and licensing requirements, which vary by state.
When in doubt, follow the guidelines that are most strict. Check with the owner about these items:
• The operator must have sufficient training and be licensed to operate that type of vessel. Contact your
council or the U.S. Coast Guard Auxiliary for guidance. Training includes safe operation, weather conditions,
emergency response, navigation, and rules of the waterway. The operator understands the responsibility
for the well-being of the Girl Scouts and volunteers and agrees to follow the Safety Activity Checkpoints.
• The vessel is currently registered by the state or is “documented” (a federal registration type) by the U.S.
Coast Guard.
• The vessel meets Coast Guard and/or local jurisdictional requirements.
• Maintains insurance as required by law in their jurisdiction.
• Life jackets or Coast Guard approved personal flotation devices are available for the number and size of all
passengers on board. Passengers must wear a life jacket while the vessel is moving, unless in an enclosed
cabin.
• The vessel is well-maintained and has all safety equipment required for its type and purpose.
• A throwable floating device (i.e., a Type IV cushion, horseshoe buoy, or life ring) is available and placed
where it is easily and quickly accessible. Ask about the procedures for if someone falls overboard.
• A float plan is filed to communicate your route.

2024–2026 Safety Activity Checkpoints Page 116 of 226
If over 30 feet, the vessel should also:
• Have had a U.S. Coast Guard safety check within the last year
• Carry current, adequate Marine or Boat Liability insurance (one million dollars or more)
Chartered or Rented Vessels. A chartered vessel is rented by the group for a specific length of time. Charters may
or may not include a captain and/or crew. If a boat is chartered with a crew, use the guidelines (above) for
privately owned recreational vessels. If a vessel is chartered without crew, you will need to provide your own
captain and crew. All must meet training and licensing standards designated by the U.S. Coast Guard. The standards
that apply will depend on the size and type of the vessel. Review this article and contact your council for additional
guidance and approval.
Cruise Ships. Before you book, check the Vessel Sanitation Program ratings of the Centers for Disease Control,
which routinely inspects ships for cleanliness, repair, food preparation, and storage.
• Book cabins in a block either across the hall from or next to one another so that your group stays together.
Teach and use the buddy system and have a plan for communicating if members of the group get separated.
Be aware that cell phones may not work on board. Secure valuables in the ship’s safe.
• Follow Girl Scout standards and guidelines in the individual activity’s safety activity checkpoints for use of
swimming pools, climbing walls, snorkeling, and other higher-risk activities. Choose shore excursions
carefully, keeping in mind that cruise ships and related vendors are not aware of Girl Scout standards. Be
thorough in asking questions about safety.
• Know, too, that often other countries do not maintain the same strict boating laws as the United States
does. Research the standards of the country you are planning to visit; if standards seem poor, find out how
to best ensure safety, or avoid unsafe situations completely. Contact your council for guidance.
Prepare for motion sickness. Suggest that those who are prone to motion sickness consider taking a remedy.
Dramamine, Bonine, or a homeopathic remedy are all options. Let troop families decide whether to use these, and
if they do, let them know that the remedies are more effective when taken in advance. Other tips:
• Bring mint, ginger candies, gingersnaps, or plain crackers to settle queasy stomachs.
• Have seasick persons stay on deck in the fresh air, if possible. Have them keep their eyes on the horizon.
Going below deck can worsen symptoms. The stern (back) of most boats is usually calmer. But avoid this
area if exhaust fumes are a problem.
Respect the environment. Choose responsible operators who follow local environmental laws. Whale-watching
boats should respect wildlife and should not aggressively chase or harass the whales.
Check weather with the ship operator. If lightning or high winds are expected, consider rescheduling.
Know where to go on a voyage. Look for ports with access to oceans, lakes, rivers, and coastal waterways.
Safety Gear. The gear you will need will depend on the type of vessel, length of your trip, location, and weather.
• Choose life jackets or Coast Guard–approved personal flotation devices (PFDs) carefully. All jackets and
devices must be Coast Guard–approved. Find approval on the label located on the inside back of the jacket.
• Ensure life jackets fit snugly. Check the “user weight” on the label to make sure a jacket is the right size for a
child. If the label is not readable, do not use the jacket—and do not use inflatable life jackets for youth or
adults. Once you have found the right fit, fasten all clips, zippers, and straps, then pull up on the shoulder
straps. The jacket should be snug enough that the chin and earlobes cannot slip through. Continuously
tighten the harness straps if they become loose; they should fit snugly.
Be vigilant. Check to see that all life jackets are in serviceable condition: no broken clips, straps, or zippers. Make
sure the life jackets are not waterlogged or torn.

2024–2026 Safety Activity Checkpoints Page 117 of 226
Ensure each child and adult wears a life jacket, always, while on a recreational vessel. They must also wear
one whenever a commercial vessel operator instructs them to do so, even on the dock.
Follow your state’s laws about the use of life jackets. Laws may differ depending on a child’s age, the type of
boat, and the type of boating operation.
Use safety gear as required by the U.S. Coast Guard or by your state’s boating and waterways regulations.
Reputable ship operators will comply with these laws. Specific gear varies by ship size and use. Ask for an
orientation on how to use safety gear, if appropriate. Take care when engaging ship operators outside the United
States.
Additional Gear/ Supplies
• Layered clothing to protect from wind, sea spray, and other weather
• Non-slip, closed-toed shoes
• Seasickness remedies (see Prepare for motion sickness, above), if needed
• Bottled water and healthy snacks
• Binoculars
• Hat or visor

2024–2026 Safety Activity Checkpoints Page 118 of 226
Orienteering
Council Approval: Not Required
Activity Permitted for: *D *B J C S A
*Daisies and Brownies may participate in orienteering when accompanied
1:1 by adults in established parks.
About Orienteering
Orienteering is an activity that involves using a map, compass, and navigational skills to find your way around or
across an unfamiliar area. The activity may also incorporate camping, backpacking, boating, hiking, cross-country
skiing, or horseback riding skills.
Orienteering often takes place on wilderness trails, although events can take place in just about any terrain such as
a beach, urban area, or park. Orienteering meets use control markers to flag various land features found on the
map, serving as checkpoints along a course. Be certain to practice Leave No Trace while orienteering. Youth should
always stay on trails.
Orienteering is not recommended for Daisies and Brownies, but they may be ready to learn pre-orienteering
activities such as map reading, navigation, and map drawing. Brownies may also enjoy geocaching; see Geocaching
Safety Activity Checkpoints.
Learn More
• Orienteering USA
• Ethics and generally accepted rules of orienteering: Orienteering Association of British Columbia
Include Girl Scout Members with Disabilities. Talk to Girl Scout members with disabilities and their caregivers.
Ask about needs and accommodations. Always be sure to contact the meet host in advance to ensure they are able
to accommodate those with disabilities.
Equity. Consider the history, culture, and past experiences of the Girl Scout members in your troop that could
affect their ability to equally participate in an activity. Work with members and families to understand how an
activity is perceived. Ensure that all Girl Scout members and their families feel comfortable and have access to
whatever is needed to fully participate, such as proper equipment, prior experiences, and the skills needed to enjoy
the activity. See the Equity section of the Introduction to Safety Activity Checkpoints for general advice about
expense,
Emergency Action Plan (EAP). Review and document your Emergency Action Plan (EAP) before starting any
activity and review it so all are prepared. Think through scenarios of what can go wrong, such as an accident,
physical injury, missing person, sudden illness, or sudden weather or water emergencies.

2024–2026 Safety Activity Checkpoints Page 119 of 226
Orienteering Checkpoints
Verify instructor knowledge and experience. Participants receive instruction from a person experienced in orienteering
before navigating an orienteering course. First-timers participate on a beginner-level course. Those with previous
topographic map reading experience may be eligible to attempt an advanced beginners’ course.
Select a safe orienteering site. The site selected is a park, camp, or other area with a good trail network; proper
landowner permission is secured to use the site.
Always avoid orienteering during hunting season.
Prepare for emergencies. Ensure the presence of a waterproof first aid kit and a first aider with a current
certificate in first aid, including adult and child CPR or CPR/AED; if any part of the activity is located 30 minutes or
more from emergency medical services, ensure the presence of a first aider with Wilderness First Aid certification.
Follow basic orienteering safety standards. Take part as a group or with buddies. Each participant is given an
allotted time to complete the course and must check in at the finish area, whether they completed the course or
not. Beginning and finishing course times of each participant are carefully noted to ensure all participants have
returned.
Take proper precautions in areas where snakes, ticks, or poisonous plants are prevalent.
Map your course. Get to know map symbols and how things like elevation and relief are communicated on maps.
Learn about orienteering techniques. Before participating in orienteering, learn about strategies such as pacing,
thumbing, and handrails.
Plan the right activity for the age group. Juniors should do orienteering in small groups and be accompanied on
a course by an adult with basic instruction in orienteering. Cadettes, Seniors, and Ambassadors who have received
training may orienteer in groups of at least two.
Competitive orienteering courses often require participants to operate independently; solo competition is not
recommended for inexperienced Girl Scouts or Juniors. However, Cadettes, Seniors, and Ambassadors whose skills
match or exceed the demands of the course may participate in such competitions.
Plan ahead. When participating in a meet, there should be a clear area of safety (a safety lane), a specific finish
time and location, and a search and rescue procedure designed by the competition’s host and the Girl Scout adult
volunteer.
Practice Leave No Trace skills before participating in orienteering. Pick up garbage you find along the way, be
sure not to trample vegetation, and be aware of wildlife.
Safety Gear
• Orienteering map
• Compass and watch
• Emergency signaling whistle
• Long pants, hiking boots, sneakers
• Daypack to carry personal belongings

2024–2026 Safety Activity Checkpoints Page 120 of 226
Outdoor Cooking
Council Approval: Not Required
Activity Permitted for: D B J C S A
Required: At least one adult trained for outdoor cooking by your
council
About Outdoor Cooking
Historically, wood fires were the primary source of heat for camp cooking, but the practice of cooking with large
fires is no longer recommended because of the detrimental effects on the environment and surrounding vegetation.
Instead, use an established fire pit to ignite a small fire or use alternative cooking methods, such as a portable fuel-
based cook stove or a solar or box oven.
Extensive outdoor cooking is not recommended for Daisies, but a less extensive activity, such as roasting
marshmallows or cooking a one-pot meal, is appropriate. Look for campsites and parks with designated fire pit
areas.
As Girl Scouts progress, they can learn to use a variety of cooking methods, including wood fire, propane, gas
stoves, charcoal, canned heat (great for grilled cheese sandwiches!), and even solar energy.
As cooks become accomplished outdoor chefs, they can expand their skills with new types and techniques of
cooking. Learn how to start a fire without matches, try solar cooking, or taste-test new campfire cuisine. Plan
outdoor recipes. Vote for your favorite meals and plan how to cook them outdoors.
Learn More
• Leave No Trace
• Outside Magazine: The Absolute Beginner’s Guide to Camp Cooking
• Discover kid-friendly camp cooking tips at Run Wild My Child.
Include Girl Scout Members with Disabilities. Talk to Girl Scout members with disabilities and their caregivers.
Ask about needs and accommodations. Always be sure to contact the location and/or the instructor in advance to
ensure they are able to accommodate those with disabilities.
Equity. Consider the history, culture, and past experiences of the Girl Scout members in your troop that could
affect their ability to equally participate in an activity. Work with members and families to understand how an
activity is perceived. Ensure that all Girl Scout members and their families feel comfortable and have access to
whatever is needed to fully participate, such as proper equipment, prior experiences, and the skills needed to enjoy
the activity. See the Equity section of the Introduction to Safety Activity Checkpoints for general advice about
expense,
Emergency Action Plan (EAP). Review and document your Emergency Action Plan (EAP) before starting any
activity and review it so all are prepared. Think through scenarios of what can go wrong, such as an accident,
physical injury, missing person, sudden illness, or sudden weather or water emergencies.

2024–2026 Safety Activity Checkpoints Page 121 of 226
Outdoor Cooking Checkpoints
Verify leader/instructor knowledge and experience. Ensure at least one adult is trained or possesses
knowledge, skills, and experience in the following areas:
• Outdoor cooking activities and leadership, including dishwashing, food storage, sanitation, menu planning,
and level-appropriate cooking methods
• Outdoor skills necessary to lead the group
• Safety management
• Judgment and maturity
• Group dynamics and management
• Supervision of Girl Scouts and adults
Connect with your Girl Scout council regarding permits with the local fire district, land management agency,
and/or conservation office. The adult volunteer also checks the fire index with local authorities and ensures local
air pollution regulations are followed.
Encourage resource sharing. Support the group in creating a checklist of group and personal equipment and
distribute to members. Repackage all food to minimize waste and the amount of garbage that needs to be removed
from the campsite.
Never cook inside a tent!
Be prepared for primitive campsites. If cooking in primitive areas with little to no modern conveniences,
observe these standards:
• Use existing fire rings if a fire is necessary.
• Make sure the campsite is located at least 200 feet from all water sources.
• Avoid fragile mountain meadows and areas of wet soil.
• Avoid camping under dead tree limbs.
• Do dishwashing and personal bathing at least 200 feet away from water sources.
• Make certain to have a fire bucket or other fire extinguishing method nearby.
Store food securely, away from tents and out of reach of animals. Check local regulations to find out if a
bearproof canister is required. If the site is in bear country, check with local authorities on precautions to take.
Ensure that garbage, sanitary supplies, and toilet paper are removed and disposed of securely away from the
camping area.
Take safety precautions. Fire safety rules, emergency procedures, and first aid for burns are reviewed with the
group and understood. Procedures are established and known in advance for notifying the fire department or land
management agency officials in case of a fire. Fire drills are practiced at each site.
Prepare for emergencies. Ensure the presence of a waterproof first aid kit and a first aider with a current
certificate in first aid, including adult and child CPR or CPR/AED, who is prepared to handle burns and other
injuries related to the location, including extremes of temperature, such as heat exhaustion, heat stroke, frostbite,
cold exposure, and hypothermia, as well as sprains, fractures, and sunburn. If any part of the activity is located 30
minutes or more from emergency medical services, ensure the presence of a first aider with Wilderness First Aid
certification. If feasible, a vehicle is available to transport an injured or sick person.
On the Day of Outdoor Cooking
Store garbage in insect and animal-proof containers with plastic inner linings and cover it securely when there
is a campsite garbage-pickup service. When there is no garbage-pickup service, remove garbage from campsite in
plastic bags and discard, as appropriate. Recycle whenever possible. Do not bury food. Carry out food, trash, grease,
and fuel canisters. Do not remove natural materials, such as leaves or branches.

2024–2026 Safety Activity Checkpoints Page 122 of 226
Prepare for safe use of portable cook stoves. Portable cook stoves differ in size and in fuel use. Follow the
manufacturer’s instructions carefully, and closely supervise use of any stove. Take an adequate amount of fuel and
store the extra fuel supply away from the cooking flame. Do not overheat the fuel tank.
Keep all stove parts clean. Check that lines and burners are not clogged. Do not refuel the cook stove or change
canisters near an open flame. Take care not to spill fuel; if fuel does spill, relocate the stove before lighting it.
Be aware of stability. Place portable cook stoves in safe, level, and stable positions, shielded from the wind and
away from foot traffic. Do not pile rocks or other items around the cook stove for stability. Use pots of appropriate
size, so that the stove is not top-heavy.
Do not dispose of pressurized cans in a fire, leave them in direct sunlight, or keep them in enclosed areas
where the temperature is high. See the manufacturer’s instructions on the label. Store and dispose of fuel
canisters in the recommended manner.
Consider fire safety. During times of extreme fire danger, be sure to check with local authorities to make sure
cook stoves are permitted.
Cook safely with solar stoves. If using solar cookware, remember that pots and food inside a solar oven are hot
even if the stove does not feel hot. Use insulated gloves when removing pots and opening the lid. Ensure adequate
cooking time for your area.
Practice safe cooking with open fire. If cooking over open flames:
• Build fires in designated areas and avoid establishing new fire sites. An established fire site is clear of
overhanging branches, steep slopes, rotted stumps or logs, dry grass, and leaves, and has been cleared of
any burnable material, such as litter, duff, or pine needles.
• Make certain to have a fire bucket or other fire extinguishing method nearby.
• Tie long hair back or cover hair with bandanas.
• No plastic garments, such as ponchos, are to be worn around open flames.
• Where wood gathering is permitted, use only dead, fallen wood, and keep the cooking fires small. Store
wood away from the fire area. Watch for flying sparks and put them out immediately.
• Obtain wood from local sources to avoid bringing pests and diseases from one location to another.
• Before leaving the site, check that the fire is completely out by sprinkling the fire with water or smothering
it with earth or sand, stirring, and then sprinkling or smothering again. Do not douse the fire with water, as
it will create steam which can cause severe burns.
• Hold hands over coals, ashes, partially burned wood, or charcoal for one minute to verify coolness.
• Plan for disposing of cold ashes and partially burned wood. You may scatter ashes and burned wood
throughout the woods away from the campsite. Do not put ashes and burned wood in a plastic bucket; do
not leave a bucket with ashes or burned wood against the side of a building or on a wood deck.
• Practice safe cooking with charcoal fires. If using charcoal, fires should be started with fuels explicitly
labeled “charcoal starters.” Never use gasoline as a fire starter. Never add charcoal lighter fluid to a fire
once it has started.

2024–2026 Safety Activity Checkpoints Page 123 of 226
Tips for Safe Food Preparation and Storage
Pack the appropriate amount of food. In order to avoid discarding unused food, make sure to bring along the
appropriate amount of food for the group. To properly plan food supplies, consider the activities you’ll be
participating in, keeping in mind that participants will burn more calories and hence need to eat more when
participating in rigorous activities. Also, more calories are needed during cold weather.
Prepare nutritious meals. Meals should be prepared with consideration of food allergies, religious beliefs,
and dietary restrictions (such as vegetarianism and veganism). Whenever possible, buy food and supplies that
avoid excess packaging, and buy in bulk. Review health considerations, including the importance of keeping
utensils and food preparation surfaces sanitized, cleaning hands, cooking meats thoroughly (use a meat
thermometer to verify cooking temperatures), refrigerating perishables, and using clean water when preparing
food. Do not use chipped or cracked cups and plates.
Cook with caution. Girl Scouts should learn about the safe use of kitchen tools and equipment, including
knives. Maintain discipline in the cooking area to prevent accidents with hot food and sharp utensils. Do not
overfill cooking pots and do not use pressurized cans, soda-can stoves, or plastic basins, bottles, or cooking
utensils near an open flame.
Avoid spreading germs. Each person has an individual drinking cup. Wash hands before food preparation and
eating. No person with a skin infection, a cold, or a communicable disease participates in food preparation.
Be certain all cooks and fire tenders roll up long sleeves and tie back long hair.
Keep perishables cool. Store perishables such as creamed dishes, dairy products, meats, and salads at or
below 40 degrees Fahrenheit in a refrigerator or insulated cooler with ice. If this will not be possible, use
powdered, dehydrated, freeze-dried, or canned foods. On extended trips, do not use foods requiring
refrigeration.
Use safe drinking water (see the “Water Purification Tips”) to reconstitute powdered, dehydrated, or freeze-
dried food. Once reconstituted, eat perishable items within one hour or refrigerate them.
Dispose of leftover food to avoid food poisoning.
Water Purification Tips
Access a safe drinking water supply for cooking, drinking, and personal use. Safe drinking water is
defined as tap water tested and approved by the local health department. All other sources are considered
potentially contaminated and must be purified before use. Giardia lamblia (a parasite) should be suspected in
all surface water supplies.
Use one of the three water-purification methods:
Strain water through a clean cloth into a clean container to remove sediment, then…
• Boil water rapidly for a full minute and let cool (if over 6,500 feet in elevation, boil for three minutes),
or
• Disinfect water with water-purification tablets*, following the manufacturer’s instructions (check
product shelf life to make sure it has not expired), or
• Process water through a water purifier or specially designed water-filtration device that removes
Giardia lamblia (method will also remove many other contaminants; follow the manufacturer’s
instructions carefully).
*Using water purification tablets may not remove Giardia lamblia from water, so it is best to either boil
water or use a filtration system.
Wash dishes in a prescribed area according to this procedure:

2024–2026 Safety Activity Checkpoints Page 124 of 226
• Remove food particles from utensils and dishes and dispose of properly in waste bags.
• Wash dishes in warm, soapy water.
• Rinse dishes in hot, clear water.
• Sanitize dishes by dipping in clear, boiling water or immersing for at least two minutes in a sanitizing
solution approved by the local health department. Use a dunk bag to dip dishes, or use a long-handled
utensil, tongs, or tool to remove sanitized dishes.
• Air-dry and store dishes in a clean, covered area.
• Dispose of dishwashing and rinse water according to the campsite regulations. In backcountry areas,
scatter particle-free wastewater on the ground at least 200 feet beyond any water source or trail.
Safety Gear
• Potable water for drinking, cooking, and cleaning, or fresh water source with water purification supplies
• Source of refrigeration to keep perishable foods cold such as an insulated cooler, along with ice.
• Fuel source (as necessary for the type of cooking you are doing)
• Insulated fire-retardant gloves
• Firefighting equipment, such as fire extinguisher, bucket of water, loose soil or sand, and a shovel and rake
• Hand sanitizer or soap and paper towels
• Knives and cutting boards
• Rubber bands, barrettes, or bandanas to tie back hair
• Three dish pans for dishwashing, along with biodegradable dishwashing soap
• Pot scrubber
• Mess kit with non-breakable plates, bowls, mugs, and cutlery in dunk bag
• Rope for dunk-bag line
• Portable cook stove and fuel (as necessary for the type of cooking you are doing)
• Long-handled cooking utensils such as ladles (as necessary for the type of cooking you are doing)

2024–2026 Safety Activity Checkpoints Page 125 of 226
Paddling and Rowing Sports—Master Progression Chart
Type of Craft
and Water
Grade Level
Participant to
Instructor Ratio
Instructor/Expert Certification
With multiple choices, only one is required.
Rowing
Grade Level
Participant to
Instructor Ratio
Instructor/Expert Certification
With multiple choices, only one is required.
Rowboat:
Protected from wind,
waves, and boat
traffic, flat, no current
D, B, J, C, S, A
Daisies only with
adult in boat
12:1 plus
1 watcher/ helper
• Girl Scouts small craft safety training
• OR American Canoe Association (ACA) Paddlesports
Safety Facilitator for that craft
• OR an instructor with the demonstrated equivalent
experience in line with these credentials
Scull or Shell:
Protected from wind,
waves, and boat
traffic, flat, no
current
C, S, A
who are strong
swimmers
Varies, consult
instructor or
coach.
• U.S. Rowing Coach Level 1 or higher
• Demonstrated equivalent experience in line with
above credentials
Corcl
Grade Level
Participant to
Instructor Ratio
Instructor/Expert Certification
With multiple choices, only one is required.
Protected from wind,
waves, and boat
traffic, flat, no
current
B, J, C, S, A
12:1 plus
1 watcher/ helper
• American Red Cross (ARC) Lifeguarding with
Waterfront Module
• OR ACA Paddlesports Safety Facilitator for that craft
• OR Girl Scouts small craft safety training
• OR instructor/expert with demonstrated equivalent
experience in line with above credentials
Canoeing
Grade Level
Participant to
Instructor Ratio
Instructor/Expert Certification
With multiple choices, only one is required.
Flat water:
Protected from wind,
waves, and outside
boat traffic, with
current less than 0.5
knots, and within
swimming distance
of shore
D, B, J, C, S, A
Daisies
permitted only
with an adult in
their canoe,
unless with an
ACA accredited
camp in
compliance with
ACA standards.
6 participants: 1
trip leader; with
an additional
qualified
assistant, ratio
12:2.
ACA accredited
camps adhere to all
ACA standards for
Daisies in canoes.
• American Canoe Association (ACA) Paddlesports
Safety Facilitator certification in canoeing AND
completion of a flat-water canoe safety and rescue
skills course
• OR ACA Level 1: Introduction to Canoeing Instructor
or higher
• OR Girl Scouts small craft safety training
• OR ARC Lifeguarding with Waterfront Module
• OR instructor with demonstrated equivalent
experience in line with above credentials
River Class I:
Moving water rivers
including Class I
sections
J, C, S, A
6 participants: 1
trip leader; with
an additional
qualified
assistant, ratio
12:2
• ACA Paddlesports Safety Facilitator in canoeing and
completion of a Level 2: Essentials of River Canoeing
Skills Course
• OR ACA River Canoeing Day Trip Leading Skills
Assessment
• OR ACA River Canoeing Level 2: Essentials of River
Canoeing Instructor or higher
• OR an instructor with demonstrated equivalent
experience in line with above credentials

2024–2026 Safety Activity Checkpoints Page 126 of 226
River Class II:
Whitewater rivers
including Class II
sections, where
limited maneuvering
in current is required
to avoid obstacles
C, S, A
6 participants: 1
trip leader; with
an additional
qualified
assistant, ratio
12:2
• ACA River Canoe Day Trip Leader Assessment
• OR ACA River Canoeing Level 3 Instructor or higher
• OR an instructor with demonstrated equivalent
experience in line with above credentials
• Helmets required
River Class III:
Sections of rivers
rated class II–III,
where precise
maneuvering in
current is required to
avoid obstacles
C, S, A
6 participants: 1
trip leader; with
an additional
qualified
assistant, ratio
12:2
• ACA River Canoe Day Trip Leader Assessment AND
Level 4: Swiftwater Rescue Skills Assessment
• OR Level 4: Whitewater Canoeing Skills Assessment
AND Level 4: Swiftwater Rescue Skills Assessment
• OR ACA Level 4: Whitewater Canoeing Instructor
Level 4 or higher
• OR an instructor with demonstrated equivalent
experience in line with above credentials
• Helmets required
River Trips on
Class II–III
C, S, A
Varies, ask
outfitter
• Licensed professional guide or instructor who is
provided by an outfitter
• Helmets required
Kayaking
Grade Level
Participant to
Instructor Ratio
Instructor/Expert Certification
With multiple choices, only one is required.
Flat water:
Protected from wind,
waves, and outside
heavy boat traffic,
with current less
than 0.5 knots, and
within swimming
distance of shore
B, J, C, S, A
5 participants: 1
trip leader; with
an additional
qualified
assistant, ratio
10:2
• American Canoe Association (ACA) Paddlesports
Safety Facilitator certification in kayaking and
completion of a Flatwater Kayak Safety and Rescue
skills course
• OR ACA Level 1: Introduction to Kayaking Instructor
or higher
• OR Girl Scouts small craft safety training
• OR ARC Lifeguarding with Waterfront Module
• OR Instructor with the demonstrated equivalent
experience in line with these credentials
River Class I:
Moving water rivers
including class I
sections
J, C, S, A
5 participants: 1
trip leader; with
an additional
qualified
assistant, ratio
10:2
• ACA Paddlesports Safety Facilitator in Kayaking and
completion of a Level 2: Essentials of River Kayaking
skills course
• OR ACA River Kayaking Day Trip Leading Skills
Assessment
• OR ACA Level 2: Essentials of River Kayaking
instructor or higher
• OR an instructor with the demonstrated equivalent
experience in line with these credentials
• Use helmets when they are recommended or
provided
River Class II:
Whitewater rivers
including class II
sections, where
limited maneuvering
C, S, A
5 participants: 1
trip leader; with
an additional
qualified
assistant, ratio
10:2 t
• ACA River Kayak Day Trip Leader Assessment and
Level 3: River Safety and Rescue Skills Assessment
• OR Level 3: River Kayaking Skills Assessment and
Level 3: River Safety and Rescue Skills Assessment
• OR ACA Level 3: River Kayaking Instructor or higher

2024–2026 Safety Activity Checkpoints Page 127 of 226
in current is required
to avoid obstacles
• OR an instructor with the demonstrated equivalent
experience in line with these credentials
• Helmets required
River Class III:
Sections of rivers
rated class II–III,
where maneuvering
in current is required
to avoid obstacles
C, S, A
5 participants: 1
trip leader; with
an additional
qualified
assistant, ratio
10:2
• ACA River Kayak Day Trip Leader Assessment and
Level 4: Swiftwater Rescue Skills Assessment
• OR Level 4: Whitewater Kayaking Skills Assessment
and Level 4: Swiftwater Rescue Skills Assessment
• OR ACA Level 4: Whitewater Kayaking Instructor or
higher
• OR an instructor with the demonstrated equivalent
experience in line with these credentials
• Helmets required
River Trips on
Class II–III
C, S, A
Varies; mandated
by outfitter
• Licensed professional guide OR licensed professional
instructor who is provided by an outfitter
• Helmets required
Coastal Kayak
Touring:
Calm, protected water
with constant access
to safe landing, within
half mile from shore;
wind less than 10
knots, waves less than
1 foot, current less
than 1 knot, no surf
C, S, A
5 participants: 1
trip leader; with
an additional
qualified
assistant, ratio
10:2
• ACA Level 2: Essentials of Kayak Touring Trip Leader
Assessment
• OR ACA Level 2: Kayak Touring Instructor or higher
• OR an instructor with the demonstrated equivalent
experience in line with these credentials
Sea/Surf:
Waterways with
constant access to
safe landing, within
1.5 mile from shore;
wind 10–15 knots,
chop 1–2 foot, surf 1–
2 foot, current 0-2
knots
C, S, A
Varies; mandated
by outfitter
• Licensed professional guide
• OR licensed professional instructor who is provided
by an outfitter
River Class IV–V
Not Permitted
N/A
N/A
Sea/Surf
C, S, A
5:1 or 10:1 with
qualified
assistant
• ACA Coastal Surf or Coastal Kayaking Level 2
Instructor or higher
• OR an instructor with the demonstrated equivalent
experience in line with these credentials
Packrafting
Grade Level
Participant to
Instructor Ratio
Instructor/Expert Certification
With multiple choices, only one is required.
Flat water: Protected
from wind, waves,
and outside boat
traffic, with current
less than 0.5 knots,
and within swimming
distance of shore
B, J, C, S, A
Daisies not
permitted
5 participants: 1
trip leader; with
an additional
qualified
assistant, ratio
10:2
• American Canoe Association (ACA) Paddlesports
Safety Facilitator certification in kayaking and
completion of a Flatwater Kayak Safety and Rescue
Skills course
• OR ACA Level 1: Introduction to Packrafting
Instructor or higher
• OR Girl Scouts small craft safety training

2024–2026 Safety Activity Checkpoints Page 128 of 226
• OR American Red Cross (ARC) Lifeguarding with
Waterfront Module
• OR an instructor with the demonstrated equivalent
experience in line with these credentials
River Class I:
Moving water rivers
including class I
sections
J, C, S, A
5 participants: 1
trip leader; with
an additional
qualified
assistant, ratio
10:2
• ACA Paddlesports Safety Facilitator in Kayaking and
completion of a Level 2: Essentials of River
Packrafting skills course
• OR ACA River Kayaking Day Trip Leading Skills
Assessment
• OR ACA Level 2: Essentials of River Packrafting
instructor or higher
• OR an instructor with the demonstrated equivalent
experience in line with these credentials
• Use helmets when they are recommended or
provided
River Class II:
Whitewater rivers
including class II
sections, where
limited maneuvering
in current is required
to avoid obstacles
C, S, A
5 participants: 1
trip leader; with
an additional
qualified
assistant, ratio
10:2
• ACA River Kayak Day Trip Leader Assessment and
Level 3: River Safety and Rescue Skills Assessment
• OR Level 3: River Packrafting Skills Assessment and
Level 3: River Safety and Rescue Skills Assessment
• OR ACA Level 3: River Packrafting Instructor or
higher
• OR an instructor with demonstrated equivalent
experience in line with these credentials
• Helmets required
River Class III:
Sections of rivers
rated class II–III,
where maneuvering
in current is required
to avoid obstacles
C, S, A
5 participants: 1
trip leader; with
an additional
qualified
assistant, ratio
10:2
• ACA River Kayak Day Trip Leader Assessment and
Level 4: Swiftwater Rescue Skills Assessment
• OR Level 4: Whitewater Packrafting Skills
Assessment and Level 4: Swiftwater Rescue Skills
Assessment
• OR ACA Level 4: Whitewater Packrafting Instructor
or higher
• OR an instructor with the demonstrated equivalent
experience in line with these credentials
• Helmets required
Packraft touring:
Calm, protected
water with constant
access to safe landing
and within 0.5 nm
from shore; winds
less than 10 knots;
waves less than 1
foot; current less than
1 knot; no surf-shore
break (less than 1 ft);
not applicable to
crashing surf zone
C, S, A
5 participants: 1
trip leader; with
an additional
qualified
assistant, ratio
10:2
• ACA Level 2: Essentials of Kayak Touring Trip Leader
Assessment
• OR ACA Level 2: Kayak Touring Instructor or higher
• OR an instructor with the demonstrated equivalent
experience in line with these credentials

2024–2026 Safety Activity Checkpoints Page 129 of 226
Trips in
Coastal/Sea/Surf
Waterways:
Lakes or coastal
waters with potential
areas of exposure to
mild wind and wave
conditions, with
constant access to
safe landing and
within 1.5 nm from
shore; 10–15 knot
winds; 1–2 foot
waves (chop); 1–2
foot surf; 1–2 knots of
current
C, S, A
Varies, mandated
by outfitter
• Licensed professional guide
• OR licensed professional instructor who is provided
by an outfitter
Stand-Up
Paddleboarding
Grade Level
Participant to
Instructor Ratio
Instructor/Expert Certification
With multiple choices, only one is required.
Flat water:
Protected from wind,
waves, and outside
heavy boat traffic,
with current less
than 0.5 knots, and
within swimming
distance of shore
J, C, S, A
5 participants: 1
trip leader; with
an additional
qualified
assistant, ratio
10:2
• American Canoe Association (ACA) Paddlesports
Safety Facilitator certification in SUP and completion
of ACA Level 1: Introduction to SUP Skills course
• OR ACA SUP Day Trip Leader Assessment
• OR Level 1 Introduction to SUP Instructor or higher
• OR Girl Scouts small craft safety training
• Completed boat education paddle sports course for
your state
• OR an instructor with demonstrated equivalent
experience in line with these credentials
• OR American Red Cross Lifeguarding with
Waterfront Module
• OR Demonstrated equivalent experience in line with
above credentials
River Class I:
Moving water rivers
including class I
sections
C, S, A
5 participants: 1
trip leader; with
an additional
qualified
assistant, ratio
10:2
• ACA SUP Day Trip Leading Skills Assessment AND
ACA Level 3: River SUP Skills Course,
• OR ACA Level 3: River SUP instructor or higher,
• OR an instructor with demonstrated equivalent
experience in line with these credentials
• Use helmets when they are recommended or
provided
• Leashes not required, but if worn must be on a
quick-release belt
River Class II:
Whitewater rivers
including class II
sections, where
limited maneuvering
in current is required
to avoid obstacles
C, S, A
5 participants: 1
trip leader; with
an additional
qualified
assistant, ratio
10:2
• ACA Level 4: Whitewater SUP Assessment and Level
4: Swiftwater Rescue Skills Course
• OR ACA Level 4: Whitewater SUP instructor or
higher
• OR an instructor with the demonstrated equivalent
experience in line with these credentials
• Helmets and quick-release leashes required
Coastal SUP /
Touring:
C, S, A
5 participants: 1
trip leader; with
• ACA SUP Trip Leader Assessment

2024–2026 Safety Activity Checkpoints Page 130 of 226
Calm, protected
water with constant
access to safe
landing, within half
mile from shore;
wind less than 10
knots; waves less
than
1 foot; current less
than 1 knot; no surf
an additional
qualified
assistant, ratio
10:2
• OR ACA Level 2: Essentials of SUP Instructor or
higher
• OR an instructor with the demonstrated equivalent
experience in line with these credentials
• Helmets not required
• Leashes required (straight or coil)
Trips in Coastal/
Sea/Surf
Waterways:
Lakes or coastal
waters with potential
areas of exposure to
mild wind and wave
conditions, with
constant access to
safe landing and
within 1.5 nm from
shore; 10–15 knot
winds; 1–2 foot
waves; 1–2 foot surf;
1–2 knots of current
C, S, A
Varies, mandated
by outfitter
• Licensed professional guide
• OR licensed professional instructor who is provided
by an outfitter
River Class III–V
Not Permitted
N/A
N/A
Whitewater
Rafting
Grade Level
Participant to
Instructor Ratio
Instructor/Expert Certification
With multiple choices, only one is required.
River Class I:
Moving water rivers
including class I
sections
B, J, C, S, A
6 participants: 1
trip leader; with
an additional
qualified
assistant, ratio
12:2.
In accordance with the type of raft being used:
• ACA Level 2: Essentials of Rafting—Paddle (or
higher) Skills Course
• OR ACA Level 2: Essentials of Rafting—Oar (or
higher) Skills Course
• OR Level 2: Essentials of Rafting—Paddle (or higher)
Guide Certification
• OR Level 2: Essentials of Rafting—Oar (or higher)
Guide Certification
• OR Level 2: Essentials of Rafting—Paddle (or higher)
Instructor Certification
• OR Level 2: Essentials of Rafting—Oar (or higher)
Instructor Certification
• OR an instructor with demonstrated equivalent
experience in line with these credentials
River Class II:
Whitewater rivers
including class II
sections, where
limited maneuvering
in current is required
to avoid obstacles
B, J, C, S, A
6 participants: 1
trip leader; with
an additional
qualified
assistant, ratio
12:2
In accordance with the type of raft being used:
• ACA Level 3: Rafting—Paddle (or higher) Skills
Course
• OR ACA Level 3: Rafting—Oar (or higher) Skills
Course
• OR Level 3: Rafting—Paddle (or higher) Guide
Certification

2024–2026 Safety Activity Checkpoints Page 131 of 226
• OR Level 3: Rafting—Oar (or higher) Guide
Certification
• OR Level 3: Rafting—Paddle (or higher) Instructor
Certification
• OR Level 3: Rafting—Oar (or higher) Instructor
Certification
• OR an instructor with demonstrated equivalent
experience in line with these credentials
River Class III:
Sections of rivers
rated class II–III,
where precise
maneuvering in
current is required to
avoid obstacles
J, C, S, A
6 participants: 1
trip leader; with
an additional
qualified
assistant, ratio
12:2
In accordance with the type of raft being used:
• ACA Level 4: Whitewater Rafting—Paddle (or
higher) Skills Course
• OR ACA Level 4: Whitewater Rafting—Oar (or
higher) Skills Course
• OR Level 4: Whitewater Rafting—Paddle (or higher)
Guide Certification
• OR Level 4: Whitewater Rafting—Oar (or higher)
Guide Certification
• OR Level 4: Whitewater Rafting—Paddle (or higher)
Instructor Certification
• OR Level 4: Whitewater Rafting—Oar (or higher)
Instructor Certification
• OR an instructor with demonstrated equivalent
experience in line with these credentials
• OR Licensed professional whitewater rafting guide
provided by an outfitter
• Helmets required
River Class IV:
Sections of rivers
rated class III–IV,
where precise
maneuvering in
current is required to
avoid obstacles
C, S, A
6 participants: 1
trip leader; with
an additional
qualified
assistant, ratio
12:2.
In accordance with the type of raft being used:
• ACA Level 5: Advanced Whitewater Rafting—Paddle
(or higher) Skills Course
• OR ACA Level 4: Advanced Whitewater Rafting—Oar
(or higher) Skills Course
• OR Level 5: Advanced Whitewater Rafting—Paddle
(or higher) Guide Certification
• OR Level 5: Advanced Whitewater Rafting—Oar (or
higher) Guide Certification
• OR Level 5: Advanced Whitewater Rafting—Paddle
(or higher) Instructor Certification
• OR Level 5: Advanced Whitewater Rafting—Oar (or
higher) Instructor Certification
• OR an instructor with the demonstrated equivalent
experience in line with these credentials
• OR Licensed professional whitewater rafting guide
provided by an outfitter
• Helmets required
Trips: Class I–IV
C, S, A
Varies, mandated
by outfitter.
Licensed professional whitewater rafting guide provided
by an outfitter
River Class V–VI
Not Permitted
N/A
N/A

2024–2026 Safety Activity Checkpoints Page 132 of 226
Canoeing
Council Approval: Required
Activity Permitted for: *D B J C S A
Not Recommended for: Daisies, except with an experienced adult
in each canoe and on flat water.
Camps with current ACA accreditation are expected to adhere to
current ACA standards for canoeing with all Girl Scouts including
Daisies.
About Canoeing
Canoeing is a great team-building exercise and a fun way to enjoy the outdoors. Canoes developed all over the
world. Indigenous peoples of Canada designed lightweight, agile boats from wood and used them to transport
people and goods for thousands of years. Canoeing only became a sport in the U.S. in the late 19
th
century.
Whether you’re playing games on a pond or taking a whitewater trip on a river, there is a canoeing option for
everyone. Canoeists sit on a seat or kneel in the canoe and use a paddle to propel their boat. Most canoes are for
two people, but some canoes can hold up to 12. Canoes that are 15 feet or shorter should hold no more than two
paddlers with no passengers.
Currents, waves, rapids, and wind affect conditions. Those conditions and the type of canoe will determine what is
appropriate for your troop. See Paddling and Rowing Sports—Master Progression Chart for details. Be sure all
participants have the training and experience to participate in the level expected. Class III rapids require prior
council approval. Participants may be Cadettes and older who have demonstrated and documented prior
experience of progression.
Whitewater canoeing can only be done on water that has been run and rated, and only up to Class III difficulty, as
defined by the American version of the International Scale of River Difficulty.
Learn More
• American Canoe Association
• Interactive maps of places to go: Paddling.com and American Whitewater
• Instructional videos about canoeing strokes: Paddling.com
Include Girl Scout Members with Disabilities. Talk to Girl Scout members with disabilities and their caregivers.
Ask about needs and accommodations. Always be sure to contact the location and/or the instructor in advance to
ensure they are able to accommodate those with disabilities. For more information visit Move United and
Paralympic.org to find out about inclusion in canoeing, and learn about water safety for children with special
needs.
Equity. Consider the history, culture, and past experiences of the Girl Scout members in your troop that could
affect their ability to equally participate in an activity. Work with members and families to understand how an
activity is perceived. Ensure that all Girl Scout members and their families feel comfortable and have access to
whatever is needed to fully participate, such as proper equipment, prior experiences, and the skills needed to enjoy
the activity. See the Equity section of the Introduction to Safety Activity Checkpoints for general advice about
expense,
Emergency Action Plan (EAP). Review and document your Emergency Action Plan (EAP) before starting any
activity and review it so all are prepared. Think through scenarios of what can go wrong, such as an accident,
physical injury, missing person, sudden illness, or sudden weather or water emergencies.

2024–2026 Safety Activity Checkpoints Page 133 of 226
Canoeing Checkpoints
Confirm swimming ability. Success on the water depends on comfort and ability in the water. Conducting a
swimming test in advance is highly recommended. See Swimming Safety Activity Checkpoints for a sample or ask
your instructor for guidelines. If a swimming test is not possible, presume all participants are non-swimmers. Only
strong swimmers are approved for whitewater canoeing.
All participants must wear a U.S. Coast Guard–approved life jacket. Type III life jackets are recommended and
should fit according to weight and height specifications. Inspect life jackets to ensure they are in good condition
and contain no tears.
Practice recovery procedures. The instructor demonstrates self-recovery and righting techniques. All paddlers
learn and practice these skills. This will help prevent becoming disoriented or frightened if they end up in the
water and provides important skills.
Type of Craft
and Water
Grade Level
Participant to
Instructor Ratio
Instructor/Expert Certification
With multiple choices, only one is required.
Canoeing
Grade Level
Participant to
Instructor Ratio
Instructor/Expert Certification
With multiple choices, only one is required.
Flat-water,
protected from
wind, waves, and
outside boat
traffic, with
current less than
0.5 knots, and
within
swimming
distance of shore
D, B, J, C, S, A
Daisies permitted
only with an
adult in their
canoe, unless
with an ACA
accredited camp
in compliance
with ACA
standards
6 participants: 1
trip leader; with
an additional
qualified
assistant, ratio
12:2
ACA accredited
camps adhere to
all ACA standards
for Daisies in
canoes
• American Canoe Association (ACA) Paddlesports
Safety Facilitator certification in canoeing AND
completion of a flat-water canoe safety and rescue
skills course
• OR ACA Level 1: Introduction to Canoeing Instructor
or higher
• OR Girl Scouts small craft safety training
• OR ARC Lifeguarding with Waterfront Module
• OR instructor with demonstrated equivalent
experience in line with above credentials
River Class I:
Moving water
rivers including
Class I sections
J, C, S, A
6 participants: 1
trip leader; with
an additional
qualified
assistant, ratio
12:2
• ACA Paddlesports Safety Facilitator in canoeing AND
completion of a Level 2: Essentials of River Canoeing
Skills Course
• OR ACA River Canoeing Day Trip Leading Skills
Assessment
• OR ACA River Canoeing Level 2: Essentials of River
Canoeing Instructor or higher
• OR an instructor with demonstrated equivalent
experience in line with above credentials
River Class II:
Whitewater
rivers including
Class II sections,
where limited
maneuvering in
current is
required to
avoid obstacles
C, S, A
6 participants: 1
trip leader; with
an additional
qualified
assistant, ratio
12:2
• ACA River Canoe Day Trip Leader Assessment
• OR ACA River Canoeing Level 3 Instructor or higher
• OR an instructor with demonstrated equivalent
experience in line with above credentials
• Helmets required
River Class III:
Sections of rivers
rated class II–III,
C, S, A
6 participants: 1
trip leader; with
an additional
• ACA River Canoe Day Trip Leader Assessment AND
Level 4: Swiftwater Rescue Skills Assessment

2024–2026 Safety Activity Checkpoints Page 134 of 226
where precise
maneuvering in
current is
required to
avoid obstacles
qualified
assistant, ratio
12:2
• OR Level 4: Whitewater Canoeing Skills Assessment
AND Level 4: Swiftwater Rescue Skills Assessment
• OR ACA Level 4: Whitewater Canoeing Instructor
Level 4 or higher
• OR an instructor with demonstrated equivalent
experience in line with above credentials
• Helmets required
River Trips on
Class II–III
C, S, A
Varies, ask
outfitter
• Licensed professional guide or instructor who is
provided by an outfitter
• Helmets required
Ensure the instructor or guide reviews site-specific emergency techniques. For example, whitewater
canoeists are instructed in how to float through rapids, how to breathe while swimming in rapids, and how to swim
to shore. The lead instructor or guide must have firsthand knowledge of the hazards and conditions of the location
being used.
Check lifeguard qualifications. If using lifeguards to oversee canoeing, confirm that they have the proper
training, experience, and rescue equipment for the body of water and the specific watercraft involved. See the
Swimming Safety Activity Checkpoints.
Be aware of the lifeguard’s position. A stationary lifeguard can only be used when canoeing is taking place on
flat water close to shore. For large bodies of water or rivers, the lifeguard must be in a canoe and positioned with
the group.
Arrange for watchers/helpers. An adult watcher or skilled helper is required for certain size groups. See
Paddling and Rowing Sports—Master Progression Chart. This person should have basic skills in the activity and
supports the group by reinforcing instructions. They also watch for possible emergencies and help the instructor
with rescues if needed. Basic water rescue, Girl Scouts small craft safety training, or similar training is the
preferred preparation. Consult the instructor for specific watcher/helper qualifications.
Select a safe site. Don’t paddle in unknown areas. Know the locations of all shipping channels. Do not canoe more
than one mile from the nearest shore. Make sure of the following:
• Avoid busy channels when possible. If you must cross them, do so at a 90-degree angle to the channel
traffic. Also avoid surf zones and areas with standing waves unless they are part of planned whitewater
canoeing.
• On long passages, boats should stay close enough together that a group decision can be made if
wind and water conditions change.
• Be aware of possible changes in water level, due to tides or dam releases, and how these affect water
conditions.
• Avoid hazards such as strainers, sieves, hydraulics, waterfalls, bridges, dams, fences, and low power lines.
Rapids must be avoided unless part of a planned whitewater route.
Research water conditions and select the right boats for participant skill level. Consider weather and water
conditions, weight of passengers, and equipment to be carried. Make sure:
• The craft weight and capacity are not exceeded. Many boats have a plate near the stern (back) showing
these maximums.
• Canoes that are 15 feet or shorter hold no more than two people.
• You are aware of the type of canoe needed for the water to be used.
• Canoes are not overloaded with gear, and gear is distributed evenly among paddlers.

2024–2026 Safety Activity Checkpoints Page 135 of 226
Know universal signals. Whistle and visual signals are used to pass messages or call for help. Learn them at
Paddle.com.
File a float plan. If participating in a long-distance trip, file a float plan with a reliable person who will notify
authorities should your group not return on time.
On the Day of Canoeing
• Get a weather and wind report. Check Weather.com or other reliable weather sources, including the
“boat and beach” forecast, which covers wind speed, water temperature, and wave height. Be prepared
with a backup plan or postpone the activity if weather prevents the outing.
• Review what to do in a storm. If thunder is heard or lightning is seen, get everyone off the water
immediately. Do not return until at least 30 minutes have passed since the last evidence of the storm. If you
cannot get to shore, secure all loose gear, keep a sharp lookout for other boats and obstructions, head into
the wind at a 45-degree angle, and stay low. If possible, do not touch metal or water when there is a chance
of lightning.
• Use the buddy system. Instruct paddlers to keep their boat within sight of at least one other boat. Use the
buddy system on the water with boats the same as you would on land.
• Transport boats safely. Use car-top racks or trailers specifically designed for canoes. Secure boats with
two lines across the top (one at each end) and with lines at the bow and the stern. Drivers must have prior
experience hauling trailers.
Report accidents. Notify marine law enforcement or your council as appropriate.
Privately Owned Canoes. Ensure that the owner/operator:
• Is a knowledgeable adult with the understanding and ability to take responsibility for Girl Scouts’ safety
and well-being.
• Agrees to follow the Safety Activity Checkpoints relevant to the activity.
• Maintains the vessel in accordance with Safety Activity Checkpoints.
• Coordinates with the activity leader to confirm the required safety gear is available for all participants and
gear meets the specifications of authorities for the local jurisdiction.
• Meets Coast Guard and/or local jurisdiction requirements.
• Maintains insurance and registration as required by law in their jurisdiction.
Safety Gear
• Canoes suitable for the type of water, with proper flotation and air bag, if used, checked before use
• Paddles of the appropriate size and style for the canoeist and the type of canoeing
• Emergency sound device, such as a whistle, compressed air horn, or VHF radio on navigable waters
• U.S. Coast Guard–approved life jacket for each paddler. Type III life jackets are recommended and should fit
according to weight and height specifications.
• Rescue gear appropriate for boat type and conditions (ask your instructor), such as:
o throw bag or throw line
o waist-mounted tow system (lightweight rope that attaches to towing person and to towed boat)
o rescue sling to get participants back into boat
o designated rescue craft, such as a paddleboard or chase boat
o any other items required by the boating jurisdiction where you will paddle
• Emergency gear appropriate for the canoeing type and distance from shore, such as:
o emergency repair kit: duct tape or electrical tape, screwdriver, pliers, and/or
spare paddle, waterproof first aid kit, repair kit, and standard safety equipment, including signaling
equipment

2024–2026 Safety Activity Checkpoints Page 136 of 226
• Emergency survival packet: raincoat, waterproof matches, lightweight/space blanket, hat, pocket knife,
10x10-foot tarp, rope, food, and appropriate liquids. Food and water bottles should be secured in the boat.
• A safety helmet with a strong, flexible plastic shell and chin strap, as well as openings for drainage, worn
when indicated by instructor or guide
• Bailer (a scoop for removing water from a boat)
• A waterproof flashlight
• A painter (a strong line at the bow used for securing the canoe that is at least half the length of the boat)
• At least one graspable and throwable Coast Guard–approved personal flotation device (Type IV buoyant
cushion or ring buoy or equivalent) immediately available for each group on the water
• Compass, waterproof chart, VHF marine radio, and other essentials for extended trips
• Locking blade knife carried by instructor, guide, or qualified adult in their life jacket or other readily
accessible place, and a line for towing or rescue
Note: Canoeing at night may require additional gear; consult your instructor.

2024–2026 Safety Activity Checkpoints Page 137 of 226
Corcl Boats
Council Approval: Required
Activity Permitted for: B J C S A
Not Appropriate for: Daisies
About Corcl Boats
The Corcl boat is designed specifically for 8- to 15-year-olds to enjoy in flat water: spinning, racing, and having fun
at the shore. Corcls offer a great first experience for Girl Scouts who will progress to other paddle sports. Paddlers
can move easily and quickly through the water. The boats feature a 225-pound capacity, an innovative double hull
that is designed for many ways to paddle, and ergonomic handles for easy carrying and transport.
Corcls flip over easily, so paddlers need to be comfortable in the water. Corcls are not to be towed behind a
motorized craft and are for use in flat, calm waters only.
Learn More
• Instructions, tips, and games to enjoy: Corcl.com
Include Girl Scout Members with Disabilities. Talk to Girl Scout members with disabilities and their caregivers.
Ask about needs and accommodations. Always be sure to contact the location and/or the instructor in advance to
ensure they are able to accommodate those with disabilities. Visit Abilities.com for more information about
adaptive equipment for paddlers, and to learn about water safety for children with special needs.
Equity. If there are any height, weight, or similar restrictions, communicate clearly to families in advance. Choose a
vendor and vessel type that is more inclusive, if necessary, to be sure all can participate. Consider the history,
culture, and past experiences of the Girl Scout members in your troop that could affect their ability to equally
participate in an activity. Work with members and families to understand how an activity is perceived. Ensure that
all Girl Scout members and their families feel comfortable and have access to whatever is needed to fully
participate, such as proper equipment, prior experiences, and the skills needed to enjoy the activity. See the Equity
section of the Introduction to Safety Activity Checkpoints for general advice about expense,
Emergency Action Plan (EAP). Review and document your Emergency Action Plan (EAP) before starting any
activity and review it so all are prepared. Think through scenarios of what can go wrong, such as an accident,
physical injury, missing person, sudden illness, or sudden weather or water emergencies.
Corcl Boats Checkpoints
Ensure participants are able to swim and are comfortable in the water. Success on the water depends on
comfort and ability in the water. Conducting a swimming test in advance is highly recommended. See Swim Test in
Swimming Safety Activity Checkpoints or ask your instructor for guidelines.
Ensure all paddlers are wearing a U.S. Coast Guard–approved life jacket. Type III life jackets are
recommended and should fit according to weight and height specifications. Inspect life jackets to ensure they are in
good condition and contain no tears.
Start in shallow water where paddlers can learn how to navigate boarding their boat, paddling, balancing using
their arms and paddles, and how to stay centered.

2024–2026 Safety Activity Checkpoints Page 138 of 226
Verify instructor/expert qualifications and experience. The skill level of the adults must be higher than the
difficulty of the intended boat type. At least one adult instructor or lifeguard should be able to effectively
communicate commands and instructions, and be certified or trained per the Corcl section of the Master
Progression Chart:
Corcl Boat
Grade Level
Participant to
Instructor Ratio
Instructor/Expert Certification
With multiple choices, only one is required.
Flat, no current
B, J, C, S, A
12:1 plus
1 watcher/
helper
• American Red Cross (ARC) Lifeguarding with
Waterfront Module
• OR Demonstrated equivalent experience in line with
above credentials
Ensure the instructor or lifeguard reviews site-specific emergency plans. Note that a stationary lifeguard can
only be used when Corcl boats are being used close to a dock or shore. For larger bodies of flat water, the lifeguard
must be in a boat and positioned with the group.
Arrange for watchers/helpers. One adult watcher or skilled helper is required for every 12 girls, plus one
additional adult. See Paddling and Rowing Sports—Master Progression Chart. Watchers should have basic skills in
the activity and support the group by reinforcing instructions, watching for possible emergencies, and helping with
rescues if needed. Basic water rescue, Girl Scouts small craft safety training, or similar training is the preferred
preparation.
Stay clear of paddles. Because Corcl boats are small and can float close to one another, paddlers can inadvertently
hit other paddlers and boats.
Practice recovery procedures. If a Girl Scout steps on the edge of a Corcl boat, the boat will flip. Demonstrate self-
recovery and righting techniques and have members learn and practice these skills. This will help prevent
disorientation or fear if the Corcl flips and they end up in the water.
Select a safe site. Corcl boats are only approved for flat water. Do not paddle in unknown areas. Paddling is only
permitted near the shore.
Learn lifeguard signals. Whistle and visual signals may be used to pass messages, call paddlers in, or call for help.
Cover these before beginning the activity.
Prepare for emergencies. Pack a waterproof first aid kit. See Introduction: Standard Safety Guidelines for more
information and guidance on what to include.
Safety Gear
• U.S. Coast Guard–approved life jacket for every paddler
• Kayak paddle for each boat (smaller Girl Scouts may go two to a Corcl, but only one paddle is used per boat)
• Rescue gear such as throw bag or throw line
• Tether or painter (a strong line at the bow used for securing the Corcl that is at least half the length of the
boat) attached to each boat
• Cell phone or walkie-talkies to communicate need for emergency services

2024–2026 Safety Activity Checkpoints Page 139 of 226
Kayaking
Council Approval: Required
Activity Permitted for: B J C S A
Not Recommended for: Daisies
About Kayaking
Kayaks were developed by the Inuit people, as well as Aleut tribes, located in Arctic regions of North America.
Indigenous peoples built early kayaks from a range of available materials, such animal skins, bones, and wood, and
used the kayaks for transportation as well as hunting. After the arrival of Europeans, kayaking became a sport, and
was added to the Olympics in 1936.
Virtually any body of water is suitable for certain types of kayaking. Start with flat water with little or no current,
and progress to more advanced conditions. Kayaks come in a variety of shapes and sizes and are designed for
different types of water and paddler skill levels. “Sit on top” kayaks are simple, stable boats that are great for
beginners. “Decked” or “sit inside” kayaks are covered by a deck and spray skirt; the paddler sits inside with legs
extended. All involve moving a kayak across water using a double-bladed paddle and combine exercise,
transportation, and fun!
Your troop can kayak on bays, rivers, lakes, and oceans. Currents, waves, rapids, and wind affect conditions. Those
conditions and the type of boat will determine what is appropriate for your troop. Be sure all participants have the
training and experience to participate in the level expected.
Learn More
• Interactive maps of places to go: Paddling.com and American Whitewater
• American version of the International Scale of River Difficulty
• About canoeing, kayaking, and stand-up paddleboarding: Paddling.com
• Info on gear selection: Paddling.com
• Free online paddling safety course, recommended for all paddlers: ACA Paddlesports
• Collection of educational paddling videos: ACA Paddlesports Resource Library
Include Girl Scout Members with Disabilities. Talk to Girl Scout members with disabilities and their caregivers.
Ask about needs and accommodations. Always be sure to contact the location and/or the instructor in advance to
ensure they are able to accommodate those with disabilities. Visit Move United to learn about inclusion in kayaking
and water safety for children with special needs.
Equity. Ask the kayak provider about any height or weight restrictions, and communicate this information to
families in advance. Choose a different watercraft if these restrictions would keep anyone from participating.
Consider the history, culture, and past experiences of the Girl Scout members in your troop that could affect their
ability to equally participate in an activity. Work with members and families to understand how an activity is
perceived. Ensure that all Girl Scout members and their families feel comfortable and have access to whatever is
needed to fully participate, such as proper equipment, prior experiences, and the skills needed to enjoy the activity.
See the Equity section of the Introduction to Safety Activity Checkpoints for general advice about expense,

2024–2026 Safety Activity Checkpoints Page 140 of 226
Emergency Action Plan (EAP). Review and document your Emergency Action Plan (EAP) before starting any
activity and review it so all are prepared. Think through scenarios of what can go wrong, such as an accident,
physical injury, missing person, sudden illness, or sudden weather or water emergencies.
Kayaking Checkpoints
Confirm swimming ability. Success on the water depends on comfort and ability in the water. Conducting a
swimming test in advance is highly recommended. See Swimming Safety Activity Checkpoints for a sample or ask
your instructor for guidelines. If a swimming test is not possible, presume all participants are non-swimmers.
Ensure all paddlers wear a U.S. Coast Guard–approved life jacket. Type III life jackets are recommended and
should fit according to weight and height specifications. Inspect life jackets to ensure they are in good condition
and contain no tears.
Practice recovery procedures. The instructor should demonstrate self-recovery and righting techniques, and
girls should learn and practice these skills. This will help prevent their becoming disoriented or frightened if they
end up in the water.
Paddlers must be trained on how to perform wet exits and must be able to execute one successfully before
being allowed to use a decked kayak. If spray skirts are used, wet exits must be performed before the outing can
begin.
Practice appropriate self-rescue and re-entry techniques. If kayaking in cold water, paddlers should learn cold
water survival techniques and treatment for hypothermia.
Verify instructor/expert qualifications and experience. The skill level of the adults must be higher than the
difficulty of the intended kayak type. At least one adult instructor or lifeguard should be able to effectively
communicate commands and instructions, and be certified or trained per the Kayak section of the Master
Progression Chart:
Kayaking
Grade Level
Participant to
Instructor Ratio
Instructor/Expert Certification
With multiple choices, only one is required.
Flat water:
Protected from
wind, waves, and
outside heavy
boat traffic, with
current less than
0.5 knots, and
within
swimming
distance of shore
B, J, C, S, A
5:1 or 10:1 with
qualified
assistant
• American Canoe Association (ACA) Paddlesports
Safety Facilitator certification in kayaking and
completion of a Flatwater Kayak Safety and Rescue
skills course
• OR ACA Level 1: Introduction to Kayaking Instructor
or higher
• OR Girl Scouts small craft safety training
• OR ARC Lifeguarding with Waterfront Module
• OR Instructor with the demonstrated equivalent
experience in line with these credentials
River Class I:
Moving water
rivers including
class I sections
J, C, S, A
5:1 or 10:1 with
qualified
assistant
• ACA Paddlesports Safety Facilitator in Kayaking and
completion of a Level 2: Essentials of River Kayaking
skills course
• OR ACA River Kayaking Day Trip Leading Skills
Assessment
• OR ACA Level 2: Essentials of River Kayaking
instructor or higher
• OR an instructor with demonstrated equivalent
experience in line with these credentials
• Use helmets when they are recommended or
provided

2024–2026 Safety Activity Checkpoints Page 141 of 226
River Class II:
Whitewater
rivers including
class II sections,
where limited
maneuvering in
current is
required to avoid
obstacles
C, S, A
5:1 or 10:1 with
qualified
assistant
• ACA River Kayak Day Trip Leader Assessment and
Level 3: River safety and Rescue Skills Assessment
• OR Level 3: River Kayaking Skills Assessment and
Level 3: River Safety and Rescue Skills Assessment
• OR ACA Level 3: River Kayaking Instructor or higher
• OR an instructor with demonstrated equivalent
experience in line with these credentials.
• Helmets required
River Class III:
Sections of rivers
rated class II–III,
where
maneuvering in
current is
required to avoid
obstacles
C, S, A
5:1 or 10:1 with
qualified
assistant
• ACA River Kayak Day Trip Leader Assessment and
Level 4: Swiftwater Rescue Skills Assessment
• OR Level 4: Whitewater Kayaking Skills Assessment
and Level 4: Swiftwater Rescue Skills Assessment
• OR ACA Level 4: Whitewater Kayaking Instructor or
higher
• OR an instructor with demonstrated equivalent
experience in line with these credentials
• Helmets required
Kayak Touring:
Calm, protected
water with
constant access
to safe landing,
within 0.5 mile
from shore; wind
less than 10
knots, waves less
than 1 foot,
current less than
1 knot, no surf
C, S, A
5:1 or 10:1 with
qualified
assistant
• ACA Level 2: Essentials of Kayak Touring Trip Leader
Assessment
• OR ACA Level 2: Kayak Touring Instructor or higher
• OR an instructor with the demonstrated equivalent
experience in line with these credentials
Sea/Surf:
Waterways with
constant access
to safe landing,
within 1.5 miles
from shore; wind
10–15 knots,
chop 1–2 foot,
surf 1–2 foot,
current 0–2
knots
C, S, A
Varies;
mandated by
outfitter
• Licensed professional guide
• OR licensed professional instructor who is provided
by an outfitter
Class IV–V
Not Permitted
N/A
N/A
Qualified assistants: The American Canoe Association does not put strict parameters on the definition of “qualified
assistant” on purpose. Assistants do not need to be certified, but they need to understand the curriculum and be able to
meaningfully assist in the delivery of a quality course and provide assistance and rescue should an emergency arise. ACA
Paddlesport online course, or Girl Scouts small craft safety training, or similar training is recommended as preparation.
Ensure the instructor/expert will review site-specific emergency techniques for the type of craft used. For
example, whitewater kayakers are instructed in how to float through rapids, how to breathe while swimming in
rapids, and how to swim to shore.
Ensure the lead instructor/expert has firsthand knowledge of the hazards and conditions of the location and
type of boat being used. You’ll want to verify that at least one adult instructor/guide is certified by the American
Canoe Association, or other sponsoring organization approved by your council. Certifications must be appropriate
for the activity.

2024–2026 Safety Activity Checkpoints Page 142 of 226
Verify lifeguard qualifications and experience. If using a lifeguard as your expert, ensure they have current
certification in American Red Cross (ARC) Lifeguarding with Waterfront Module, or its equivalent, suitable for the
body of water used. Lifeguards are used as experts for flat water, near shore kayaking only.
Arrange for watchers/helpers. An adult watcher or skilled helper is required for certain size groups. See
qualified assistants in table, above. This person should have basic kayaking skills. They support the group by
reinforcing instructions. They also watch for possible emergencies and help the instructor with rescues if needed.
Refer to the bottom of the Master Progression Chart and consult the instructor for specific watcher/helper
qualifications.
Keep weight evenly distributed. Keeping gear and fellow paddlers evenly distributed makes the boat safer and
easier to paddle.
Stay together. On long passages, boats should stay close enough together that a group decision can be made if
wind and water conditions change.
Select a safe site:
• Do not paddle in unknown areas.
• Avoid busy channels when possible. If you must cross them, do so at a 90-degree angle to the channel
traffic.
• Avoid surf zones and areas with standing waves unless they are part of planned whitewater kayaking.
• Only perform this activity on water that has been run and rated and up to Class III difficulty, as defined
by the American version of the International Scale of River Difficulty.
• Be aware of possible changes in water level, due to tides or dam releases, and how these affect water
conditions.
Avoid hazards such as strainers, sieves, hydraulics, waterfalls, bridges, dams, fences, and low power lines. Rapids
must be avoided unless part of a planned whitewater route.
Research water conditions and select the right boats for participant skill level. Consider weather and water
conditions, weight of passengers, and equipment to be carried. Make sure that:
• kayak weight and capacity are not exceeded; many boats have a plate near the stern (back) showing these
maximums
• kayakers are using the type of kayak needed for the water conditions present, and ensure the kayak is sized
for the person(s) using it
• kayaks are not overloaded with gear; gear should be distributed evenly with paddlers
Know universal signals. Whistle and visual signals are used to pass messages or call for help. Learn them at
Paddle.com.
File a float plan. If participating in a long-distance trip, file a float plan with a reliable person who will notify
authorities should your group not return on time.
On the Day of Paddling or Rowing
• Get a weather and wind report. Check Weather.com or other reliable weather sources, including the
“boat and beach” forecast, which covers wind speed, water temperature, and wave height. Be prepared
with a backup plan or postpone the activity if weather prevents the outing.
• Review what to do in a storm. If thunder is heard, or lightning seen, get everyone off the water
immediately. Do not return until at least 30 minutes have passed since the last evidence of the storm. If you
cannot get to shore, secure all loose gear, keep a sharp lookout for other boats and obstructions, head into
the wind at a 45-degree angle, and stay low. If possible, do not touch metal or water when there is a chance
of lightning.

2024–2026 Safety Activity Checkpoints Page 143 of 226
• Review self-rescue techniques. See above.
• Use the buddy system. Instruct kayakers to keep sight of at least one other boat at all times.
• Transport boats safely. Use car-top racks or trailers specifically designed for kayaks. Secure boats with
two lines across the top (one at each end), and with lines at the bow and the stern. Drivers must have prior
experience hauling trailers.
Report accidents. Notify marine law enforcement or your council, if appropriate.
Safety Gear
Some gear will depend on the type of kayaking or on water conditions. Check with your instructor.
• U.S. Coast Guard–approved life jacket (Type III life jackets recommended and should fit according to weight
and height specifications)
• Kayak sized appropriately for the participants and suitable for the type of water
• Kayaks with proper flotation and any air bags checked before use (if float bags are used, make sure they are
secured to kayak)
• Double-bladed paddle in the appropriate size and style for the activity and person using it (ask instructor
about proper fit)
• Emergency sound device, such as a whistle, compressed air horn, or VHF radio
• Rescue gear appropriate for kayak type and conditions (ask your instructor), such as:
o at least one graspable and throwable Coast Guard–approved personal flotation device, throw bag,
or throw line
o waist-mounted tow system (lightweight rope that attaches to towing person and to towed boat);
should be one tow system for every three to four kayaks
• Emergency gear appropriate for the kayaking type and distance from shore, such as:
o emergency repair kit: duct tape or electrical tape, screwdriver, pliers, spare plugs
o spare paddle, first aid kit, repair kit, and standard safety equipment, such as signaling equipment
o emergency survival packet: raincoat, waterproof matches, lightweight/space blanket, hat, pocket
knife, 10x10-foot tarp, rope, food, and appropriate liquids (food and water bottles should be
secured in the boat)
• Safety helmet with strong, flexible plastic shell and chin strap, as well as openings for drainage should be
worn when:
o paddling in waters that are Class II or III
o paddling in or near sea caves
• Bailer (a scoop or sponge for removing water from a boat) secured to the kayak
Packrafting
Council Approval: Required
Activity Permitted for: B J C S A
Not Recommended for: Daisies
About Packrafting
Virtually any body of water is suitable for certain types of packrafting. Start with flat water with little or no current,
and progress to more advanced conditions. Packrafts come in a variety of shapes and sizes and are designed for

2024–2026 Safety Activity Checkpoints Page 144 of 226
different types of water and paddler skill levels. “Sit on top” packrafts are simple, stable boats that are great for
beginners. “Decked” or “sit inside” packrafts are covered by a deck and spray skirt; the paddler sits inside with legs
extended. All involve moving a packraft across water using a double-bladed paddle and combine exercise,
transportation, and fun!
Your troop can paddle packrafts on bays, rivers, lakes, and oceans. Currents, waves, rapids, and wind affect water
conditions. Those conditions and the type of boat should be decided by the skills and knowledge possessed by your
troop. Be sure all participants have the training and experience to participate in the level expected.
Learn More
• Interactive maps of places to go: Paddling.com and American Whitewater
• American version of the International Scale of River Difficulty
• United States Geological Survey (USGS) National Water Dashboard is an interactive map to access real-time
water data from over 13,500 stations nationwide
• About canoeing, kayaking, and stand-up paddleboarding: Paddling.com
• Free online paddling safety course, recommended for all paddlers: ACA Paddlesports
• Collection of educational paddling videos: ACA Paddlesports Resource Library
• Info on gear selection and how-to: Paddling.com
Include Girl Scout Members with Disabilities. Talk to Girl Scout members with disabilities and their caregivers.
Ask about needs and accommodations. Always be sure to contact the location and/or the instructor in advance to
ensure they are able to accommodate those with disabilities. For more information, visit Move United to find out
about inclusion in packrafting.
Equity. Ask the packraft provider about any height or weight restrictions, and communicate this information to
families in advance. Choose a different watercraft if these restrictions would keep anyone from participating.
Consider the history, culture, and past experiences of the Girl Scout members in your troop that could affect their
ability to equally participate in an activity. Work with members and families to understand how an activity is
perceived. Ensure that all Girl Scout members and their families feel comfortable and have access to whatever is
needed to fully participate, such as proper equipment, prior experiences, and the skills needed to enjoy the activity.
See the Equity section of the Introduction to Safety Activity Checkpoints for general advice about expense,
Emergency Action Plan (EAP). Review and document your Emergency Action Plan (EAP) before starting any
activity and review it so all are prepared. Think through scenarios of what can go wrong, such as an accident,
physical injury, missing person, sudden illness, or sudden weather or water emergencies.
Packrafting Checkpoints
Confirm swimming ability. Success on the water depends on comfort and ability in the water. Conducting a
swimming assessment in advance is highly recommended. See Swimming Safety Activity Checkpoints for a sample
or ask your instructor for guidelines. If a swimming test is not possible, presume all participants are non-
swimmers.
Ensure all paddlers wear a U.S. Coast Guard–approved life jacket. Type III life jackets are recommended and
should fit according to weight and height specifications. Inspect life jackets to ensure they are in good condition
and contain no tears, compressed foam, or broken buckles/zippers.
Practice recovery procedures. The instructor should demonstrate self-recovery and righting techniques, and
paddlers should learn and practice these skills. This will help prevent disorientation or fear if they end up in the
water.

2024–2026 Safety Activity Checkpoints Page 145 of 226
Paddlers must be trained on how to perform wet exits and must be able to execute one successfully before
being allowed to use a decked boat. If spray skirts are used, wet exits must be performed before the outing can
begin.
Practice appropriate self-rescue and re-entry techniques. If packrafting in cold water, paddlers should learn
cold water survival techniques and treatment for hypothermia.
Verify instructor knowledge and experience. The skill level of the adults must be higher than the difficulty of
the intended packrafting type. Use the chart below to verify required instructor certifications. The instructor or
guide must be able to effectively communicate commands and instructions.
Required Certifications: Use the chart below to verify required instructor certifications.
Type of Craft
and Water
Grade Level
Participant to
Instructor Ratio
Instructor/Expert Certification
With multiple choices, only one is required.
Packrafting
Flat water, protected
from wind, waves, and
outside boat traffic,
with current less than
0.5 knots, and within
swimming distance of
shore
B, J, C, S, A
5 Participants: 1 trip
leader; with an
additional qualified
assistant, ratio 10:2
• American Canoe Association (ACA)
Paddlesports Safety Facilitator
certification in kayaking AND completion
of a Flatwater Kayak Safety and Rescue
skills course
• OR ACA Level 1: Introduction to
Packrafting Instructor or higher
• OR Girl Scouts small craft safety training
• OR American Red Cross (ARC)
Lifeguarding with Waterfront Module
• OR an instructor with the demonstrated
equivalent experience in line with these
credentials
River Class I:
Moving water rivers
including class I
sections
J, C, S, A
5 Participants: 1 trip
leader; with an
additional qualified
assistant, ratio 10:2
• ACA Paddlesports Safety Facilitator in
Kayaking and completion of a Level 2:
Essentials of River Packrafting skills
course
• OR ACA River Kayaking Day Trip Leading
Skills Assessment
• OR ACA Level 2: Essentials of River
Packrafting instructor or higher
• OR an instructor with the demonstrated
equivalent experience in line with these
credentials
• Use helmets when they are
recommended or provided.
River Class II:
Whitewater rivers
including class II
sections, where limited
maneuvering in current
is required to avoid
obstacles
C, S, A
5 Participants: 1 trip
leader; with an
additional qualified
assistant, ratio 10:2
• ACA River Kayak Day Trip Leader
Assessment and Level 3: River Safety and
Rescue Skills Assessment
• OR Level 3: River Packrafting Skills
Assessment and Level 3: River Safety and
Rescue Skills Assessment
• OR ACA Level 3: River Packrafting
Instructor or higher

2024–2026 Safety Activity Checkpoints Page 146 of 226
• OR an instructor with the demonstrated
equivalent experience in line with these
credentials
• Helmets required
River Class III:
Sections of rivers rated
class II–III, where
maneuvering in current
is required to avoid
obstacles
C, S, A
5 Participants: 1 trip
leader; with an
additional qualified
assistant, ratio 10:2
• ACA River Kayak Day Trip Leader
Assessment and Level 4: Swiftwater
Rescue Skills Assessment
• OR Level 4: Whitewater Packrafting Skills
Assessment and Level 4: Swiftwater
Rescue Skills Assessment
• OR ACA Level 4: Whitewater Packrafting
Instructor or higher
• OR an instructor with the demonstrated
equivalent experience in line with these
credentials
• Helmets required
Packraft touring:
Calm, protected water
with constant access to
safe landing and within
0.5 nm from shore;
winds less than 10
knots; waves less than 1
foot; current less than 1
knot; no surf—shore
break less than 1 ft; not
applicable to crashing
surf zone
C, S, A
5 Participants: 1 trip
leader; with an
additional qualified
assistant, ratio 10:2
• ACA Level 2: Essentials of Kayak Touring
Trip Leader Assessment
• OR ACA Level 2: Kayak Touring
Instructor or higher
• OR an instructor with the demonstrated
equivalent experience in line with these
credentials
Trips in
Coastal/Sea/Surf
Waterways:
Lakes or coastal waters
with potential areas of
exposure to mild wind
and wave conditions,
with constant access to
safe landing and within
1.5 nm from shore; 10–
15 knot winds; 1–2 foot
waves (chop); 1–2 foot
surf; 1–2 knots of
current
C, S, A
Varies, mandated by
outfitter
• Licensed professional guide
• OR licensed professional instructor who
is provided by an outfitter
Qualified assistants: ACA does not put strict parameters on the definition of “qualified assistant” on purpose;
that person does not need to be certified, but they need to understand the curriculum and be able to meaningfully
assist in the delivery of a quality course as well as provide assistance and rescue should an emergency arise.
Generally speaking, they should not need constant supervision like a brand new student. ARC Basic Water Rescue,
ACA Paddlesport online course, Girl Scouts small craft safety training, or similar training is the preferred
preparation.
Recertifications Timelines: Certification for Paddling Instructors, Paddlesports Safety Facilitators, Guides, and
Trip Leader Assessment holders should be renewed every four years.

2024–2026 Safety Activity Checkpoints Page 147 of 226
Ensure the instructor/guide will review site-specific emergency techniques for the type of craft used. For
example, whitewater packrafters are instructed in how to navigate through rapids, how to breathe while
swimming in rapids, and how to swim to shore.
Ensure the lead instructor/guide has firsthand knowledge of the hazards and conditions of the location and
type of boat being used. You’ll want to verify that at least one adult instructor/guide is certified by the American
Canoe Association (ACA) or other sponsoring organization approved by your council. Certifications must be
appropriate for the activity.
Be aware of the lifeguard’s position. A stationary lifeguard can only be used when packrafting is taking place on
flat water close to shore. For large bodies of water or rivers, the lifeguard must be in a packraft and positioned with
the group.
Arrange for watchers/helpers. An adult watcher or skilled helper is required for certain size groups. See
Paddling and Rowing Sports—Master Progression Chart. This person should have basic packrafting skills. They
support the group by reinforcing instructions. They also watch for possible emergencies and help the instructor
with rescues, if needed. ARC Basic Water Rescue, ACA Paddlesport online course, Girl Scouts small craft safety
training, or similar training is the preferred preparation. Consult the instructor for specific watcher/helper
qualifications.
Keep weight evenly distributed. Keeping the weight of gear and fellow paddlers evenly distributed makes the
boat more stable and easier to paddle.
Select a safe site. Do not paddle in unknown areas. Know the locations of all shipping channels. Do not paddle
farther than 1 mile from the nearest shore. Americanwhitewater.org is the standard for classifying river venues.
When certain venues/waterways are not listed on the Americanwhitewater.org site, expert advice will be sought
before approval can be provided. The USGS National Water Dashboard can be used to assess stream flow, surface
water levels, groundwater levels, spring water levels, water quality, precipitation, atmospheric changes, weather
conditions, alerts, and more. Make sure of the following:
• Stay together. On long passages, boats should stay close enough together that a group decision can be
made if wind and water conditions change.
• Only perform this activity on water that has been run and rated and up to Class III difficulty, as defined
by the American version of the International Scale of River Difficulty.
• Be aware of possible changes in water level due to rain, tides, or dam releases, and how these affect
water conditions.
• Avoid hazards such as strainers, sieves, hydraulics, waterfalls, bridges, dams, and fences. Rapids must be
avoided unless part of a planned whitewater route.
Research water conditions and select the right boats for participant skill level. Consider weather and water
conditions, weight of passengers, and equipment to be carried. Make sure that:
• Packraft weight and capacity are not exceeded
• Paddlers are using the type of packraft needed for the water conditions present, and ensure the packraft is
sized for the person(s) using it
• Packrafts are not overloaded with gear; gear should be distributed evenly with paddlers
Know universal signals. Whistle and visual signals are used to pass messages or call for help. Learn them at
Paddle.com.
File a float plan. If participating in a long-distance trip, file a float plan with council so a reliable person can notify
authorities should your group not return on time.
On the Day of Paddling

2024–2026 Safety Activity Checkpoints Page 148 of 226
• Get a weather and wind report. Check Weather.com or other reliable weather sources, including the
“boat and beach” forecast, which covers wind speed, water temperature, and wave height. Be prepared
with a backup plan or postpone the activity if weather prevents the outing.
• Review what to do in a storm. If thunder is heard, or lightning seen, get everyone off the water
immediately. Do not return until at least 30 minutes have passed since the last evidence of the storm. If you
cannot get to shore, secure all loose gear, keep a sharp lookout for other boats and obstructions, head into
the wind at a 45-degree angle, and stay low. If possible, do not touch metal or water when there is a chance
of lightning.
• Review self-rescue techniques. See above.
• Use the buddy system. Instruct participants to keep sight of at least one other boat at all times.
• Transport boats safely.
Report accidents. Notify marine law enforcement or your council, if appropriate.
Privately Owned Packrafts. Ensure that the owner/operator:
• Is a knowledgeable adult with the understanding and ability to take responsibility for Girl Scouts’ safety
and well-being.
• Agrees to follow the Safety Activity Checkpoints relevant to the activity.
• Maintains the vessel in accordance with Safety Activity Checkpoints.
• Coordinates with the activity leader to confirm the required safety gear is available for all participants and
gear meets the specifications of authorities for the local jurisdiction.
• Meets Coast Guard and/or local jurisdiction requirements.
• Maintains insurance and registration as required by law in their jurisdiction.
Safety Gear. Some gear will depend on the type of packrafting, or on water conditions. Check with your instructor.
• U.S. Coast Guard–approved life jacket (Type III life jackets recommended and should fit according to weight
and height specifications)
• Packraft sized appropriately for the participants and suitable for the type of water
• Packraft with proper flotation and any air bags checked before use
• Double-bladed paddle in the appropriate size and style for the activity and person using them (ask
instructor about proper fit)
• Emergency sound device, such as a whistle or compressed air horn
• Rescue gear appropriate for boat type and conditions (ask your instructor), such as:
o at least one graspable and throwable Coast Guard–approved personal flotation device, throw bag,
or throw line
o Locking blade knife carried by instructor, guide, or qualified adult in their life jacket or other
readily accessible place, and a line for towing or rescue
o Any other items required by the boating jurisdiction in which Girl Scouts will paddle
• Emergency gear appropriate for the paddling type and distance from shore, such as:
o Emergency repair kit: duct tape or electrical tape, screwdriver, pliers, spare paddle, waterproof first
aid kit, repair kit, and standard safety equipment, including signaling equipment
• Emergency survival packet: raincoat, waterproof matches, lightweight/space blanket, hat, pocket knife,
10x10-foot tarp, rope, food, and appropriate liquids. Food and water bottles should be secured in the boat.
• Safety helmet with strong, flexible plastic shell and chin strap with buckle, should be worn when:
o paddling in waters that are Class II or III, or
o paddling in or near sea caves
• Bailer (a scoop or sponge for removing water from the boat)
• A waterproof flashlight
Note that packrafting at night may require additional gear; consult your instructor.

2024–2026 Safety Activity Checkpoints Page 149 of 226

2024–2026 Safety Activity Checkpoints Page 150 of 226
Row Boating
Council Approval: Required
Activity Permitted for: *D B J C S A
Not Recommended for: Daisies, except with an experienced adult in
each rowboat
About Row Boating
Rowing uses oars to propel a boat across the water and is one of the earliest forms of transportation. It is a great
way to build teamwork and skill. Beginners can start rowing in a stable boat on flat water. Most Daisies do not have
the reach needed to row a standard rowboat. Daisies may use basic rowboats only if they have an adult in the boat
with them. Interested rowers can progress to competitive “crew” racing, or specialized rowing in boats such as
Venetian gondolas. Currents, waves, rapids, and wind affect conditions. Those conditions and the type of boat will
determine what is appropriate for your troop. See Paddling and Rowing Sports—Master Progression Chart.
Most rowing is done on flat water with little or no current, such as a lake, calm river, or pond. Oceans and rivers
can be suitable if rowers have advanced instruction and skills. Consult local experts or your council for suggestions.
You can learn a lot about rowing online. You should learn basic skills from an expert, but it is fun to discover gear
options, places to go, and cool tips. Check out the basics at U.S. Rowing.
Also find out about collegiate and Olympic rowing. Some colleges and universities have women’s crew teams,
which race streamlined boats called “sculls” and “shells” in races called “regattas.”
Learn More
• Rowing vocabulary
• General boating safety: Boat Safe, Boat-Ed, U.S. Coast Guard
Include Girl Scout Members with Disabilities. Talk to Girl Scout members with disabilities and their caregivers.
Ask about needs and accommodations. Always be sure to contact the location and/or the instructor in advance to
ensure they are able to accommodate those with disabilities. For more information, visit Paralympic.org and learn
about water safety for children with special needs.
Equity. Consider the history, culture, and past experiences of the Girl Scout members in your troop that could
affect their ability to equally participate in an activity. Work with members and families to understand how an
activity is perceived. Ensure that all Girl Scout members and their families feel comfortable and have access to
whatever is needed to fully participate, such as proper equipment, prior experiences, and the skills needed to enjoy
the activity. See the Equity section of the Introduction to Safety Activity Checkpoints for general advice about
expense,
Emergency Action Plan (EAP). Review and document your Emergency Action Plan (EAP) before starting any
activity and review it so all are prepared. Think through scenarios of what can go wrong such as an accident,
physical injury, missing person, sudden illness, or sudden weather or water emergencies.
Row Boating Checkpoints
Ensure participants are wearing U.S. Coast Guard–approved life jackets. Type III life jackets are
recommended and should fit according to weight and height specifications. Inspect life jackets to ensure they are in

2024–2026 Safety Activity Checkpoints Page 151 of 226
good condition and contain no tears. Exception for competitive racing sculls and shells: because they can get caught
on oars in fast-paced team rowing, it is acceptable to carry life jackets in a chase boat. All competitive rowers must be
strong swimmers.
Confirm swimming ability. Success on the water depends on comfort and ability in the water. Conducting a
swimming test in advance is highly recommended. See Swimming Safety Activity Checkpoints for a sample or ask
your instructor for guidelines. If a swimming test is not possible, presume all participants are non-swimmers. Only
strong swimmers may row in sculls and shells.
Practice recovery procedures. The instructor should demonstrate self-recovery and righting techniques for the
type of boat being used. Learn and practice these skills, as appropriate for the trip. This will help prevent
disorientation or fear if participants end up in the water.
Verify instructor/expert qualifications and experience. The skill level of the adults must be higher than the
difficulty of the intended rowing type. At least one adult instructor or lifeguard should be able to effectively
communicate commands and instructions, and be certified or trained per the rowing section of the Master
Progression Chart:
Type of Craft
and Water
Grade Level
Participant to
Instructor Ratio
Instructor/Expert Certification
With multiple choices, only one is required.
Rowing
Grade Level
Participant to
Instructor Ratio
Instructor/Expert Certification
With multiple choices, only one is required.
Rowboat:
Protected from
wind, waves, and
boat traffic, flat,
no current
D, B, J, C, S, A
Daisies only with
adult in boat
12:1 plus
1 watcher/
helper
• Girl Scouts small craft safety training
• OR American Canoe Association (ACA) Paddlesports
Safety Facilitator for that craft
• OR an instructor with the demonstrated equivalent
experience in line with these credentials
Scull or Shell:
Protected from
wind, waves, and
boat traffic, flat,
no current
C, S, A
who are strong
swimmers
Varies, consult
instructor or
coach
• U.S. Rowing Coach Level 1 or higher
• OR Demonstrated equivalent experience in line with
above credentials
Ensure the instructor will review site-specific emergency techniques for the type of craft used.
Ensure the lead instructor has firsthand knowledge of the hazards and conditions of the location and type of
boat being used.
Ensure adult certifications are appropriate for the activity.
Check lifeguard qualifications. Ensure lifeguards overseeing rowing have the proper training, experience, and
rescue equipment for the body of water and the specific watercraft involved.
Arrange for watchers/helpers. An adult watcher or skilled helper is required to assist the instructor. See
Paddling and Rowing Sports—Master Progression Chart. This person should have basic skills in rowing and
supports the group by reinforcing instructions and watching for possible emergencies. ARC Basic Water Rescue,
Girl Scouts small craft safety training, or similar training is the preferred preparation. Consult the instructor for
specific watcher/helper qualifications.
Select a safe site. Do not row in unknown areas; know the locations of all shipping channels. Rowing is not
permitted farther than 1 mile from the nearest shore. Make sure of the following:
• Busy channels are avoided when possible and crossed carefully, when necessary, at a 90-degree angle to
the channel traffic
• Surf zones and areas with standing waves are avoided

2024–2026 Safety Activity Checkpoints Page 152 of 226
• On long passages, boats are close enough together so that a group decision can be made if wind and water
conditions change
• You are aware of possible changes in water level due to tides or dam releases, and how these affect water
conditions
Avoid hazards. These include strainers, sieves, hydraulics, waterfalls, bridges, dams, fences, and low power lines.
Rapids must be avoided.
Do not exceed boat weight and capacity. Many boats have a plate near the stern (back) showing these
maximums.
Ensure boats are not overloaded with gear. Gear should be distributed evenly among rowers.
Know universal signals. Whistle and visual signals should be used to pass messages or call for help. Learn them at
Paddle.com.
Prepare for emergencies. Pack a waterproof first aid kit if taking a rowing trip. See Introduction: Standard Safety
Guidelines for information on what to pack and other guidelines.
File a float plan. If participating in a long-distance trip, file a float plan with a reliable person who will notify
authorities should your group not return on time.
On the Day of Paddling or Rowing
• Get a weather and wind report. Check Weather.com or other reliable weather sources, including the
“boat and beach” forecast, which covers wind speed, water temperature, and wave height. Be prepared
with a backup plan or postpone the activity if weather prevents the outing.
• Review what to do in a storm. If thunder is heard or lightning seen, get everyone off the water
immediately. Do not return until at least 30 minutes have passed since the last evidence of the storm. If you
cannot get to shore, secure all loose gear, keep a sharp lookout for other boats and obstructions, head into
the wind at a 45-degree angle, and stay low. If possible, do not touch metal or water when there is a chance
of lightning.
Report accidents. Notify marine law enforcement or your council as appropriate.
Safety and Required Gear
• U.S. Coast Guard–approved life jacket (Type III life jackets recommended and should fit according to weight
and height specifications)
• Rowboat, scull, or shell sized appropriately for the participants and suitable for the type of water
• Oars that are the right size and style for the boat type and person using them
• Emergency sound device, such as a whistle, compressed air horn, or VHF radio on navigable waters
• At least one graspable and throwable Coast Guard–approved personal flotation device (Type IV buoyant
cushion or ring buoy or equivalent) immediately available for each group on the water (for boats 16 feet or
longer)
• Rescue gear appropriate for boat type and conditions
• Emergency gear appropriate for the activity type and distance from shore, such as:
o bailer (a scoop for removing water from a boat) or foot pump
o emergency repair kit: duct tape or electrical tape, screwdriver, pliers, spare plugs
o spare oar or paddle, first aid kit, repair kit, and standard safety equipment, including signaling
equipment
o emergency survival packet: raincoat, waterproof matches, lightweight/space blanket, hat, pocket
knife, 10x10-foot tarp, rope, food, and appropriate liquids (food and water bottles should be
secured in the boat)
• All other items required by the boating jurisdiction in which you will row

2024–2026 Safety Activity Checkpoints Page 153 of 226

2024–2026 Safety Activity Checkpoints Page 154 of 226
Stand-Up Paddleboarding
Council Approval: Required
Activity Permitted for: J C S A
Not Recommended for: Daisies and Brownies
About Stand-Up Paddleboarding
Stand-up paddleboarding (SUP) is a water sport born from surfing, with modern roots in Hawaii. While standing,
paddlers propel SUPs across the water with long-handled paddles. Paddling is a full-body sport that uses core
muscles and develops excellent balance and coordination. With instruction, beginners can quickly learn to paddle
on flat water lakes and bays. Experienced paddlers can tackle ocean surf or rivers with a certified instructor’s
guidance.
With the right instruction, equipment, and preparation, almost any body of water is suitable for SUP. Start on flat
water with little or no current. Progress to more advanced conditions, like rivers or oceans.
The U.S. Coast Guard considers SUPs vessels when they are used outside of designated swim areas or ocean surfing
zones. Therefore, federal regulations about life jackets, sound devices, and lights apply.
Learn More
• Interactive maps of places to go: Paddling.com and American Whitewater
• For river paddling: American version of the International Scale of River Difficulty
• Free online paddling safety course, recommended for all paddlers: ACA Paddlesports
• Collection of educational paddling videos: ACA Paddlesports Resource Library
• Info on gear selection and how-to: Paddling.com
• American Canoe Association SUP: Leashes & Lifejackets Video—When to Wear, When Not to Wear
• Stand Up Paddle World magazine
Include Girl Scout Members with Disabilities. Talk to Girl Scout members with disabilities and their caregivers.
Ask about needs and accommodations. Always be sure to contact the location and/or the instructor in advance to
ensure they are able to accommodate those with disabilities. Visit Move United and Abilities.com to learn more
about inclusion and adaptive equipment for paddlers, as well as water safety for children with special needs.
Equity. Ask the paddleboard provider about any height or weight restrictions, and communicate this information
to families in advance. Ensure the provider has a board appropriate for each person, or choose another vendor.
Consider the history, culture, and past experiences of the Girl Scout members in your troop that could affect their
ability to equally participate in an activity. Work with members and families to understand how an activity is
perceived. Ensure that all Girl Scout members and their families feel comfortable and have access to whatever is
needed to fully participate, such as proper equipment, prior experiences, and the skills needed to enjoy the activity.
See the Equity section of the Introduction to Safety Activity Checkpoints for general advice about expense,
Emergency Action Plan (EAP). Review and document your Emergency Action Plan (EAP) before starting any
activity and review it so all are prepared. Think through scenarios of what can go wrong, such as an accident,
physical injury, missing person, sudden illness, or sudden weather or water emergencies.
Stand-Up Paddleboarding Checkpoints
Confirm swimming ability. Success on the water depends on comfort and ability in the water. Conducting a
swimming test in advance is highly recommended. See Swimming Safety Activity Checkpoints for a sample or ask

2024–2026 Safety Activity Checkpoints Page 155 of 226
your instructor for guidelines. If a swimming test is not possible, presume all participants are non-swimmers. Only
strong swimmers are approved for paddling in open ocean or moving water.
Ensure all paddlers wear a U.S. Coast Guard–approved life jacket. Type III life jackets are recommended and
should fit according to weight and height specifications. Inspect life jackets to ensure they are in good condition
and contain no tears.
Practice recovery procedures. The instructor demonstrates self-recovery and righting techniques. Learn and
practice these skills. This will help prevent disorientation or fear if someone ends up in the water (which is likely
with SUP).
Verify instructor knowledge and experience:
• The skill level of the adults must be higher than the difficulty of the intended activity.
• The instructor or guide must be able to effectively communicate commands and instructions.
• The instructor or guide needs to review site-specific emergency techniques. For example, when paddling in
shallow water, the instructor should remind paddlers how to fall from their boards.
• The lead instructor or guide needs to have firsthand knowledge of the hazards and conditions of the
location being used.
• At least one adult instructor or guide should be currently certified for the conditions per the Master
Progression Chart:
Stand-Up
Paddleboarding
Grade Level
Participant to
Instructor Ratio
Instructor/Expert Certification
With multiple choices, only one is required.
Flat water:
Protected from wind,
waves, and outside
heavy boat traffic, with
current less than 0.5
knots, and within
swimming distance of
shore
J, C, S, A
5 participants: 1
trip leader; with
an additional
qualified
assistant, ratio
10:2
• American Canoe Association (ACA)
Paddlesports Safety Facilitator certification in
SUP and completion of ACA Level 1:
Introduction to SUP Skills course
• OR ACA SUP Day Trip Leader Assessment
• OR Level 1 Introduction to SUP Instructor or
higher
• OR Girl Scouts small craft safety training
• OR completed boat education paddle sports
course for your state
• OR an instructor with the demonstrated
equivalent experience in line with these
credentials
• OR American Red Cross Lifeguarding with
Waterfront Module
• OR demonstrated equivalent experience in line
with above credentials
River Class I:
Moving water rivers
including class I
sections
C, S, A
• ACA SUP Day Trip Leading Skills Assessment
and ACA Level 3: River SUP Skills Course
• OR ACA Level 3: River SUP instructor or higher
• OR an instructor with the demonstrated
equivalent experience in line with these
credentials
• Use helmets when they are recommended or
provided. Leashes not required, but if worn
must be on a quick-release belt.
River Class II:
Whitewater rivers
including class II
C, S, A
5 Participants: 1
trip leader; with
• ACA Level 4: Whitewater SUP Assessment and
Level 4: Swiftwater Rescue Skills Course

2024–2026 Safety Activity Checkpoints Page 156 of 226
sections, where limited
maneuvering in current
is required to avoid
obstacles
an additional
qualified
assistant, ratio
10:2
• OR ACA Level 4: Whitewater SUP instructor or
higher
• OR an instructor with the demonstrated
equivalent experience in line with these
credentials
• Helmets and quick-release leashes required.
Coastal SUP /
Touring:
Calm, protected water
with constant access to
safe landing, within half
mile from shore; wind
less than 10 knots,
waves less than 1 foot,
current less than 1
knot, no surf
C, S, A
5 Participants: 1
trip leader; with
an additional
qualified
assistant, ratio
10:2
• ACA SUP Trip Leader Assessment
• OR ACA Level 2: Essentials of SUP Instructor or
higher
• OR an instructor with the demonstrated
equivalent experience in line with these
credentials
• Helmets not required. Leashes required
(straight or coil).
Trips and ocean surf
SUP
C, S, A
Varies, mandated
by outfitter
• Licensed professional guide
• OR licensed professional instructor who is
provided by an outfitter.
Class III–V
Not Permitted
N/A
N/A
Qualified assistants: The American Canoe Association does not put strict parameters on the definition of “qualified
assistant” on purpose. Assistants do not need to be certified, but they need to understand the curriculum and be able to
meaningfully assist in the delivery of a quality course and provide assistance and rescue should an emergency arise. ACA
Paddlesport online course, Girl Scouts small craft safety training, or similar training is recommended as preparation.
Check lifeguard qualifications. For lifeguards used as experts overseeing SUP, ensure they have the proper
training, experience, and rescue equipment for the body of water being used.
Arrange for watchers/helpers. An adult watcher or skilled helper is required for some group sizes. See Paddling
and Rowing Sports—Master Progression Chart. This person should have basic skills in the activity and support the
group by reinforcing instructions, watching for possible emergencies, and helping with rescues if needed. Basic
water rescue, Girl Scouts small craft safety training, or similar training is the preferred preparation. Consult the
instructor for specific watcher/helper qualifications.
Select a safe site. Do not paddle in unknown areas; know the locations of all shipping channels. Paddling is not
permitted farther than 1 mile from the nearest shore. Make sure of the following:
• The launching area is free of glass and debris and has a gentle slope and good footing. Rocks should be
avoided.
• Busy channels are avoided when possible and crossed carefully, when necessary, at a 90-degree angle to
the channel traffic.
• Surf zones and areas with standing waves are avoided, except as part of planned ocean/surf or whitewater
paddling.
• On long passages, boards are close enough together so that a group decision can be made if wind and water
conditions change.
• You are aware of possible changes in water level due to tides or dam releases, and how these affect water
conditions.
• Avoid hazards such as strainers, sieves, hydraulics, waterfalls, bridges, dams, fences, and low power lines.
Rapids must be avoided unless part of a planned whitewater route.

2024–2026 Safety Activity Checkpoints Page 157 of 226
Research water conditions. Select the right boards for participant skill level and conditions.
Know universal signals. Whistle and visual signals are used to pass messages or call for help. Learn them at
Paddle.com.
Prepare for emergencies. Pack a waterproof first aid kit if you will be away from shore. Follow other guidelines
in Introduction: Standard Safety Guidelines.
File a float plan. If participating in a long-distance trip, file a float plan with a reliable person who will notify
authorities should your group not return on time.
On the Day of Paddling
• Get a weather and wind report. Check Weather.com or other reliable weather sources, including the
“boat and beach” forecast, which covers wind speed, water temperature, and wave height. Be prepared
with a backup plan or postpone the activity if weather prevents the outing.
• Review what to do in a storm. If thunder is heard, or lightning seen, get everyone off the water
immediately. Do not return until at least 30 minutes have passed since the last evidence of the storm. If you
cannot get to shore, keep a sharp lookout for other boats and obstructions, head into the wind at a 45-
degree angle, and stay low.
• Review self-rescue techniques. Ensure each person can get back on their board. When paddling in cold
water, also review cold-water survival techniques and treatment for hypothermia.
• Use the buddy system. Stay within sight of at least one other board.
• Transport boats safely. Use car-top racks or trailers specifically designed for paddleboards. Secure them
with two lines across the top (one at each end), and with lines at the bow and the stern. Drivers must have
prior experience hauling trailers.
Report accidents. Notify marine law enforcement or your council as appropriate.
Safety Gear. Some of the gear you will need depends on the type of paddling or on the water conditions. Check
with your instructor.
• A U.S. Coast Guard–approved life jacket is worn, always, while paddling (Type III life jackets recommended
and should fit according to weight and height specifications)
• Paddleboards sized appropriately for the participants and suitable for the type of water
• Paddles the appropriate size and style for the activity and person using them (a good rule of thumb is 10
inches higher than the paddler’s height; keep extras on hand)
• Emergency sound device, such as a whistle
• Rescue gear appropriate for conditions, such as a throw bag or throw line or waist-mounted tow system
• Leash to keep board close in case paddler falls off (no leashes in rivers, to avoid entrapment)
• Helmet, chest protector, arm protection, and leg protection for whitewater stand-up paddleboarding
(inflatable board recommended)
• Any other items required by the boating jurisdiction in which you will paddle

2024–2026 Safety Activity Checkpoints Page 158 of 226
Whitewater Rafting
Council Approval: Required
Activity Permitted for: B (Class I–II rapids), J (Class I–III rapids),
C S A (Class I–IV rapids)
About Whitewater Rafting
Humans have been traveling by water for many thousands of years. Indigenous people were the first to navigate
rivers and rapids in search of fish, game, and new lands. Although these adventurous people used canoes rather
than “rafts,” they were the first known whitewater travelers in what is now known as North America.
Whitewater rafting is a thrilling experience for challenge-seeking Girl Scouts, as well as those who just love the
outdoors. Rafts come in a variety of styles and lengths, usually 11 to 20 feet long, seating four to 12 rafters. You will
need to find a reputable outfitter to arrange the trip. Ask your council about places and outfitters in your area. A
river guide will come with you and provide instruction, steering, and coaching. They will know the river well and
be able to perform rescues, if needed.
Rafting should only be done on rivers that have been run and rated, and only up to Class IV. It is important to
understand the International Scale of River Difficulty or Whitewater Classification System. Be sure all participants
have the training and experience to participate in the level expected. Be sure your guide has run the leg of the river
before. See the Paddling and Rowing Sports—Master Progression Chart for the types of whitewater Girl Scouts
may run, by program level.
The Whitewater Classification System
Class I (Easy): Moving water with small disturbances on the surface and a few small waves; poses little to no
danger to swimmers.
Class II (Novice/Beginner): Faster moving water with easily avoided rocks, holes, and waves; danger to
swimmers is still slight but care must be taken.
Class III (Intermediate): Fast moving water containing various rocks, holes, currents, and waves that require
skillful maneuvering to avoid; swimmers could be at risk and may require help.
Class IV (Advanced): Strong rapids, large waves, big holes, unpredictable currents, and dangerous
obstructions requiring multiple maneuvers to get through or around; swimmers at risk and will require help to
be rescued.
Class V (Expert): All characteristics of Class IV with the added danger of being longer and containing more
continuous features that may not be avoided; serious risk to swimmers, others may be of no help.
Class VI (non-runnable): Only a team of experts who carefully plan every aspect of this expedition would have
hope of surviving these rivers and rapids.
Learn More
• Interactive map of places to go and a list of rivers: American Whitewater
• Whitewater rafting terminology
Include Girl Scout Members with Disabilities. Talk to Girl Scout members with disabilities and their caregivers.
Ask about needs and accommodations. Always be sure to contact the location and/or the instructor in advance to

2024–2026 Safety Activity Checkpoints Page 159 of 226
ensure they are able to accommodate those with disabilities. For more information, visit Move United for
information about adaptive rafting. Learn about water safety for children with special needs.
Equity. Ask the whitewater guide or outfitter about any height or weight restrictions, and communicate this
information to families in advance. Choose a different activity if these restrictions would keep anyone from
participating. Consider the history, culture, and past experiences of the Girl Scout members in your troop that
could affect their ability to equally participate in an activity. Work with members and families to understand how
an activity is perceived. Ensure that all Girl Scout members and their families feel comfortable and have access to
whatever is needed to fully participate, such as proper equipment, prior experiences, and the skills needed to enjoy
the activity.
Emergency Action Plan (EAP). Review and document your Emergency Action Plan (EAP) before starting any
activity and review it so all are prepared. Think through scenarios of what can go wrong such as an accident,
physical injury, missing person, sudden illness, or sudden weather or water emergencies.
Whitewater Rafting Checkpoints
Confirm swimming ability. Success on the water depends on comfort and ability in the water. Conducting a
swimming test in advance is highly recommended. See Swimming Safety Activity Checkpoints for a sample or ask
your instructor for guidelines. If a swimming test is not possible, presume all participants are non-swimmers.
All rafters must wear a U.S. Coast Guard–approved life jacket. Type III life jackets are recommended and
should fit according to weight and height specifications. Inspect life jackets to ensure that they are in good
condition and contain no tears.
All whitewater rafters must wear a helmet.
Ensure the skill level of the adults is higher than the difficulty of the intended activity.
Verify instructor knowledge and experience. Make sure the instructor or guide has certification from a formal
training program, such as the American Canoe Association’s rafting program or the International Rafting
Federation. The guide needs to be able to effectively communicate commands and instructions. Also, important:
• Instructor can demonstrate self-recovery and righting techniques for the type of trip (learn and practice
these skills when possible).
• The guide should review site-specific emergency techniques and help rafters learn how to float through
rapids, how to breathe while swimming in rapids, and how to swim to shore.
• The lead instructor or guide has firsthand knowledge of the hazards and conditions of the location and type
of boat being used.
• At least one guide has documented training and experience guiding in the type of river being run and has
run the river in advance.
• The guide subscribes to the American Whitewater Safety Code.
• At least one adult instructor or guide should be currently certified for the conditions per the Master
Progression Chart:
Whitewater
Rafting
Grade Level
Participant to
Instructor Ratio
Instructor/Expert Certification
With multiple choices, only one is required.
Whitewater
rafting day
trips
Class I–II
B, J, C, S, A
6:1 or 12:1 with
qualified
assistant
• American Canoe Association (ACA) Rafting Level 4
Instructor or higher
• International Rafting Federation (IRF) Guide
Certification
• Demonstrated equivalent experience in line with
above credentials

2024–2026 Safety Activity Checkpoints Page 160 of 226
Whitewater
rafting day
trips
Class I–III
J, C, S, A
Varies, ask
outfitter
Licensed professional river guide provided by an
outfitter
Whitewater
rafting day
trips
Class I–IV
C, S, A
Varies, ask
outfitter
Licensed professional river guide provided by an
outfitter
Whitewater
extended trips
Class I–IV
C, S, A
Varies, ask
outfitter
Licensed professional river guide provided by an
outfitter
Select durable rafts. Make sure the outfitter uses rafts that:
• Are of heavy-duty construction.
• Have at least four air compartments.
• Have an adequate number of large D-rings securely attached to the sides.
• Have snug hand lines along the sides.
• Are not loaded beyond their capacity of participants or gear.
Select a safe site. Do not paddle in unknown areas.
• Only raft on water that has been run and rated and up to Class IV difficulty, as defined by the American
version of the International Scale of River Difficulty.
• Be aware of possible changes in water level due to tides or dam releases and how these affect water
conditions.
• Avoid hazards such as strainers, sieves, hydraulics, waterfalls, bridges, dams, fences, and low power lines.
Know universal signals. Whistle and visual signals are used to pass messages or call for help. Learn them at
Paddle.com.
File a float plan. If participating in a long-distance trip, file a float plan with a reliable person who will notify
authorities should your group not return on time.
On the Day of Rafting
• Get a weather and wind report. Check Weather.com and with your outfitter about expected weather and
river flow. Be prepared with a backup plan or postpone the activity if weather prevents the outing.
• Review what to do in a storm. If thunder is heard, or lightning seen, get everyone off the water
immediately. Do not return until at least 30 minutes have passed since the last evidence of the storm.
• Transport boats safely. Use car-top racks or trailers specifically designed for the type of craft. Secure
boats with two lines across the top (one at each end), and with lines at the bow and the stern. Drivers must
have prior experience hauling trailers.
Report accidents. Notify marine law enforcement or your council as appropriate.
Safety Gear. The gear you will need depends on the type of trip, water conditions, and weather expected. Check
with your outfitter.
• U.S. Coast Guard–approved life jacket for each person (Type III life jackets recommended and should fit
according to weight and height specifications)
• Raft sized appropriately for the participants and suitable for the type of rapids
• Paddles of the style and size required for the activity and person using them
• Emergency sound device, such as a whistle, compressed air horn, or VHF radio on navigable waters

2024–2026 Safety Activity Checkpoints Page 161 of 226
• At least one graspable and throwable Coast Guard–approved personal flotation device (Type IV buoyant
cushion or ring buoy or equivalent) immediately available for each group on the water (boats 16 feet or
longer)
Rescue and emergency gear appropriate for boat type and conditions, such as:
• A throw bag or throw line
• Raft repair kit
• Spare paddle, first aid kit, and standard safety equipment, including signaling equipment
• Emergency survival packet: raincoat, waterproof matches, lightweight/space blanket, hat, pocket knife,
10x10-foot tarp, rope, food, and appropriate liquids (food and water bottles should be secured in the boat)
• A safety helmet for each person with a strong, flexible plastic shell and chin strap, as well as openings for
when rafting in waters that are Class II or higher
• Protective clothing (wet suit or dry suit) worn when rafting in water below 70 degrees Fahrenheit (when
water is warmer, wear layered, non-cotton clothing; store any extra clothing in a waterproof bag)
• Bailer (a scoop for removing water from a boat) or foot pump if the boat is not self-bailing
• Secure, closed-toe hiking/sport sandals or water shoes, or other non-slip footwear (old sneakers are fine),
no flip-flops or loose slip-on water moccasins)
• Eyeglass keepers or goggles for those who need them
• Dry bags and/or waterproof containers to keep gear dry on extended trips; encourage all to pack wisely
(do not overload rafts)
• Compass, waterproof chart, and other essentials for extended trips
• Locking blade knife carried by river guide in their life jacket or other readily accessible place
• Any other items required by the boating jurisdiction in which you will raft

2024–2026 Safety Activity Checkpoints Page 162 of 226
Parades and Other Large Gatherings
Council Approval: Not Required
Activity Permitted for: D, B, J, C, S, A
About Parades
Parades are a great opportunity to show what you care about, connect with your community, and have fun!
Whether you are participating in a parade or planning a Girl Scout event, series, or other large group gathering, it is
important to represent Girl Scouts in the best possible way and encourage troop members to plan the festivities.
Include Girl Scout Members with Disabilities. Talk to Girl Scout members with disabilities and their caregivers.
Ask about needs and accommodations. Always be sure to contact the location and/or the instructor in advance to
ensure they are able to accommodate those with disabilities.
Equity. Many parades are held to mark holidays. Note that holidays in the U.S. have different meanings to different
communities based on history, culture, and religion. Encourage conversation around what the particular holiday
means to the group, and respect all opinions. Consider these factors and past experiences of the Girl Scout
members in your troop that could affect their ability to equally participate in an activity. Work with members and
families to understand how an activity is perceived. Ensure that all Girl Scout members and their families feel
comfortable and have access to whatever is needed to fully participate, such as proper equipment, prior
experiences, and the skills needed to enjoy the activity.
Emergency Action Plan (EAP). Review and document your Emergency Action Plan (EAP) before starting any
activity and review it so all are prepared. Think through scenarios of what can go wrong such as an accident,
physical injury, missing person, sudden illness, or sudden weather or water emergencies.
Parades and Other Large Gathering Checkpoints
Respect parade and large group gathering standards. Local regulations and permit procedures are observed
for public gatherings, facility use, food handling, certificates of insurance, and sales or excise tax. Guidelines for
personal protection are observed. Local authorities are contacted for safety and security suggestions and
assistance applicable to the parade or event. For safety reasons, name tags or other personal identification are not
worn in public places. GSUSA and council guidelines on publicity, photo releases, and interviews are observed.
Select a safe location. The location for any community event, large group gathering, or parade is inspected in
advance, with consideration for the following, as appropriate:
• Accessibility to the group and to the public
• Suitability to event size, age groups, and kinds of activities
• Parking availability
• Availability of restrooms
• Security arrangements, including availability of police protection
• Lighting for evening and indoor events
• Vulnerability to inclement weather
• Proximity to medical facilities
• Fire safety, which includes not exceeding the occupancy limits for indoor activities or events; sufficient
emergency exits, which are well marked and operational; and having an emergency evacuation plan in
place

2024–2026 Safety Activity Checkpoints Page 163 of 226
• A food-preparation area used for large groups of people meets state and local standards and includes
sufficient potable water and restrooms for participants
• Provisions are made for garbage removal and site cleanup
Consider the following:
• Need, interest, and readiness of the group
• The sponsor of the event or activity
• The needs of the community to be served
• Scheduling issues
• GSUSA and council guidelines on fundraising, endorsements, collaborating with other organizations, and
maintaining nonprofit status
Make appropriate plans for parade floats. Floats drawn by trucks and automobiles must be covered by
automobile insurance in the name of the vehicle owners. Float construction is safe, using non-toxic or flame-
retardant materials, and secured to the body of the float and the vehicle. Floats are equipped with portable ABC fire
extinguishers.
Identify a place to meet in case of separation from the supervising adult or the group.
No leaning over the edges; legs and arms do not hang outside of the float. When sitting on a moving float,
remain securely seated with no legs dangling over the side.
Riders on floats have secure seating, or a secure handhold or safety harness is used if standing. Floats are
not overcrowded. Participants do not walk close to moving floats. An adult accompanies youth on any moving float.
Any coupling of a trailer to a vehicle is appropriate to the load and has a safety chain.
Nothing is distributed to onlookers from a moving vehicle or a float.
Prepare for emergencies. Ensure the presence of a first aid kit and a first aider with a current certificate in First
Aid, including Adult and Child CPR or CPR/AED, who is prepared for cases of abrasions, sprains, and fractures.
Emergency transportation is available; if any part of the activity is located 30 minutes or more from emergency
medical services, ensure the presence of a first aider and plan for emergency medical routes; consider heavily
trafficked routes depending on the day and time.
Take safety precautions. Instruction is given on safe pedestrian practices, when applicable. Adults must know
where youth are, always. Advance arrangements are made for picking up the Girl Scouts after the event, and
parents and participants understand the arrangements.
Gear for Parades and Other Large Group Gatherings
• Girl Scout uniform, pin, or some other means of group identification
• Comfortable walking shoes
Additional Recommended Gear
• Sunscreen (SPF of at least 15) and lip balm
• Sunglasses
• Reusable water bottle and water for filling bottles

2024–2026 Safety Activity Checkpoints Page 164 of 226
Pocket Knife and Jackknife Safety
Council Approval: Required
Activity Permitted for: B J C S A
Not Permitted for: Daisies*
*Daisies can learn basic knife safety with cardboard/wood examples.
About Pocket Knives / Jackknives
An important and versatile tool for camping, the pocket/jackknife is safe when handled carefully. It may have more
than one blade or tool. It may include an awl for drilling holes, a can opener, or a combination screwdriver and
bottle cap opener. Inform parents prior to teaching this skill. All Girl Scouts should receive proper training and sign
off on the Girl Scout Pocket Knife/Jackknife Safety Pledge.
Learn More
• Montana Knife Company’s Knife Skills for Kids: How to Teach Your Children Safe Knife Use
• Gear Junkie: Kids and Knives
Include Girl Scout Members with Disabilities. Talk to Girl Scout members with disabilities and their caregivers.
Ask about needs and accommodations. Always be sure to contact the location and/or the instructor in advance to
ensure they are able to accommodate those with disabilities.
Equity. If planning to allow any pocket knives on Girl Scout adventures, provide knife safety education for all troop
members, whether or not they own a knife. See about borrowing from your council or a neighboring troop for the
education piece. Consider the history, culture, and past experiences of the Girl Scout members in your troop that
could affect their ability to equally participate in an activity. Work with members and families to understand how
an activity is perceived. Ensure that all Girl Scout members and their families feel comfortable and have access to
whatever is needed to fully participate, such as proper equipment, prior experiences, and the skills needed to enjoy
the activity.
Emergency Action Plan (EAP). Review and document your Emergency Action Plan (EAP) before starting any
activity and review it so all are prepared. Think through scenarios of what can go wrong such as an accident,
physical injury, missing person, sudden illness, or sudden weather or water emergencies.
Pocket Knife/Jackknife Checkpoints
Assess participants’ maturity level. Participants must be old enough to understand safety procedures and handle
equipment so as not to endanger themselves and others.
Dress appropriately for the activity. Avoid wearing dangling earrings, bracelets, and necklaces that may become
entangled in equipment. Make sure long hair is tied back and always wear closed-toed shoes.
Skill learning and development should focus on the following areas:
• How to open and close knife safely
• How and when to use knife
• How to safely store knife when not in use
• How to sharpen the blade
• How to clean the blade/knife
• How to pass and acknowledge when you receive the knife by saying Thank You
• What the circle of safety is

2024–2026 Safety Activity Checkpoints Page 165 of 226
• Always keeping the knife pointed in safe direction
• Additional emergency and safety procedures
Verify instructor knowledge and experience. One adult needs to be trained in pocket knife/jackknife safety
(depending on which you are doing). These checkpoints should be reviewed with the facilitator and the Girl Scout
Pocket Knife/Jackknife Safety Pledge should be signed off.
Girl Scout Pocket Knife/Jackknife Safety Pledge
Carrying a pocket knife/jackknife is an honor and a responsibility. I have participated in a specific training and
workshop on pocket knife/jackknife handling and safety. For the safety of myself and those around me, I agree to
the following guidelines:
I will always:
• respect my pocket knife/jackknife and use it as a designated tool,
• keep my pocket knife/jackknife closed and stored when not in use,
• be sure to not use my pocket knife/jackknife when there is a chance that someone could be hurt,
• promise to never throw or toss my pocket knife/jackknife, and
• use my pocket knife/jackknife safely and in the way in which I was taught.
Date: _________________________________________________________________
Girl Scout Name/Signature: _____________________________________________________________________________________________
Responsible Adult Name/Signature: ___________________________________________________________________________________

2024–2026 Safety Activity Checkpoints Page 166 of 226
Rocketry / Model Rocketry
Council Approval: Required
Activity Permitted for: J, C, S, A
Activity Not Permitted for: Daisies and Brownies*
*Daisies and Brownies are not quite ready to participate in model rocketry (as defined below), but they can
participate in simple science experiments like air-powered drinking straw rockets, balloon rockets, stomp rockets, or
water-powered bicycle pump rockets.
*Daisies and Brownies may observe model rocket launches at a safe distance.
About Rocketry
Launching model rockets is a relatively safe and inexpensive way to learn about the principles of engineering,
design, physics, and in some cases, chemistry. Model rockets are constructed of paper, wood, plastic, and other
lightweight materials and use an electrical launch system. Sport rocketry clubs can be found in communities across
the United States.
Volunteers should use basic safety principles, including eye safety and safe distances when setting up simple
rocketry experiments. For guidance, see Miscellaneous Activities Safety Activity Checkpoints and always consult the
safety standards in the Introduction: Standard Safety Guidelines.
Note: Rockets over 1,500 grams are considered “high powered rockets” and require certification from the National
Association of Rocketry. Contact your council for information and approval for high powered rocketry. Radio
controlled rocket gliders are not approved.
Learn More
• National Association of Rocketry
• NASA Beginners Guide to Model Rockets
• Estes Model Rockets Education
Include Girl Scout Members with Disabilities. Talk to Girl Scout members with disabilities and their caregivers.
Ask about needs and accommodations. Always be sure to contact the location and/or the instructor in advance to
ensure they are able to accommodate those with disabilities.
Equity. Consider the history, culture, and past experiences of the Girl Scout members in your troop that could
affect their ability to equally participate in an activity. Work with members and families to understand how an
activity is perceived. Ensure that all Girl Scout members and their families feel comfortable and have access to
whatever is needed to fully participate, such as proper equipment, prior experiences, and the skills needed to enjoy
the activity. See the Equity section of the Introduction to Safety Activity Checkpoints for general advice about
expense,
Emergency Action Plan (EAP). Review and document your Emergency Action Plan (EAP) before starting any
activity and review it so all are prepared. Think through scenarios of what can go wrong such as an accident,
physical injury, missing person, sudden illness, or sudden weather or water emergencies.
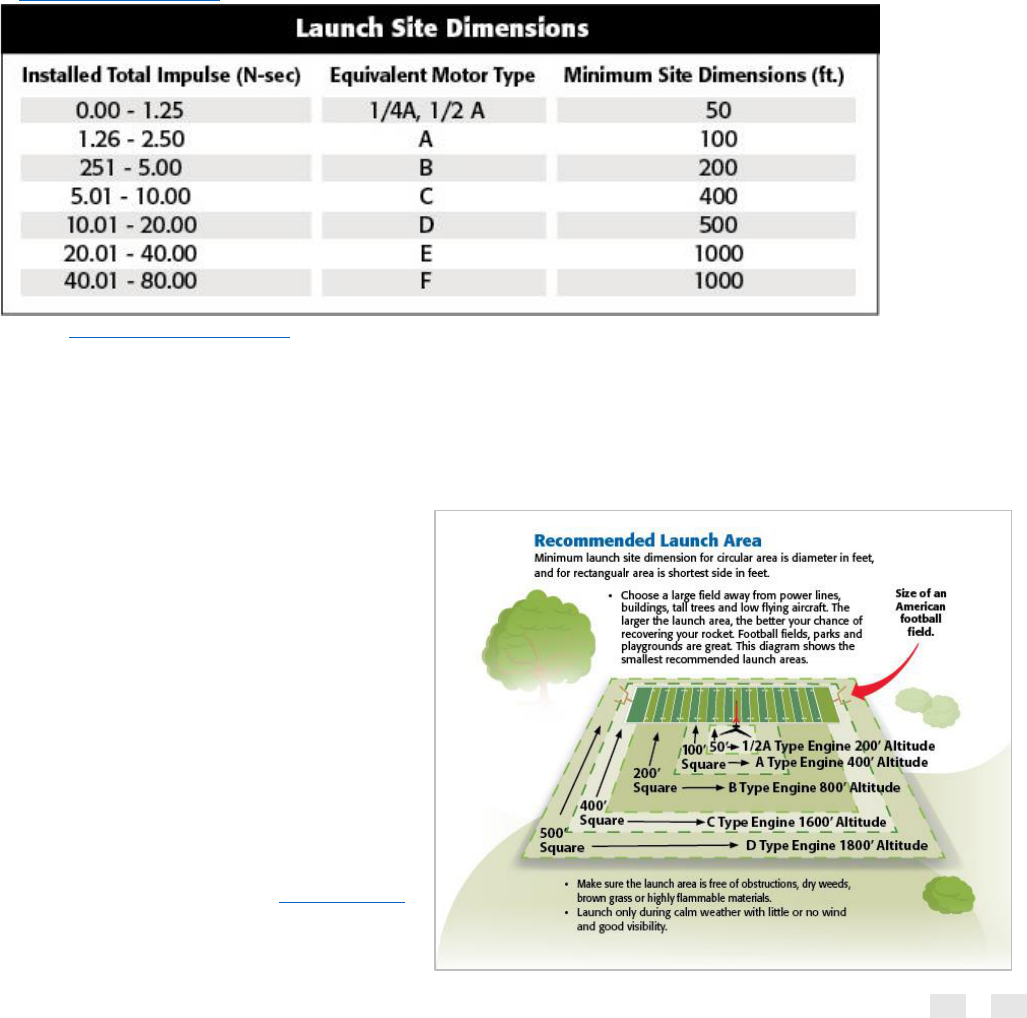
2024–2026 Safety Activity Checkpoints Page 167 of 226
Rocketry Checkpoints
Verify instructor knowledge and experience. Make sure that the facilitator has experience with model rocketry
and understands common safety protocols. Consider partnering with your local rocketry club or science teacher
who may have experience with model rockets.
Assess maturity level. Participants must be old enough to understand safety procedures and handle equipment so
as not to endanger themselves and others.
Launch site. Launch rockets outdoors in an open area. Choose a large open area or field that is free of crowds,
away from power lines, buildings, tall trees, and low-flying aircraft. The larger the launch area, the better the
chance of recovering the rocket. Football fields, parks, and playgrounds often work well. According to the National
Association of Rocketry, launch site size depends on the size of the rocket and should be at least as large as the
recommendations in the table below. Set up safety zones for launch and for observation (at least 15 feet away with
D motors or smaller and 30 feet away with larger rockets).
Source: Get Started with Estes
*Based on the Model Rocket Safety Code of the National Association of Rocketry
Prepare for emergencies. Follow your Emergency Action Plan (EAP) and always have a first aid kit available.
Know ahead of time where the nearest emergency room is located. For this activity, have a specific preparedness
plan in case of grass fires.
Get Permission. Check local ordinances. You should always check with your local city government for any
special regulations that may apply to your area.
Generally, you can fly most model rockets in a
clear area the size of a football or soccer field.
Follow FAA guidance. For example, if you live
near a U.S. border, take care not to cross over into
the territory of a foreign country; or within the
United States, be careful not to cross into a
sovereign nation or territory; and never launch
rockets near airports, low-flying aircraft, or
military bases. Seek permission from the site and
consider if permission is needed from any
neighboring properties should rockets need to be
recovered.
Check weather conditions. Check Weather.com
for safe weather conditions. Be prepared to
postpone the launch, if needed. Wind speeds
should not be greater than 20 miles per hour.

2024–2026 Safety Activity Checkpoints Page 168 of 226
There should be no lightning storms predicted in the area. Ensure there is no dry grass close to the launch pad and
that the launch site does not present risk of grass fires.
Materials. Ensure equipment and materials are in good working condition. Use materials that are lightweight and
non-metal parts for the nose, body, and fins of the rocket. Rockets should not weigh over 1,500 grams. If they do,
they will require a High-Power Rocketry Certification.
Motors. Use only certified commercially made model rocket motors. Do not tamper with the motors or use them
for any purposes except those recommended by the manufacturer.
Ignition system. Launch rockets with an electrical launch system and electrical motor igniters. Launch system
should have a safety interlock in series with the launch switch. Use a launch switch that returns to the “off” position
when the rocket is released. Fuse-lit ignition is prohibited.
Launch safety. Use a countdown before launch and ensure observers are paying attention and at a safe distance.
Safety zones may need to be adjusted based on wind conditions. Use a launch rod, tower, or rail that is pointed to
within 30 degrees of vertical to ensure that the rocket flies nearly straight up. Make sure the rod is above eye level
or capped off when not in use. Use a blast deflector to prevent the motor’s exhaust from hitting the ground. Consult
the National Association of Rocketry for guidance on simultaneous launches.
Flight safety. Do not launch rockets at targets, into clouds, or near airplanes. Do not put any flammable or
explosive payload on/in the rocket.
Misfires. If the rocket does not launch, have a plan to safely disconnect the battery and wait at least 60 seconds
before allowing anyone to approach the rocket.
Recovery. Use a flame-resistant or fireproof recovery system such as a streamer or parachute on the rocket so that
it returns safely and undamaged. Rockets may be used again if they are not damaged. Do not attempt to recover a
rocket from power lines, tall trees, or other dangerous places.
Dress appropriately for the activity. Dress for the weather. Often launch sites lack shade. In hot weather make
proper arrangements for shade, ensure that participants have sunscreen, and make water available.

2024–2026 Safety Activity Checkpoints Page 169 of 226
Sailing
Council Approval: Required
Activity Permitted for: *B J C S A
Activity Not permitted for: Daisies
Not Recommended for: *While sailing for Brownies is permitted,
carefully evaluate maturity and decision-making skills based on small
craft progression for Girl Scouts and consider whether the sailboat
type being used is appropriate.
About Sailing
The sport of sailing has become very high-tech and competitive since its humble beginnings, but sailors and racers
still must rely on the force of wind to propel their boats. There are a wide variety of sailboats, including small and
large sailboats, keelboats, and multihulls.
Note: Girl Scouts are not allowed to operate motorized boats without council permission and are never allowed to
parasail. The instructor-to-youth ratio recommended is one to four.
Know where to sail. Oceans and lakes are ideal for sailing, but many sailing or yacht clubs offer instructions on
reservoirs, rivers, and ponds. Contact your Girl Scout council for site suggestions.
Learn More
• U.S. Sailing
• World Sailing
• U.S. Coast Guard’s Boating Safety Division
Include Girl Scout Members with Disabilities. Talk to Girl Scout members with disabilities and their caregivers.
Ask about needs and accommodations. Always be sure to contact the location and/or the instructor in advance to
ensure they are able to accommodate those with disabilities. For more information visit Move United or U.S.
Sailing’s Adaptive Instruction Program for more information on including people with disabilities. Learn about
water safety for children with special needs.
Equity. Consider the history, culture, and past experiences of the Girl Scout members in your troop that could
affect their ability to equally participate in an activity. Work with members and families to understand how an
activity is perceived. Ensure that all Girl Scout members and their families feel comfortable and have access to
whatever is needed to fully participate, such as proper equipment, prior experiences, and the skills needed to enjoy
the activity. Learn about equity in sailing through the stories of sailors of many different identities and experiences.
See the Equity section of the Introduction to Safety Activity Checkpoints for general advice about expense,
Emergency Action Plan (EAP). Review and document your Emergency Action Plan (EAP) before starting any
activity and review it so all are prepared. Think through scenarios of what can go wrong such as an accident,
physical injury, missing person, sudden illness, or sudden weather or water emergencies.

2024–2026 Safety Activity Checkpoints Page 170 of 226
Sailing Checkpoints
Confirm swimming ability. Success on the water depends on comfort and ability in the water. Conducting a
swimming test in advance is highly recommended. Sailboats likely to capsize, such as Hobie Cats, Lasers, and
performance boats, should only be sailed by strong swimmers. See Swimming Safety Activity Checkpoints for a
sample or ask your instructor for guidelines. If a swimming test is not possible, presume all participants are non-
swimmers.
Mandatory life jacket. Each sailor must have a U.S. Coast Guard–approved life jacket (Type III recommended) that
fits according to weight and height specifications. Inspect life jackets to ensure that they are in good condition and
contain no tears.
Verify instructor knowledge and experience. Ensure the adult or sailing instructor is certified as a sailing
instructor or sailing counselor by U.S. Sailing, completes Girl Scouts small craft safety training, or possesses
equivalent certification or documented experience according to your council’s guidelines.
Compile key contacts. See Introduction: Standard Safety Guidelines.
Select appropriate sailboats for water and passengers. Make sure craft weight and passenger capacities are not
exceeded (some crafts clearly display maximum capacity). Consider weather and water conditions, weight of
passengers, and equipment.
File a float plan. If participating in a long-distance sailing trip, it is recommended that a float plan be completed
and filed (left) with a person knowledgeable about the trip and when to expect the party back. This person should
inform authorities if you are late.
Transport sailboats safely. Sailboats are transported on car-top racks or trailers designed to haul sailboats.
Sailboats should be secured with two lines across the top and a line at the bow and the stern. Drivers must have
prior experience hauling trailers.
Prepare for emergencies. Ensure the presence of a waterproof first aid kit and a first aider with a current
certificate in first aid, including adult and child CPR or CPR/AED, who is prepared for cases of near-drowning,
immersion hypothermia, and sunburn. If any part of the activity is located 30 minutes or more from emergency
medical services, ensure the presence of a first aider with Wilderness First Aid certification.
On the Day of Sailing
• Get a weather and wind report. Never sail on a stormy or excessively windy day. On the day of the sailing
trip or lesson, visit Weather.com (which includes marine forecasts, including water temperature and wave
height) to determine if conditions are appropriate. If weather conditions prevent the sailing activity, be
prepared with a backup plan or alternate activity.
• Review rescue tips. U.S. Sailing provides instructions for small boat capsize recovery.
• Use the buddy system. See Introduction: Standard Safety Guidelines.
• Be prepared in the event of a storm with lightning. Exit water immediately and take shelter away from
tall objects (including trees, buildings, and electrical poles). Find the lowest point in an open flat area. Squat
low to the ground on the balls of the feet, and place hands on knees with head between them. During
storms, if shore cannot be reached, secure all loose gear, keep a sharp lookout for other boats and
obstructions, head into the wind at a 45-degree angle, and stay low.
Ensure docking safety. Ensure that docking lines are in good condition. Follow general safety guidelines provided
by boating facility for docking the craft, and ensure the boat is securely connected to the dock before participants
exit.
Privately owned sailboats. If using a sailboat that is privately owned, ensure that the owner/operator:

2024–2026 Safety Activity Checkpoints Page 171 of 226
• Is a knowledgeable adult with understanding and ability to assume responsibility for the safety and well-
being of Girl Scout members.
• Agrees to follow the Safety Activity Checkpoints relevant to the activity.
• Maintains the vessel in accordance with the Safety Activity Checkpoints.
• Coordinates with the activity leader to confirm the required safety gear is available for all participants, and
that the gear meets the specifications of authorities for the local jurisdiction.
• Meets Coast Guard and/or local authority requirements.
• Maintains insurance and registration as required by law in their jurisdiction.
For vessels over 30 feet, see Offshore Water Vessels Safety Activity Checkpoints.
Carbon monoxide warning. Never allow “teak surfing,” swim platform dragging, or bodysurfing behind any
vessel. Do not operate a motor or generator while anyone is on or holding onto a swim platform, swim deck, swim
step, or swim ladder, except for a very brief time when docking, or entering/exiting the vessel. Carbon monoxide
emitted at the stern (back) of the boat can cause death in these situations.
Safety Gear
• U.S. Coast Guard–approved life jacket (Type III recommended) that fits according to weight and height
specifications
• Boat shoes (closed-toe) and non-slip hiking/sport sandals with a heel strap, or water socks or shoes (no
flip-flops)
• Emergency sound device, such as a whistle, foghorn, or sounding flares
• Layered clothing that is easily changeable depending on temperatures (waterproof jacket recommended)
• Sailing gloves (help save tender hands and improve grip)
• Rigging knife
• Emergency repair kit (duct tape or electrical tape, screwdriver, pliers, shackles, extra line, sewing kit, a
spare drain plug, extra cotter rings/pins, and a short piece of light line/rope)
• Emergency survival packet: raincoat, waterproof matches, lightweight/space blanket, hat, raincoat, pocket
knife, minimum of 10x10-foot tarp, rope, drinking cup, food, and appropriate liquids (food and water
bottles should be secured in the sailboat)
• Paddle (as secondary means of propulsion)
• Bailer (a bucket or scoop used to remove water from a boat)
• At least one graspable and throwable Coast Guard–approved personal flotation device (Type IV buoyant
cushion or ring buoy or equivalent) immediately available for each group on the water

2024–2026 Safety Activity Checkpoints Page 172 of 226
Scuba Diving
Council Approval: Required
Activity Permitted for: C S A
About Scuba Diving
Scuba is an acronym for “self-contained underwater breathing apparatus” and requires specialized equipment.
Scuba diving can take place in a variety of locations, including oceans, lakes, and rivers.
Divers can progress from exploratory experiences in pools, to various certification training courses, and finally to
recreational dives.
Organizations such as the National Association of Underwater Instructors (NAUI), Scuba Schools International
(SSI), and the Professional Association of Diving Instructors (PADI), offer online tools to locate certified scuba
instructors. Scuba diving is a challenging activity, and Girl Scouts who wish to learn to scuba dive must be at least
12 years old and meet the age and health requirements set by the certifying agency.
Pool-Only Scuba Experience Programs
Most dive agencies offer non-certification scuba experience programs for beginner participants of varying ages.
This is a great way to explore the sport before “diving in.” Follow dive agency standards for age, health,
supervision, and maximum depth requirements. Girl Scout adult-to-youth ratios must be maintained.
A Girl Scout swim test is required prior to participating in a pool-only scuba experience program. Contact your
council for information on whether or not the dive professional teaching the class can administer the test prior to
water activities. A sample swim test can be found in Swimming Safety Activity Checkpoints.
Learn More
• Professional Association of Diving Instructors (PADI)
• Scuba Schools International (SSI)
• National Association of Underwater Instructors (NAUI)
• World Recreational Scuba Training Council (WRSTC)
• Diver’s Alert Network (DAN)
• World’s best dives for kids and teens: Sport Diver
• Family-friendly scuba dives: The Active Times
Include Girl Scout Members with Disabilities. Talk to Girl Scout members with disabilities and their caregivers.
Ask about needs and accommodations. Always be sure to contact the location and/or the instructor in advance to
ensure they are able to accommodate those with disabilities. For more information, visit Handicapped SCUBA
Association and adaptive scuba programs.
Equity. Consider the history, culture, and past experiences of the Girl Scout members in your troop that could
affect their ability to equally participate in an activity. Work with members and families to understand how an
activity is perceived. Ensure that all Girl Scout members and their families feel comfortable and have access to
whatever is needed to fully participate, such as proper equipment, prior experiences, and the skills needed to enjoy

2024–2026 Safety Activity Checkpoints Page 173 of 226
the activity. See the Equity section of the Introduction to Safety Activity Checkpoints for general advice about
expense,
Emergency Action Plan (EAP). Review and document your Emergency Action Plan (EAP) before starting any
activity and review it so all are prepared. Think through scenarios of what can go wrong such as an accident,
physical injury, missing person, sudden illness, or sudden weather or water emergencies.
Scuba Diving Checkpoints
Confirm participants are able to participate in scuba activities. Each person must complete the World
Recreational Scuba Training Council (WRSTC) medical form, including a doctor’s signature stating the student is fit
for diving prior to enrollment.
Confirm participants are strong swimmers. Scuba requires a high degree of ability and comfort in the water,
called “watermanship.” Dive training organizations’ watermanship evaluations vary, but typically include
demonstration of ability to swim a minimum of 200 yards, tread water for 15 minutes, or swim 500 yards with
mask, fins, and snorkel, or some combination. Consult the instructor.
Ensure participants also fully understand the body of water they are going to dive in and be aware of the type
of marine life they may come across.
Verify instructor knowledge and experience. Ensure that the scuba diving teacher holds instructional
certification from SSI, PADI, NAUI, or another industry-recognized dive training organization. Verify that the
certifying agency has guidelines for working with youth.
Maintain appropriate ratios. These ratios must be followed:
Type of Training
Instructor to Student Ratio
Pool training activities
1:8
Confined water training activities
1:6
Open water training dive
1:4; two students may be added with
additional instructor
Open water certification
1:4; instructor with a certified
assistant
These ratios are considered an ideal and can be reduced if environmental
conditions or other factors are not optimal. Please obtain prior council approval
for adjusted instructor ratios.
To maintain general supervision of the Girl Scout divers, non-diving volunteers may be able to supervise pool or
confined water activities by watching from the pool deck or surface. For open water training dives, non-divers may
supervise from land or boat. Among the student divers, instructors, and watchers, there must always be two
unrelated adults, one of whom is female, who are approved by your Girl Scout council. These supervisors do not
replace the need for certified instructors.
Select a safe diving site. Make sure your instructor is familiar with the scuba site. Scuba trips to unknown or non-
designated areas are not allowed.
Size up scuba gear. Communicate ages, heights, and weights to instructors and equipment providers to ensure the
appropriate size of scuba gear is available. Be sure that the instructor and participants check equipment before use.
See gear list below.

2024–2026 Safety Activity Checkpoints Page 174 of 226
Use the buddy system. All divers should use the buddy system above and under the water. Solo diving is
prohibited within Girl Scout programs. Members do not dive alone.
Prepare for emergencies. Ensure the presence of a waterproof first aid kit and a first aider with a current
certificate in first aid, including adult and child CPR or CPR/AED, who is prepared for cases of near-drowning,
immersion hypothermia, and sunburn. If any part of the activity is located 30 minutes or more from emergency
medical services, ensure the presence of a first aider with Wilderness First Aid certification.
Get a weather and wind report. Never scuba dive on a stormy or extremely windy day. Check the local dive
report, Weather.com, or another reliable weather source to determine if conditions are appropriate. Know how to
respond if weather conditions change quickly.
Be prepared in the event of a storm with lightning. Exit water immediately and take shelter away from tall
objects (including trees, buildings, and electrical poles). Find the lowest point in an open, flat area. Squat low to the
ground on the balls of the feet, and place hands on knees with head between them. If on a boat, follow the
instructions of the boat captain.
Recreational Diving. After becoming certified divers, Girl Scouts may continue with recreational (non-training)
dives, based on certification levels. A diving professional is required to provide expert supervision.
• Follow dive agency standards that will give guidelines on what progressive experiences are possible.
Most agencies have Junior Diver standards; adhere to requirements to dive with an adult, parent, or
professional.
• Pre–entry level certification/supervised diver courses (such as PADI Scuba Diver) requirements for
maximum depth and supervision must be met. Verify that all participants are certified by a reputable
diving agency. All divers must provide proof of diving experience within six months of the dive or take
remedial instruction.
• The ratio for recreational diving is 1:8 (professional-to-diver).
• Solo diving in Girl Scouts is prohibited; all divers must dive with a buddy.
• Full entry diving of wrecks and overhead environments are prohibited by recreational divers in a Girl
Scout program.
• Rebreathers and any gas blends (except air and up to 36 percent enriched air) are prohibited. Only
those certified to use enriched air blends may do so.
Diving from Boats. If using a privately owned diving boat, ensure that the owner/operator:
• Is a knowledgeable adult with understanding and ability to assume responsibility for the safety and well-
being of Girl Scout members.
• Agrees to follow the Safety Activity Checkpoints relevant to the activity.
• Maintains the vessel in accordance with the Safety Activity Checkpoints.
• Coordinates with the activity leader to confirm the required safety gear is available for all participants, and
that the gear meets the specifications of authorities for the local jurisdiction.
• Meets Coast Guard and/or local jurisdictional requirements.
• Maintains insurance and registration as required by law in their jurisdiction.
For vessels over 30 feet, see Offshore Water Vessels Safety Activity Checkpoints.
Carbon monoxide warning. Never allow “teak surfing,” swim platform dragging, or bodysurfing behind any
vessel. Do not operate a motor or generator while anyone is on or holding onto a swim platform, swim deck, swim
step, or swim ladder, except for a very brief time when docking, or entering or exiting the vessel. Carbon monoxide
emitted at the stern (back) of the boat can cause death in these situations.
Scuba Diving Gear. Required gear for all diving activities:
• Fins, mask, snorkel, and boots (if conditions warrant)

2024–2026 Safety Activity Checkpoints Page 175 of 226
• Compressed gas cylinder and valve
• Buoyancy control device (BCD) with tank mount or separate backpack, and low-pressure inflator
• Primary regulator and alternate air source
• Breathing gas monitoring device/Submersible Pressure Gauge (SPG).
• Depth monitoring device
• Time monitoring device
• Quick-release weight system and weights (if necessary, for neutral buoyancy)
• Adequate exposure protection for local dive conditions
• Emergency oxygen kit and waterproof first aid kit (one per group)
Additional Required Gear for Open Water Dives
• When divers are riding or waiting on a boat, each wears a U.S. Coast Guard–approved life jacket (Type III
recommended) that fits according to weight and height specifications. Inspect life jackets to ensure they are
in good condition and contain no tears.
• At least one graspable and Coast Guard–approved personal flotation device (Type IV buoyant cushion or
ring buoy or equivalent) should be immediately available for each group on the water.
• Compass
• Dive tables or dive computer
• Audible emergency surface signaling device
• Personal surface marker buoy
• Floating dive flag (one per group or as dictated by local regulations)
• Dive tool/knife (certified divers) unless prohibited by local regulations
• Lights, slate and pencil, drift buoy, or other gear, as conditions require
Recommended Gear
• Mask defogger solution
• Swimsuit with rash guard and swim tights, or dive skin
• Waterproof, coral-safe sunscreen (SPF of at least 15) and lip balm

2024–2026 Safety Activity Checkpoints Page 176 of 226
Sledding and Tobogganing
Council Approval: May Be Required
Activity Permitted for: D B J C S A
Includes: Snow tubing
About Sledding and Tobogganing
The history of sledding is quite interesting. Traditionally, sleds were used to transport goods and people in places
where wheels could not operate. Toboggans, made of poles tied together with leather, were used by Indigenous
people across North America to carry food, clothing, and other items across snow. The Inuit people made the first
toboggans out of whale bone or wood strips. The word “toboggan” comes from the word tobakun. This means
“sled” in the language of the Mi’kmaq people, who are indigenous to Canada.
Today, people of all ages enjoy sledding, tobogganing, and tubing as an enjoyable outdoor winter activity and sport.
Tobogganing has even grown to be a formal sport in the Winter Olympics.
Sleds and toboggans will vary in design, shape, and material and can range from round plastic discs to rectangular
wood structures with metal runners. A toboggan is typically a long, flat-bottomed sled made of thin boards that
curve upward in a C-shape at one end. Snow tubes are inflatable, doughnut-shaped, rubber or plastic inner tubes,
similar to those used in water tubing, but with dimpled centers.
Stick to designated sledding, tobogganing, and snow-tubing hills away from roads or heavily wooded areas to enjoy
sledding safely. Girl Scouts should also receive basic instruction in sledding safety and conduct rules and learn to
perform basic steering skills, including how to slow down and stop. Members are never to be towed behind a
motor vehicle, including a snowmobile.
Connect with your Girl Scout council for site suggestions. In addition, some ski resorts will offer snow-tubing and
tobogganing classes within specially designated areas, so check with your local ski resorts if you have any nearby.
Learn More
• Competitive and Olympic sledding: Team USA
• Tips on sledding from the National Safety Council
Include Girl Scout Members with Disabilities. Talk to Girl Scout members with disabilities and their caregivers. Ask
about needs and accommodations. Always be sure to contact the location and/or the instructor in advance to ensure
they are able to accommodate those with disabilities. For more information, visit Move United.
Equity. Consider the history, culture, and past experiences of the Girl Scout members in your troop that could
affect their ability to equally participate in an activity. Work with members and families to understand how an
activity is perceived. Ensure that all Girl Scout members and their families feel comfortable and have access to
whatever is needed to fully participate, such as proper equipment, prior experiences, and the skills needed to enjoy
the activity. See the Equity section of the Introduction to Safety Activity Checkpoints for general advice about
expense,
Emergency Action Plan (EAP). Review and document your Emergency Action Plan (EAP) before starting any
activity and review it so all are prepared. Think through scenarios of what can go wrong such as an accident,
physical injury, missing person, sudden illness, or sudden weather or water emergencies.

2024–2026 Safety Activity Checkpoints Page 177 of 226
Sledding and Tobogganing Checkpoints
Select a safe site. Ensure sledding takes place in a safe spot, away from roads and free of vehicles. The site should
have no obstructions such as rocks, poles, benches, trees, or signposts. The nature of the terrain, potential hazards
(such as an avalanche or frozen lake), mileage, and approximate activity time should be known to all group
members in advance. Avoid sledding near streets or highways.
Make smart decisions. Slide downhill feet first (like Olympians) to reduce the potential for head injuries from
collisions. Use of helmets for sledding is strongly recommended.
Do not permit towing. Girl Scout members are not permitted to be towed on sleds, toboggans, or tubes behind a
motor vehicle of any kind, including snowmobiles.
Get a weather report. On the morning of the activity, check Weather.com or other reliable weather sources to
determine if conditions are appropriate. If weather conditions prevent the activity, be prepared with a backup plan
or alternative activity, or postpone the activity. Write, review, and practice evacuation and emergency plans for
severe weather with the group.
Practice safe sledding, tobogganing, and snow tubing. Conditions should be monitored, and breaks taken to
prevent hypothermia and frostbite. Girl Scouts and adults must agree on the portion of slope to be used for
sledding and the portion to be used for walking uphill.
Prepare for emergencies. Ensure the presence of a waterproof first aid kit and a first aider with a current
certificate in first aid, including adult and child CPR or CPR/AED, who is prepared for cases of frostbite, cold
exposure, hypothermia, and altitude sickness. If any part of the activity is located 30 minutes or more from
emergency medical services, ensure the presence of a first aider with Wilderness First Aid certification.
Safety and Recommended Gear
• Hat, mittens, or warm gloves
• Waterproof winter boots
• Bicycle or ski helmets (may be required by some organized sledding facilities)
• Heavy, wool insulating socks (avoid cotton socks)
• Layered clothing
• Thermal underwear or long underwear
• Snow pants, snowsuit, or waterproof pants over warm layers

2024–2026 Safety Activity Checkpoints Page 178 of 226
Snorkeling
Council Approval: Required
Activity Permitted for: J C S A
About Snorkeling
Snorkeling is a great way to explore underwater life without the complicated equipment required for scuba diving.
It is important to learn how to breathe properly using snorkels and to receive instruction from an experienced
snorkeler or equipment rental facility.
Coral, an ecosystem of shell and marine life, is a popular attraction for snorkelers and must be respected. As ocean
organisms that support plants and fish, coral reefs are an essential part of the underwater ecosystem.
Unfortunately, coral reefs are under threat due to changes in climate patterns, ocean acidification, and people who
mistreat it. Touching coral can harm the delicate outer layer, which may take as long as 100 years to recover.
It is important to know where it is safe to snorkel. Snorkeling is recommended in warm ocean water with minimal
waves or current.
Learn More
• National Association of Underwater Instructors
• Snorkeling 101: The Complete Guide to Snorkeling
Include Girl Scout Members with Disabilities. Talk to Girl Scout members with disabilities and their caregivers.
Ask about needs and accommodations. Always be sure to contact the location and/or the instructor in advance to
ensure they are able to accommodate those with disabilities. For more information, visit the National Instructors
Association for Divers with Disabilities, and learn about water safety for children with special needs.
Equity. Consider the history, culture, and past experiences of the Girl Scout members in your troop that could
affect their ability to equally participate in an activity. Work with members and families to understand how an
activity is perceived. Ensure that all Girl Scout members and their families feel comfortable and have access to
whatever is needed to fully participate, such as proper equipment, prior experiences, and the skills needed to enjoy
the activity. See the Equity section of the Introduction to Safety Activity Checkpoints for general advice about
expense,
Emergency Action Plan (EAP). Review and document your Emergency Action Plan (EAP) before starting any
activity and review it so all are prepared. Think through scenarios of what can go wrong such as an accident,
physical injury, missing person, sudden illness, or sudden weather or water emergencies.

2024–2026 Safety Activity Checkpoints Page 179 of 226
Snorkeling Checkpoints
Confirm swimming ability. Success on the water depends on comfort and ability in the water. Conducting a
swimming test in advance is highly recommended. See Swimming Safety Activity Checkpoints for a sample or ask
your instructor for guidelines. If a swimming test is not possible, presume all participants are non-swimmers. Non-
swimmers must wear a snorkeling vest and may only snorkel in very calm waters.
Verify instructor knowledge and experience. Ensure the snorkeling instructor holds instructional certification
from Scuba Schools International (SSI) or the Professional Association of Diving Instructors (PADI) or has
equivalent certification or documented experience according to your council’s guidelines.
Verify certified lifeguard is present. If the scuba instructor is not also a certified lifeguard, you will need a
lifeguard present. Lifeguards need current ARC Lifeguarding with Waterfront Module or YMCA Waterfront
Lifeguarding Certification, or the equivalent. You need one certified lifeguard for every 25 swimmers. The primary
guard must be an adult (age 18). Secondary guards can be 16 years old.
Size up snorkeling gear. Ensure the appropriate sizes of masks, snorkels, and fins are available, and make sure
that masks fit faces securely and comfortably. With goggles, the air space in front of the eyes is important to see
properly underwater. Also keep in mind that objects viewed underwater while wearing a mask appear about 25
percent larger and closer than objects seen through a mask out of water.
Safeguard valuables. Do not leave personal belongings and valuables unattended in a public place. If working
with a snorkeling school, inquire about the company’s storage options.
Prepare for emergencies. An adult with rescue experience and/or certification must be present. If snorkeling
from a boat, at least one adult should have Girl Scouts small craft safety training or equivalent experience. (One
person can hold both of these qualifications.)
Ensure the presence of a waterproof first aid kit and a first aider with a current certificate in first aid,
including adult and child CPR or CPR/AED, who is prepared for cases of near-drowning, immersion hypothermia,
and sunburn. If any part of the activity is located 30 minutes or more from emergency medical services, ensure the
presence of a first aider with Wilderness First Aid certification.
Get a weather and wind report. Never snorkel on a stormy or extremely windy day; strong winds and large
waves decrease visibility and make swimming difficult. On the day of the snorkeling trip or lesson, check the local
dive report, Weather.com, or other reliable weather sources to determine if conditions are appropriate. If weather
conditions prevent the snorkeling activity, be prepared with a backup plan or alternative activity.
Use the buddy system. See Introduction: Standard Safety Guidelines.
Be prepared in the event of a storm with lightning. Exit water immediately, and head to shore. Take shelter
away from tall objects (including trees, buildings, and electrical poles). Find the lowest point in an open flat area.
Squat low to the ground on the balls of the feet and place hands on knees with head between them.
Safety and Required Gear
• Wearable flotation device. Consult with your instructor to evaluate whether participants should wear a
flotation device such as a simple waist belt or snorkeling vest. Water currents or surge, visibility, and
participants’ swimming ability should be considered. If life jackets are recommended by the instructor,
then use U.S. Coast Guard–approved life jackets (Type III recommended) that fit according to weight and
height specifications. Inspect life jackets to ensure they are in good condition with no tears.
• Emergency flotation device. At least one graspable and throwable Coast Guard–approved personal flotation
device (Type IV buoyant cushion or ring buoy or equivalent) needs to be immediately available.
• Snorkel
• Mask

2024–2026 Safety Activity Checkpoints Page 180 of 226
• Neoprene booties to protect bare feet
• Fins are required when snorkeling in open water.

2024–2026 Safety Activity Checkpoints Page 181 of 226
Snowshoeing
Council Approval: Not Required
Activity Permitted for: D B J C S A
About Snowshoeing
Snowshoeing has been around for thousands of years and likely originated in Central Asia. It’s a great way for Girl
Scouts of all ages to get outdoors in the winter. Snowshoeing extends the hiking season into winter and lets them
enjoy their favorite trails and parks in a new way. Best of all, all ages and ability levels can enjoy the sport together.
As the saying goes, “If you can walk, you can snowshoe.” The learning curve is much shorter than it is for skiing or
snowboarding. Snowshoeing outings can be a good winter adventure for younger Girl Scouts before advancing to
skiing or snowboarding.
There are techniques, however, that are worth practicing: widening your stance (to avoid stepping on snowshoe
frames), going up and down hills, traversing slopes, and pole usage.
Lift tickets are not necessary for snowshoeing, and at some ski areas you can rent snowshoes. Check with your
council, too, as they may have youth snowshoes available.
Learn More
• For those who are new to the activity: Snowshoe Magazine
Include Girl Scout Members with Disabilities. Talk to Girl Scout members with disabilities and their caregivers.
Ask about needs and accommodations. Always be sure to contact the location and/or the instructor in advance to
ensure they are able to accommodate those with disabilities.
Equity. Consider the history, culture, and past experiences of the Girl Scout members in your troop that could
affect their ability to equally participate in an activity. Work with members and families to understand how an
activity is perceived. Ensure that all Girl Scout members and their families feel comfortable and have access to
whatever is needed to fully participate, such as proper equipment, prior experiences, and the skills needed to enjoy
the activity. See the Equity section of the Introduction to Safety Activity Checkpoints for general advice about
expense,
Emergency Action Plan (EAP). Review and document your Emergency Action Plan (EAP) before starting any
activity and review it so all are prepared. Think through scenarios of what can go wrong such as an accident,
physical injury, missing person, sudden illness, or sudden weather or water emergencies.
Snowshoeing Checkpoints
Verify instructor knowledge and experience. Instruction should come from an adult with experience teaching
and/or supervising snowshoeing or has documented experience according to your council’s guidelines.
Know participants’ limits, especially for new or inexperienced snowshoers. There is nothing wrong with a
half-hour hike—15 minutes out and 15 minutes back. Start slowly, planning short routes and building up the level
of adventure once Girl Scouts gain confidence and ability.
Compile key contacts. See Introduction: Standard Safety Guidelines.

2024–2026 Safety Activity Checkpoints Page 182 of 226
Select a safe snowshoeing trail. Keep it girl-led: encourage Girl Scouts to plan trip details and include adequate
rest periods with opportunities to replenish fluids and eat high-energy foods (such as fruits and nuts). Stick to
established trails at first. Many ski areas have cross-country ski trails that snowshoers can share. On those, you are
never too far from other people, and you are not likely to encounter avalanche hazards.
Be able to recognize trail hazards. Creek crossings, changing weather, avalanche conditions, and tree or rock
wells can be difficult or downright dangerous.
Share your plan. Make sure a contact knows where you are snowshoeing and when to expect the group to return
home.
Practice recovering from a fall. The act of getting up while wearing snowshoes can be a cumbersome process. It
does not happen often but falls do occur when snowshoeing, most often on descents. Have members practice
getting back up.
Prepare for emergencies. Ensure the presence of a waterproof first aid kit and a first aider with a current
certificate in first aid, including adult and child CPR or CPR/AED, who is prepared for cases of frostbite, cold
exposure, hypothermia, and sprains. If any part of the activity is located 30 minutes or more from emergency
medical services, ensure the presence of a first aider with Wilderness First Aid certification.
Dress for the conditions. Be sure participants carry extra layers for warmth, particularly extra base layer tops in
case the ones they are wearing get wet from exertion or the weather. Know the signs of hypothermia so you can
recognize them quickly.
Follow snowshoeing safety standards:
• When sharing the trail with cross-country skiers, try to make your own trail whenever possible, staying out
of the tracks other skiers have worked hard to set.
• Skiers have the right-of-way on trails, since it is easier for a snowshoer to step off the trail safely than it is
for a skier to stop or go around. Always be polite to the people you meet along the trail.
• A skier indicates their desire to pass by calling “track, please.”
• Do not snowshoe close to the edge of an embankment or a cliff.
Safety and Required Gear
• Snowshoes sized and adjusted for each person and strapped securely around the shoe or boot
• Poles sized to each person’s height
• Winter boots
• Thick, water-resistant gloves or mittens
• A winter hat
• Heavy insulating socks
• Thermal underwear or winter underwear
• A water bottle
• High-energy food (such as fruits and nuts)
• A daypack to carry personal belongings
• A windproof, waterproof jacket

2024–2026 Safety Activity Checkpoints Page 183 of 226
Spelunking/Caving
Council Approval: Required
Activity Permitted for: J C S A
Not Recommended for: D B
About Spelunking/Caving
Spelunking, or caving, is an exciting, experiential way to learn about speleology, the study of caves, as well as
paleontology, which is the study of life from past geologic periods by examining plant and animal fossils. As a sport,
caving resembles rock climbing and often involves using ropes to crawl and climb up cavern nooks and through
crannies. This type of caving is not permitted for Daisies and Brownies. However, this restriction does not apply to
groups taking trips to tourist or commercial caves, which often include safety features such as paths, electric lights,
stairways, and expert guides.
Learn More
• U.S. caving clubs: National Speleological Society
• White-nose syndrome in bat populations: White Nose Syndrome
• National Caves Association
• American Cave Conservation Association: Guide to Responsible Caving
Include Girl Scout Members with Disabilities. Talk to Girl Scout members with disabilities and their caregivers.
Ask about needs and accommodations. Always be sure to contact public, governmental, and tourist cave locations
in advance to ensure they are able to accommodate those with disabilities.
Equity. Consider the history, culture, and past experiences of the Girl Scout members in your troop that could
affect their ability to equally participate in an activity. Work with members and families to understand how an
activity is perceived. Ensure that all Girl Scout members and their families feel comfortable and have access to
whatever is needed to fully participate, such as proper equipment, prior experiences, and the skills needed to enjoy
the activity. See the Equity section of the Introduction to Safety Activity Checkpoints for general advice about
expense,
Emergency Action Plan (EAP). Review and document your Emergency Action Plan (EAP) before starting any
activity and review it so all are prepared. Think through scenarios of what can go wrong such as an accident,
physical injury, missing person, sudden illness, or sudden weather or water emergencies.
Spelunking/Caving Checkpoints
Verify instructor knowledge and experience. A guide with documented experience in cave exploration should
accompany the group into the cave. A guide can also help decide which caves are suitable. Pre-trip instruction
should be given by an adult with documented experience according to your council’s guidelines.
Never go into a cave alone. Never go caving with fewer than four people in your group. Appoint a reliable,
experienced caver as the “trail guide” or “sweeper” whose job it is to keep the group together. When climbing in a
cave, always use three points of contact, including hands, feet, knees, and, possibly, the seat of your pants (the cave
scoot).

2024–2026 Safety Activity Checkpoints Page 184 of 226
Select a safe site. Obtain guidance from a local chapter of the National Speleological Society to select a cave to
explore. Never explore a cave without a guide and without written permission from the site owner/operator.
Check with your Girl Scout council for approval if needed.
Compile key contacts. See Introduction: Standard Safety Guidelines for information.
Educate in advance. Girl Scouts should learn about basic caving guidelines before planning a caving trip and they
must understand safety procedures and know how to handle equipment. Caves are fragile and sensitive
environments, and they need to recognize and use resistant surfaces for travel. If no latrine is available, pack out all
human waste, solids, and fluids. The smallest food crumbs can impact cave environments, so choose less crumbly
foods such as nuts and chewy energy bars.
Dress appropriately for the activity. Avoid wearing dangling earrings, bracelets, and necklaces that may become
entangled in equipment.
Prepare for emergencies. Ensure the presence of a waterproof first aid kit and a first aider with a current
certificate in first aid, including adult and child CPR or CPR/AED, who is prepared for cases of soft tissue and bone
injury and hypothermia. If any part of the activity is located 30 minutes or more from emergency medical services,
ensure the presence of a first aider with Wilderness First Aid certification. Also consider sudden sensations of
claustrophobia. Make a plan for any member who may want to turn back.
Get a weather report. Check Weather.com the day of the event. Also, in wet weather, avoid caves with stream
passages, as some caves can flood.
Safety Gear
• Properly fitting safety helmet with a strong chin strap. For horizontal caves, bump helmets may be used; for
vertical caves, use safety helmets carrying the International Climbing and Mountaineering Federation
(UIAA) seal, which is located on the inside of the helmet.
• Sturdy boots with ankle protection (hiking boots for dry areas; rubber boots or wellies for wet caves)
• Warm, rubber gloves (to keep hands warm and protect against cuts and abrasions)
• Long pants and shirt with long sleeves
• Extra set of clothes
• Non-perishable, high-energy foods, such as fruits and nuts
• Water
• Knee and elbow pads
• Water-resistant “wet socks” (for wet caves)
• Belt and harness
• Compass
• Three sources of light: the main light should be electric and mounted on the safety helmet, while the other
two light sources may be flashlights.
• Spare bulbs and batteries
• A trash bag (use as a poncho or for covering dirty equipment after the caving activity; cavers keep an empty
trash bag in their safety helmets)

2024–2026 Safety Activity Checkpoints Page 185 of 226
Surfing
Council Approval: Required
Activity permitted for: J C S A
Not permitted for: Daisies, Brownies, and
non-swimmers
About Surfing
Surfing (also referred to as “surfboarding”) is a common sport and lifestyle in Hawaii, which is not surprising
because the sport originated in ancient Polynesia. Surfing is one of the most challenging water sports; however, if a
new surfer is well prepared, it can be a safe, rewarding experience that develops balance, agility, strength, and
confidence. With proper instruction from an experienced surfing instructor, many first timers can stand up on their
boards during the initial two- to four-hour session. Brownies can learn with boogie boards (much smaller boards)
as opposed to surfboards, which is a good progression step to surfing. However, all Girl Scouts participating in
surfing of any kind must test as proficient swimmers before they try surfing. Refer to the Swim Test in Swimming
Safety Activity Checkpoints.
While people learn at different paces, three to four lessons are recommended for beginners. Enrolling in a surf
camp or daylong surfboarding lesson is highly recommended for beginners. Be sure to inform the surf school of
ages, heights, and sizes to reserve appropriate surfboards and wetsuits.
During lessons, even before going in the water, Girl Scouts can learn the basics of surfing, such as:
• Finding the best position for the body on the board, steering out from the shore, keeping the nose of the
surfboard pointed toward the surf to cut through the waves, and not getting positioned sideways (to avoid
getting caught by a wave and tumbled around).
• Going around the break line (the point at which waves begin to break) when paddling out from the shore
and not through it to allow other surfers plenty of space.
• Sharing the waves, staying out of the way of other surfers, and never taking off on a wave in front of
another surfer (called “snaking”).
• Keeping the board by always using the ankle leash (it is dangerous to other surfers and swimmers when
surfers let go of surfboards).
The ocean is best for surfing, but some rivers and regions along the Great Lakes also can be suitable for surfing
when the weather is warm.
Learn More
• Surfline
• Surfing Handbook
• International Surfing Association
Include Girl Scout Members with Disabilities. Talk to Girl Scout members with disabilities and their caregivers.
Ask about needs and accommodations. When planning to visit a waterfront at a park, contact the park office in
advance. Also contact the instructor or facility teaching or hosting the surfing event to ensure they are able to
accommodate those with disabilities. Learn about adaptive surfing at High Fives.
Equity. Consider the history, culture, and past experiences of the Girl Scout members in your troop that could
affect their ability to equally participate in an activity. Work with members and families to understand how an
activity is perceived. Ensure that all Girl Scout members and their families feel comfortable and have access to
whatever is needed to fully participate, such as proper equipment, prior experiences, and the skills needed to enjoy

2024–2026 Safety Activity Checkpoints Page 186 of 226
the activity. See the Equity section of the Introduction to Safety Activity Checkpoints for general advice about
expense,
Emergency Action Plan (EAP). Review and document your Emergency Action Plan (EAP) before starting any
activity and review it so all are prepared. Think through scenarios of what can go wrong such as an accident,
physical injury, missing person, sudden illness, or sudden weather or water emergencies.
Surfing Checkpoints
Check swimming ability. Participants must be strong swimmers. A swim assessment should be conducted before
or on the day of the activity. Consult with your Girl Scout council for additional guidance.
Verify instructor knowledge and experience. Instructors should hold a certification from the National Surf
Schools & Instructors Association, the International Surfing Association, or similar certification. Ocean lifeguard
certifications, per state or local standards, are required. The instructor-to-girl ratio should be one to four.
Note: The instructor-to-participant ratio is different from the adult-to-youth ratio found in Introduction:
Standard Safety Guidelines. Both ratios must be complied with when participating in surfing. For example, if 15
Juniors are participating in surfing, there must be four instructors plus two adult Girl Scout volunteers who are
not instructors.
Pick an ability-appropriate site. Make sure the surfing location complements the surfers’ abilities and levels.
Some beaches designate areas for beginners, intermediate surfers, and higher-level surfers. If the surfing location
does not designate areas by skill level, verify with the surfing instructor that the location is appropriate for
participants.
Select a safe location. A location with a soft, sandy, or muddy bottom is best. Choose a location that does not have
a sharp-edged or rocky bottom, which can be dangerous. Also, inquire about potential dangerous marine life and
rip tides. Keep away from these hazards when they become evident.
Safeguard valuables. Don’t leave personal belongings and valuables unattended in a public place. If working with
a surfboarding school or camp, call ahead to inquire about the company’s storage options.
Prepare for emergencies. Ensure the presence of a waterproof first aid kit and a first aider with a current
certificate in first aid, including adult and child CPR or CPR/AED, who is prepared for cases of near-drowning,
immersion hypothermia, and sunburn. If any part of the activity is located 30 minutes or more from emergency
medical services, ensure the presence of a first aider with Wilderness First Aid certification.
Get a weather and tide report. Never surf on a stormy day. Following rainy weather, check the water quality
before surfing. On the morning of the surf trip, determine whether conditions will be appropriate for surfing by
searching for regional surf reports on SurfLine.com, 17ft.com, and Weather.com. If weather conditions prevent the
surf trip, be prepared with a backup plan or alternative activity.
Assess wave heights. Call the surf instructor on the day of the trip to confirm that wave heights are appropriate
for participants’ skill level. Wave heights rely heavily on wind strengths; 2- to 3-foot waves are recommended for
beginners. When waves surpass 5 feet, it can be difficult to paddle out from the shore.
Be prepared in the event of a storm with lightning. Exit water immediately and take shelter away from tall
objects (including trees, buildings, and electrical poles). Find the lowest point in an open flat area. Squat low to the
ground on the balls of the feet and place hands on knees with head between them.
Required Gear
• Surfboard (soft-deck long boards are generally recommended for beginners)
• Bathing suit

2024–2026 Safety Activity Checkpoints Page 187 of 226
• Rash guard
• Wet suit (recommended for warmth and skin protection, especially when water temperature is below 70
degrees Fahrenheit; most surf schools rent full-body or partial suits, but they may not be “required”
depending on the temperatures)
• Rocky bottom surf shoes
• Goggles for members with glasses
• Waterproof sunscreen and lip balm with SPF
Safety Gear
• At least one graspable and throwable Coast Guard–approved personal flotation device (Type IV buoyant
cushion or ring buoy or equivalent) immediately available for each group on the water (check with
lifeguards at the waterfront)
• Leash, also referred to as a leg rope. This cord (usually included with a surfboard rental) attaches the
surfboard to the surfer’s ankle, so that they do not have to swim too far to catch up to the board after a
wipeout.
Recommended Gear
• Beach towel
• Dry clothing and sunglasses to wear after surfing

2024–2026 Safety Activity Checkpoints Page 188 of 226
Swimming
Council Approval: Required
Activity Permitted for: D B J C S A
About Swimming
Swimming is a Girl Scout tradition that builds fitness, leadership, and team-building skills. Your troop can swim in
pools, water parks, or natural bodies of water such as oceans, rivers, or lakes. Safety is one of the keys to having fun
in the water, and so it’s important to confirm each swimmer’s ability to swim ahead of time, whenever possible.
Consult a local parks and recreation department, YMCA, or American Red Cross for swimming lessons. There is also
a sample swim assessment provided at the end of this activity checkpoint to document completion of the swim
assessment and to categorize swimming ability level.
Learn More
• YMCA Safety Around Water
• American Red Cross Water Safety
• American Red Cross Lifeguard & Water Safety Training
• American Red Cross Water Safety for Parents and Caregivers (a free, 30-minute online course)
• USA Swimming
• Marco Polo and Find the Penny are popular swimming games, but you can make up your own, or try these
24 Fun Swimming Pool Games
Include Girl Scout Members with Disabilities. Talk to Girl Scout members with disabilities and their caregivers.
Ask about needs and accommodations. Always be sure to contact the location and/or the instructor in advance to
ensure they are able to accommodate those with disabilities. For more information, visit Move United to find out
about swimming inclusion and World Para Swimming to learn about inspiring swimmers of all abilities and learn
about water safety for children with special needs.
Equity. Contact your local YMCA or public pool about lessons. Consider the history, culture, and past experiences
of the Girl Scout members in your troop that could affect their ability to equally participate in an activity. Work
with members and families to understand how an activity is perceived. Ensure that all Girl Scout members and
their families feel comfortable and have access to whatever is needed to fully participate, such as proper
equipment, prior experiences, and the skills needed to enjoy the activity. Read about .
Emergency Action Plan (EAP). Review and document your Emergency Action Plan (EAP) before starting any
activity and review it so all are prepared. Think through scenarios of what can go wrong such as an accident,
physical injury, missing person, sudden illness, or sudden weather or water emergencies.

2024–2026 Safety Activity Checkpoints Page 189 of 226
Swimming Checkpoints
Identify lifeguard(s). When using a staffed public facility, lifeguards will be provided. At beaches or waterfronts,
make sure a lifeguard will be on duty. For swimming on your own, you will need to recruit a lifeguard. Ask your
Girl Scout council for suggestions. At least one lifeguard, certified in American Red Cross Lifeguard Training, YMCA
Lifeguard, or with equivalent experience, and one watcher should be present.
Additional lifeguards and watchers may be needed depending on the size of the group; see the Swimming
Lifeguard and Watcher Ratios table below.
Identify watchers. One watcher (or “lookout”) is needed for every ten swimmers. Watchers can be 16 years or
older. This person assists the group by watching for possible emergencies. Lifeguards and watchers are stationed
at separate posts. They stay out of the water, except in emergencies. American Red Cross Water Safety for Parents
and Caregivers(a free, 20-minute online course), YMCA Aquatics Safety Assistant, or similar training is the
preferred preparation. Alternatively, the lifeguard may be able to give watchers an orientation. Again, check with
your Girl Scout council in advance.
The ratio of lifeguards and watchers to swimmers may need to be increased depending on the number of
swimmers in one area, swimming level and ability, Girl Scout members with disabilities, age level and ability to
follow instructions, type of swimming activity (instruction, recreation), type of swimming area, weather/water
conditions, and rescue equipment available.
Swimming Lifeguard and Watcher Ratios
Number of
Swimmers
Lifeguards
Watchers
1:10 Ratio
1–10
One adult; see more on pools below
1
11–25
One adult; see more on pools below
2–3
26–35
Two lifeguards, at least one is an adult;
additional lifeguards may be 16 years of age
or older
3–4
36–50
Two lifeguards, at least one is an adult;
additional lifeguards may be 16 years of age
or older
4–5
• Pools. Lifeguards who are 16 years old or older can be used for swimming activities in back yards, hotels,
cruise ships, or public pools.
• Lakes, rivers, streams. A lifeguard certified in American Red Cross Waterfront Lifeguard course or the
equivalent is present for every 25 swimmers, plus one watcher for every 10 swimmers.
• Ocean beaches. Youth members swim at open beaches only when lifeguards are on duty. Lifeguards are
certified in accordance with local and state norms and standards.
• Shallow water. No lifeguard is necessary for wading in calm, shallow water. Note: If water level is typical
participants’ knee deep or higher, the adult(s) overseeing youth should complete the American Red Cross
Water Safety for Parents and Caregivers training or equivalent experience.
Clearly identify swimming abilities. These could be indicated, for example, with different colored wristbands to
signify beginner, intermediate, and advanced swimmers. Swim assessments can be conducted in advance, or on the

2024–2026 Safety Activity Checkpoints Page 190 of 226
day of swimming. The pool operator or lifeguard may determine the type of assessment, based on the skills needed
for the conditions at hand. A sample form follows these checkpoints. If swim assessments are not required at the
staffed facility you’re using, you may defer to the pool operator. Some examples of swim assessments for different
conditions:
• In pools, the lifeguard might ask each participant to enter the water slowly, stay close to the edge of the
pool, swim from one end to the other, and then float for 30 seconds.
• In lakes, the lifeguard might ask each participant to jump into the water, swim for 50 yards, then float or
tread water for one minute.
• In surf, the swimming assessment should be held in advance. The lifeguard might ask each participant to
jump into water over their head, swim 100 yards using a combination of freestyle and elementary
backstroke, and then tread water for two minutes.
Ensure swimming site safety. Check for the following:
• A posting indicates water quality passes health department tests and sanitation standards.
• Shallow areas are marked “No Diving.”
• Diving areas are separate from other swim areas.
• Chlorine levels are tested and maintained daily. Water should be clear.
• The area around the pool is free of clutter.
• No electrical appliances are anywhere near the pool.
• The swimming area should be free of dangerous marine life and clearly marked.
• No sharp, rocky, or heavily shelled beach waters should be chosen, if possible.
• At water parks, do not dive or run. Most water park injuries are from slips and falls.
• Participants should know their physical limits. Observe a water ride before going on. Use extra care on
water slides.
• Monitor time in the water. How long should participants swim? Swimmers’ ability, weather conditions, and
water temperature should be considered. Often, 30-minute time periods are enough.
• Swim only during daylight or in well-lit pools.
• Diving is prohibited in waters of unknown depth or conditions. For all diving, the required water depth
extends 10 feet on each side of the board or jumping point. If tides, drought, or other forces affect the water
depth, it is checked each time before diving is permitted. Never dive off the side of the diving board.
Safety Gear
For Swimming Pools, ask the pool operator or lifeguard what’s available:
• Reaching pole
• Rescue tube
• Backboard
• Ring buoy
• Throw bag with line (typically 30 feet)
For Open Water:
• Paddleboard
• Rescue can
• Kayak
• Rescue gear
Additional Gear:
• Goggles
• Swim cap

2024–2026 Safety Activity Checkpoints Page 191 of 226
• Nose and ear plugs, for those who need them
• Waterproof sunscreen and lip balm

2024–2026 Safety Activity Checkpoints Page 192 of 226
Sample Swim Assessment—Documented Verification of Completion
Swim tests are recommended every year for Girl Scouts participating in any type of aquatic activities including but
not limited to pool activity, canoeing, stand-up paddleboarding, etc. Defer to the aquatic facility, instructor, or
activity provider; some may not require an assessment, while others may require a more rigorous evaluation.
During sleepaway camp, swim tests are often conducted at the beginning of each week to assess a camper’s
swimming ability even if they have participated and completed a swim test previously in the year. Please note that
sleepaway campers generally need to complete a swim test upon arrival.
This sample assessment may be used when completing any paperwork asking for confirmation of swim level and
ability. It documents that a participant has demonstrated the swimming skills listed below. It may be customized
by an expert in the conditions or activity type (swimming, canoeing, etc.). Swimmers should swim only up to their
ability, as certified by an adult lifeguard or swim instructor. Participants complete the following requirements
to the best of their ability. Instructors, please check the appropriate level and complete the information below:
• Tread water for two minutes while keeping their head above water.
• Swim a minimum of 20 yards in one direction without stopping. Using front crawl (freestyle) while keeping
their face in the water and without touching the ground or holding onto the wall.
□ Beginner/Non-Swimmer. This swimmer cannot successfully demonstrate or complete the above
requirements. A beginner swimmer is only permitted in shallow water or where they can stand
comfortably. Non-swimmers must wear a Coast Guard–approved personal flotation device (PFD/lifejacket),
always. Consult the facility or lifeguard about whether they should be considered a beginner or non-
swimmer.
□ Intermediate Swimmer. This swimmer can successfully demonstrate the above requirements in shallow
or calm deep water but is considered a cautious swimmer or a swimmer who is not strong. Coast Guard–
approved flotation devices (PFD/lifejacket) are optional (unless required by activity), but it is not
recommended that anyone at this level participate in high-risk swimming/aquatic activities, such as
surfing.
□ Proficient Swimmer. This swimmer can successfully demonstrate the above requirements in shallow or
deep water; they display strong swimming skills and may participate in most high-risk swimming/aquatic
activities. Coast Guard–approved flotation devices (PFD/lifejacket) are not required (unless required by
activity).
Please note that some activities may require a more advanced assessment.
On (today’s date) ________________________, (participant’s name) _____________________________________________________________
has earned the above checked swim level. This test is valid for one year from the date of this test.
Instructor’s Printed Name: ______________________ Instructor’s Signature: _______________________________
Instructor’s Title: _______________________________________________________________________________________________________________

2024–2026 Safety Activity Checkpoints Page 193 of 226
Target and Shooting Sports—Master Progression Chart
Shooting Type
Grade Level
Minimum Age
Participant-to-
Instructor Ratio
Instructor/Expert Certification
Slingshot
D, B, J, C, S, A
D, B – 5:1
J, C, S, A – 10:1
One adult instructor is trained in slingshot safety,
form, technique, range rules, and emergency
procedures.
Target Paintball
B, J, C, S, A
B – 5:1
J, C, S, A – 10:1
One adult is trained in paintball safety, range rules,
and emergency procedures.
Air/BB Guns
B, J, C, S, A
B – 5:1
J, C, S, A – 10:1
One adult is a certified National Rifle Association
Range Safety Officer (RSO) or USA Shooting Sports
instructor.
Archery
B, J, C, S, A
B – 5:1
J, C, S, A – 10:1
One adult is certified by the National Field Archery
Association, USA Archery, or Easton Foundation.
3-D Archery
C, S, A
10:1
One adult is certified by the National Field Archery
Association, USA Archery, or Easton Foundation, or
demonstrated equivalent experience.
Ax/Knife/Hatchet
Throwing
C, S, A
2:1; 4:1 with an
assisting adult
One adult is trained and experienced in blade
throwing safety specific for the ax, knife, or hatchet
being used, including proper form and technique,
range rule specifications, and emergency
procedures.
Rifle
Age 12 & older
8:1
One adult is a certified RSO or USA Shooting Sports
instructor.
Shotgun, Trap,
Skeet Shooting
Age 12 & older
8:1
One adult is a certified RSO or USA Shooting Sports
instructor.
Muzzle Loading
Age 12 & older
2:1
One adult is a certified RSO or USA Shooting Sports
instructor.
Pistol
Age 14 & older
4:1
One adult is a certified RSO or USA Shooting Sports
instructor.

2024–2026 Safety Activity Checkpoints Page 194 of 226
Archery
Council Approval: Required
Shooting Type
Grade Level
Permitted
Participant-to-
Instructor Ratio
Instructor/Expert Certification
Archery
B, J, C, S, A
B – 5:1
J, C, S, A – 10:1
One adult is certified by the National Field Archery
Association, USA Archery, or Easton Foundation.
3-D Archery
C, S, A
10:1
One adult is certified by the National Field Archery
Association, USA Archery, or Easton Foundation, or
demonstrated equivalent experience.
About Archery
One of the oldest weapons and hunting methods, archery is still used for its traditional purposes, but is more
common today in the United States as a recreational and competitive activity. There are a variety of styles and sizes
of bows and arrows, but they are all used for one purpose: to hit a target. Archers develop skills based on proper
procedures and form, handling equipment, getting the right stance, sighting, and observing safety practices.
Archery is not permitted for Daisies; however, Daisies may participate in using slingshots as a progression to learn
rules and range commands for archery. See the Slingshot checkpoints. Bows and arrows should be appropriate to
the age, size, strength, and ability of the archers. Never aim at people, ever, or targets in the image of human beings.
3-D Archery. Cadettes and older may participate in a 3-D archery course where a Girl Scout moves up to the target
that could be set up between trees and use a target that is other than a circular shape to enhance accuracy and skill
level. Never shoot at targets in the shape of human beings.
Learn More
• Archery tournaments and events: National Field Archery Association
• Fix common archery mistakes: YouTube
• Archery clubs/events: USA Archery
Include Girl Scout Members with Disabilities. Talk to Girl Scout members with disabilities and their caregivers.
Ask about needs and accommodations. Always be sure to contact the location and/or the instructor in advance to
ensure they are able to accommodate those with disabilities. For more information, visit Move United and USA
Archery’s Adaptive Archery page for information on equipment, adaptations, and finding a program near you.
Equity. Consider the history, culture, and past experiences of the Girl Scout members in your troop that could
affect their ability to equally participate in an activity. Work with members and families to understand how an
activity is perceived. Ensure that all Girl Scout members and their families feel comfortable and have access to
whatever is needed to fully participate, such as proper equipment, prior experiences, and the skills needed to enjoy
the activity. See the Equity section of the Introduction to Safety Activity Checkpoints for general advice about
expense,
Emergency Action Plan (EAP). Review and document your Emergency Action Plan (EAP) before starting any
activity and review it so all are prepared. Think through scenarios of what can go wrong such as an accident,
physical injury, missing person, sudden illness, or sudden weather or water emergencies.

2024–2026 Safety Activity Checkpoints Page 195 of 226
Archery Checkpoints
Assess participants’ maturity level. Participants must be old enough to understand safety procedures and handle
equipment so as not to endanger themselves and others. Ensure that bows and arrows are appropriate to the age,
size, strength, and ability of the participants. A beginner uses arrows that extend 1 to 2 inches in front of the bow
when the bow is at full draw.
Verify instructor knowledge and experience. One adult needs to be a certified USA Archery instructor or have
equivalent certification or documented experience according to your council’s guidelines. Ensure that there is a
ratio of one instructor for every ten Girl Scouts (or five Brownies). Archery on a 3-D course is well supervised and
appropriate to age, skill level, and location of shooting.
Note: The instructor-to-participant ratio is different from the adult-to-youth ratio found in Introduction:
Standard Safety Guidelines. Both ratios must be complied with when Girl Scouts are participating in target sports.
For example, if there are 15 Cadettes on the shooting line, there must be two instructors plus two adult Girl Scout
volunteers (who are not instructors).
Select a safe site. Check with council staff to see if an approved vendor list is offered. If the council does not have
an approved vendor list, look for organized indoor and outdoor archery ranges. Call the facility to determine the
following safety information is in order:
• Equipment is stored in box/closet/cabinet and locked when not in use.
• Equipment, including targets and backstops, is checked each time and is in good condition.
• Clear safety signals and range commands to control the activity are posted and taught to all participants in
advance of stepping onto the range.
• Backstops or a specific safety zone are set behind the targets.
• Clearly delineated rear and side safety buffers are known to the entire facility population.
• Shooting line is clearly defined.
At an outdoor range, check that:
• Targets are not placed in front of houses, roads, trails, or tents.
• Areas with pedestrian traffic are avoided.
• Areas are clear of brush. A hillside backstop is recommended.
• The shooting area and the spectator area behind the shooting area are clearly marked.
• In the shooting area, there is a safe distance at least 50 yards behind the targets and 20 yards on each side
of the range.
• The range is not used after nightfall.
At an indoor range, make sure:
• Targets are well-lit.
• Doors or entries to the range are locked or blocked from the inside.
• Fire exits are not blocked.
• Equipment is properly sized for the archers.
• Bows are offered in both right- and left-handed models, are the proper size, and have the correct draw
weight for the participants.
• Only target tip arrows are used, never broadhead/hunting tips.
Always keep the bow pointed in a safe direction. This is the primary rule of target sport safety. A safe direction
means that the bow is pointed so that even if it were to go off it would not cause injury or damage. The key to this
rule is to control where the front end of the bow is pointed at all times.
On the Day of Shooting

2024–2026 Safety Activity Checkpoints Page 196 of 226
Dress appropriately for the activity. Avoid wearing dangling earrings, bracelets, and necklaces that may become
entangled in equipment. Also, make sure long hair is tied back and always wear closed-toed shoes.
Ensure the instructor reviews the rules and operating procedures beforehand. The instructor covers safety
procedures, including:
• No “dry” firing, as it can damage equipment.
• Always keeping the bow pointed in a safe direction.
Safety and Required Gear
• Wrist, finger, and arm protection, such as finger tabs and arm guards (right- and left-handed models)
• Bows and arrows
• Targets
• Quivers
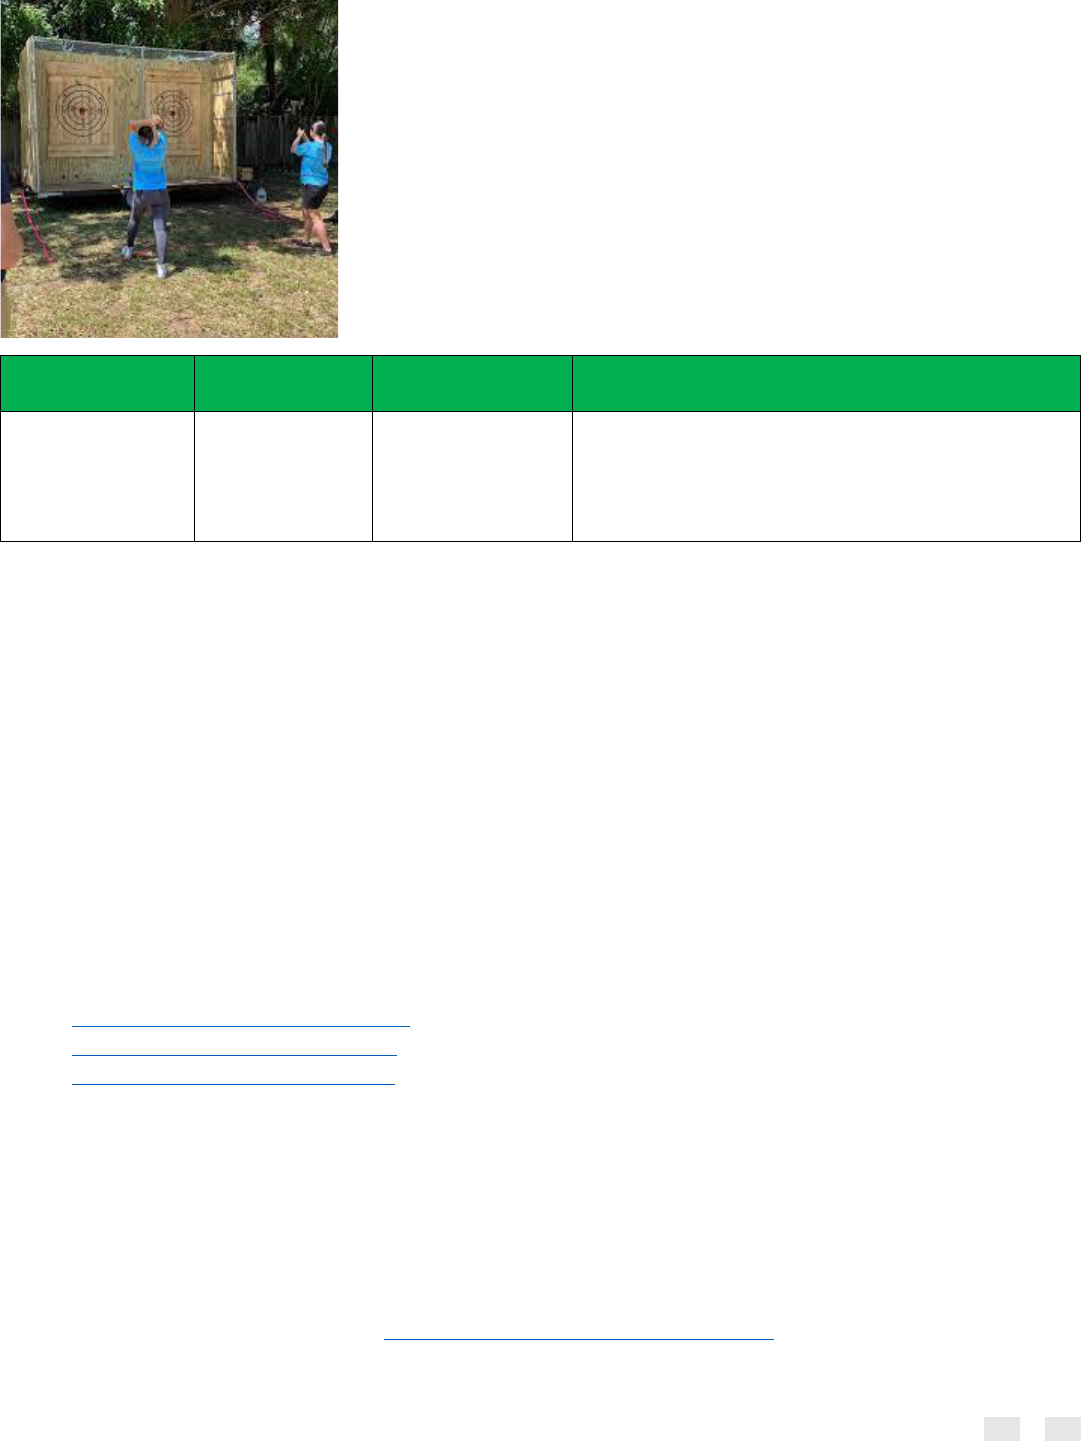
2024–2026 Safety Activity Checkpoints Page 197 of 226
Ax, Knife, and Hatchet Throwing
Council Approval: Required
Shooting Type
Activity
Permitted For
Participant-to-
Instructor Ratio
Instructor/Expert Certification
Ax/Knife/Hatchet
Throwing
C, S, A
2:1; 4:1 with
another adult
assisting
One adult is trained and experienced in blade
throwing safety specific for the ax, knife, or hatchet
being used including proper form and technique,
range rule specifications, and emergency
procedures.
About Ax, Knife, and Hatchet Throwing
Some of the oldest weapons, tools, and hunting methods include the ax, knife, and hatchet, and they are still used
for their traditional purposes in some areas today. Learning how to handle them safely by aiming at targets for
accuracy is also common today as a recreational and competitive activity. It is an ideal way to learn how to safely
handle these tools—tools that can be used in the great outdoors.
Good throwing requires learning positive traits such as patience, determination, focus, attention to detail,
discipline, and persistence. Since these skills are likewise key elements of leadership and confidence, we encourage
our Girl Scouts to take what disciplines they learn from any sport or activity and apply it to their participation in
their communities and the world.
There are a variety of styles and sizes of axes, knives, and hatchets. The ones youth will be learning about are
designed for the express purpose of hitting a target.
Learn More
• World Ax Throwing League (WATL)
• National Axe Throwing Federation
• American Knife Throwers Alliance
Include Girl Scout Members with Disabilities. Talk to Girl Scout members with disabilities and their caregivers.
Ask about needs and accommodations. Always be sure to contact the location and/or the instructor in advance to
ensure they are able to accommodate those with disabilities.
Equity. Consider the history, culture, and past experiences of the Girl Scout members in your troop that could
affect their ability to equally participate in an activity. Work with members and families to understand how an
activity is perceived. Ensure that all Girl Scout members and their families feel comfortable and have access to
whatever is needed to fully participate, such as proper equipment, prior experiences, and the skills needed to enjoy
the activity. See the Equity section of the Introduction to Safety Activity Checkpoints for general advice about
expense,

2024–2026 Safety Activity Checkpoints Page 198 of 226
Emergency Action Plan (EAP). Review and document your Emergency Action Plan (EAP) before starting any
activity and review it so all are prepared. Think through scenarios of what can go wrong such as an accident,
physical injury, missing person, sudden illness, or sudden weather or water emergencies.
Ax, Knife, and Hatchet Throwing Checkpoints
Assess participants’ maturity level. Participants must be old enough to understand safety procedures and handle
equipment so as not to endanger themselves or others.
Verify instructor knowledge and experience. One adult needs to be trained and experienced in ax, hatchet, or
knife throwing safety (depending on which you are doing), form, technique, range rule specifications, and
emergency procedures. Ensure the experienced instructor reviews all rules, range, and operating procedures
beforehand.
Note: The instructor-to-participant ratio is different from the adult-to-youth ratio found in the Safety Standards
and Guidelines. You must follow the Target and Shooting Sports—Master Progression Chart for the proper
number of instructors. Additionally, both ratios must be complied with when Girl Scouts are participating in
throwing sports. For example, if 15 Cadettes are on the throwing line, there must be four instructors plus four
adult Girl Scout volunteers (who are not instructors) who are present during the activity.
Select a safe site. Check with council staff to see if an approved vendor list is available. If the council does not have
an approved vendor list, look for organized indoor and outdoor throwing ranges. Call the facility to determine the
following safety information to select a safe site:
• Equipment should be stored in a box, closet, or cabinet and locked when not in use.
• Equipment, including targets, is checked each time and is in good condition.
• Range rules and throwing command controls are clearly posted and taught to all participants in advance of
stepping onto the range.
• Clear safety signals and range commands to control the activity are posted and taught to all participants in
advance of stepping onto the range.
• Backstops or a specific safety zone are set behind the targets.
• Clearly delineated rear and side safety buffers are known to the entire facility population.
• The shooting line is clearly defined.
At an indoor range, make sure that:
Indoor Range Specific Guidelines: WATL for Indoor Range Information
Note: For hatchet throwing, indoor ceilings must be a minimum of 12 feet high; metal chain link 15-foot floor-to-
ceiling partitions must separate sets of two targets; and within a set of two targets, there must be a 6-foot floor-to-
ceiling partition between the targets.
• Each throwing area is designated as a throwing lane.
• A regulation lane for competition must contain two targets.
• Fences or walls block this area from the rest of the facility to keep throwers and axes all contained in a safe
environment.
• Only the two participating throwers and the ax throwing coach are allowed inside the lane at one time. This
includes ensuring the area behind the throwers is clear of any other person up to 5 feet.
• 10 feet minimum/clear ceiling height (within the throwing lane) is recommended for safety reasons.
• Targets are well-lit.
• Doors or entries to the range are locked or blocked from the inside.
• Fire exits are not blocked.

2024–2026 Safety Activity Checkpoints Page 199 of 226
At an outdoor range, check that:
Range Specific Guidelines: WATL for Outdoor Range Information
• Each throwing area is designated as a throwing lane.
• There needs to be a marker of 12 feet from the targets to designate the safe zone.
• Only the two participating throwers and the supervisor are allowed inside the lane at one time. This
includes ensuring the area behind the throwers is clear of any other person up to 6 feet.
• There needs to be 8-foot-tall fencing on the sides around the throwing area. This fencing must cover at least
15 feet to the front of the targets and connect to the fencing behind the targets with the back fencing.
• There needs to be 8-foot-tall fencing covering the area behind the target.
• If the targets are not fully enclosed in fencing with a ceiling, then there must be fencing at least 10 feet
away behind the targets.
• Under no circumstances can spectators or the public be allowed to walk behind the target, even behind the
8-foot-tall fencing area.
• If there is any reason to go behind the targets, it will only be by an authorized facilitator. Axes must all be
put down any time a facilitator is behind a target.
Ensure equipment is properly sized for participants and is made for throwing. Knives should be between 9 to
16 inches and not overly sharp. Hatchet heads should weigh between 1.25 and 1.75 pounds, the handle should be
wood, length must be at least 13 inches (as measured from the top of the head to the bottom of the handle), and the
face (blade) of the axe must be no longer than 4 inches and not overly sharp.
Girl Scouts should learn about throwing. Throwers develop skills based on proper procedures and form,
handling the equipment, getting the right stance, sighting, and observing safety practices.
Always keep the knife/hatchet pointed in a safe direction. This is the primary rule of target sport safety. A safe
direction means that the knife/hatchet is handled so that even if it were to be dropped or slip out of the thrower’s
grip, it would not cause injury or damage. The key to this rule is to control your actions, always.
Dress appropriately for the activity. Make sure that all participants avoid wearing dangling earrings, bracelets,
and necklaces that may become entangled in equipment. Also make sure long hair is tied back and always wear
closed-toed shoes.
Safety and Required Gear
• Axes, knives, hatchets
• Targets (positioned at recommended/safe distance)
• Hard shoes (to protect feet from bounce backs)
• Gloves (may be provided)

2024–2026 Safety Activity Checkpoints Page 200 of 226
Slingshot
Council Approval: Required
Activity Permitted for: D B J C S A
Shooting Type
Grade Level
Permitted
Participant-to-
Instructor Ratio
Instructor/Expert Certification
Slingshot
D, B, J, C, S, A
D, B – 5:1
J, C, S, A – 10:1
One adult instructor is trained in slingshot safety,
form, technique, range rules, and emergency
procedures.
About Slingshots
Slingshots are descendants of the trebuchet and the sling—weapons used for centuries! For Girl Scouts, they serve
as a progression step for target range activities like archery by teaching them about following range rules and
commands as well as helping them to build target skills and hand-eye coordination.
Slingshots for Daisies should be simple, fun, and easy to use when the equipment is designed for children of that
grade level and body size. Participants must be old enough to understand safety procedures and handle the
equipment so as not to endanger themselves and others.
Learn More
• How to Aim a Slingshot
Include Girl Scout Members with Disabilities. Talk to Girl Scout members with disabilities and their caregivers.
Ask about needs and accommodations. Always be sure to contact the location and/or the instructor in advance to
ensure they are able to accommodate those with disabilities.
Equity. Consider the history, culture, and past experiences of the Girl Scout members in your troop that could
affect their ability to equally participate in an activity. Work with members and families to understand how an
activity is perceived. Ensure that all Girl Scout members and their families feel comfortable and have access to
whatever is needed to fully participate, such as proper equipment, prior experiences, and the skills needed to enjoy
the activity. See the Equity section of the Introduction to Safety Activity Checkpoints for general advice about
expense,
Emergency Action Plan (EAP). Review and document your Emergency Action Plan (EAP) before starting any
activity and review it so all are prepared. Think through scenarios of what can go wrong such as an accident,
physical injury, missing person, sudden illness, or sudden weather or water emergencies.

2024–2026 Safety Activity Checkpoints Page 201 of 226
Slingshot Checkpoints
Assess participants’ maturity level. Participants must be old enough to understand safety procedures and handle
equipment so not to endanger themselves or others.
Verify instructor knowledge and experience. Because slingshots are intended to serve as a progression step for
target sports, one adult needs to be a certified USA Archery instructor or have equivalent certification or
documented experience according to your council guidelines. Ensure that there is a ratio of one instructor for
every ten Girl Scouts for Juniors and older. For Daisies and Brownies, please have one instructor for five shooters.
Select a safe site:
• Equipment is stored when not in use and is in good repair.
• Equipment, including targets, is checked each time and is in good condition.
• Clear safety signals and range commands to control the activity are posted and taught to all participants in
advance of stepping onto the range.
• Backstops or a specific safety zone are set behind the targets.
• Shooting line is clearly defined.
• Clearly delineated rear and side safety buffers are known to the entire facility population.
At an outdoor range, check that:
• Targets are not placed in front of houses, roads, trails, or tents.
• Areas with pedestrian traffic are avoided.
• The shooting area and the spectator area behind the shooting area are clearly marked.
• The range is not used after nightfall.
At an indoor range, make sure:
• Targets are well-lit.
• Doors or entries to the range are locked or blocked from the inside.
• Fire exits are not blocked.
• Ensure equipment is properly sized for participants.
• “Shot” is appropriate for the range.
Girl Scouts should learn about shooting. Participants develop skills based on proper procedures and form,
handling the equipment, getting the correct stance, sighting, aiming, and observing safety practices.
Always keep the slingshot pointed in a safe direction. This is the primary rule of target sport safety. A safe
direction means that the slingshot is pointed toward the target or toward the ground, so that even if it were to go
off it would not cause injury or damage.
On the Day of Slingshot Shooting
Dress appropriately for the activity. Avoid wearing dangling earrings, bracelets, and necklaces that may become
entangled in equipment. Also make sure long hair is tied back and always wear closed-toed shoes.
Ensure the instructor reviews the rules and operating procedures beforehand. The instructor covers safety
procedures, including:
• Always keeping the slingshot pointed in a safe direction.
• Notice form to avoid snapping wrists or hand with the band.
Basic Slingshot Range Rules
• Qualified instructor may only open this range.
• Listen to and follow all commands on the range.

2024–2026 Safety Activity Checkpoints Page 202 of 226
• Do not pick up, load, or fire your slingshot until given the commands.
• Stand behind the firing line. Do not straddle the firing line.
• Absolutely no running on the range.
• No extra talking on the range.
• Step back from the firing line when you finish firing.
Basic Slingshot Safety Rules
• Hold slingshot pointed in a safe direction, toward the target or the ground.
• Keep ammunition in the pouch until given permission to load and fire.
• Leave the bands at rest until you are ready to shoot.
Safety and Required Gear
• Stable slingshot
• Ammunition appropriate for the targets: biodegradable clay ammo, dog food kibbles, ping pong balls,
marshmallows, half-inch paintballs
• Range Rules poster
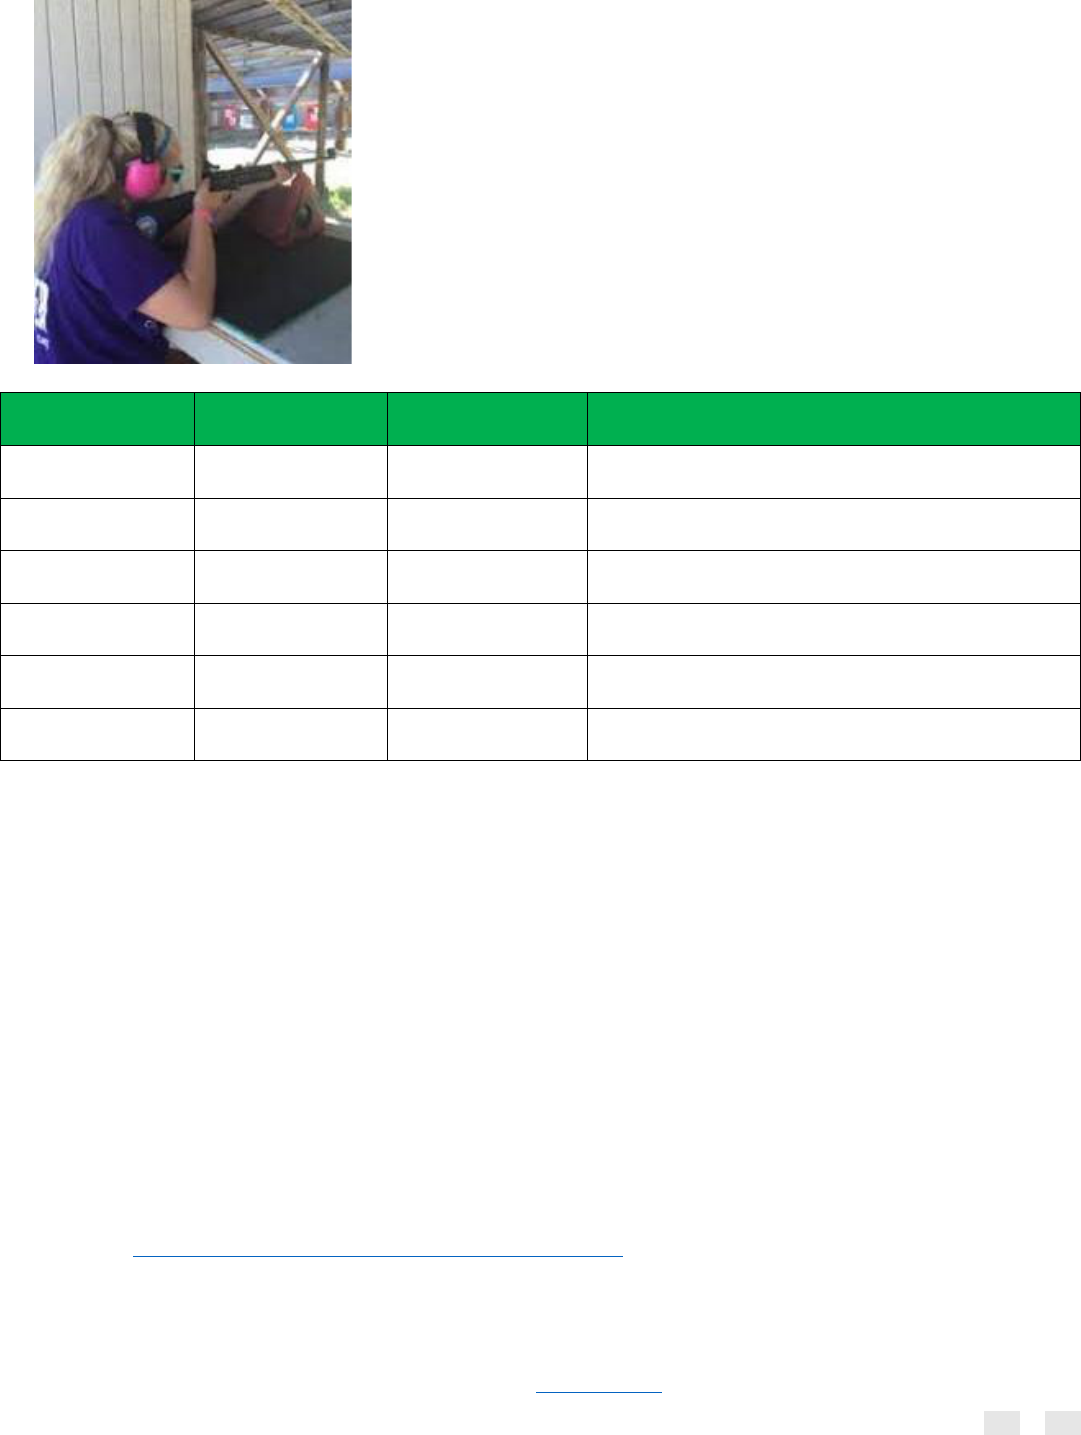
2024–2026 Safety Activity Checkpoints Page 203 of 226
Shooting Sports/Guns
Council Approval: Required
Shooting Type
Activity
Permitted For
Participant-to-
Instructor Ratio
Instructor/Expert Certification
Target Paintball
B, J, C, S, A
B – 5:1
J, C, S, A – 10:1
One adult is trained in paintball safety, range
rules, and emergency procedures.
Air/BB Guns
B, J, C, S, A
B – 5:1
J, C, S, A – 10:1
One adult is a certified RSO or USA Shooting
Sports instructor.
Rifle
Age 12 & older
8:1
One adult is a certified RSO or USA Shooting
Sports instructor.
Shotgun, Trap,
Skeet Shooting
Age 12 & older
8:1
One adult is a certified RSO or USA Shooting
Sports instructor.
Muzzle Loading
Age 12 & older
2:1
One adult is a certified RSO or USA Shooting
Sports instructor.
Pistol
Age 14 & older
4:1
One adult is a certified RSO or USA Shooting
Sports instructor.
Note: Automatic firearms are not permitted at any time.
About Shooting Sports/Guns
Why teach shooting sports? Handling a gun safely and good marksmanship develop positive traits such as patience,
discipline, determination, focus, attention to detail, and persistence. Since these skills are key elements of
leadership and confidence, we encourage Girl Scouts to take what they learn from any sport or activity and apply it
in their lives, communities, and the world.
We recognize the risks that accompany shooting sports. Learning how to handle guns properly and safely is of
paramount importance, as is the healthy respect members will develop when properly trained in shooting sports.
There are a variety of styles and sizes of guns, which are used for different age levels. The guns members will be
learning on are for the express purpose of safe target shooting. Girl Scouts are not permitted to hunt.
As of 2023, firearms are the number one cause of death for children in the United States. Given this statistic,
families may have strong feelings about their child holding or being around firearms. Engage in open dialogue and
actively listen to all families about their comfort and concerns before proceeding. Each family must determine
whether or not their Girl Scout should participate. There should be no judgment in any case.
Note: Refer to Target and Shooting Sports Master Progression Chart for age and grade level requirements. Written
permission must be obtained by your Girl Scout council in advance of the activity. Once approved, you must have
written permission from a parent/guardian before a Girl Scout is permitted to participate in target shooting.
Learn More
• Safety regarding various shooting sports/events: USA Shooting

2024–2026 Safety Activity Checkpoints Page 204 of 226
• Safety at home and on the range: National Shooting Sports Foundation
• Safe shooting certification: USA Clay Target SAFE Certification
Include Girl Scout Members with Disabilities. Talk to Girl Scout members with disabilities and their caregivers.
Ask about needs and accommodations. Always be sure to contact the location and/or the instructor in advance to
ensure they are able to accommodate those with disabilities. Visit Move United for resources about adaptive
shooting.
Equity. Consider the history, culture, and past experiences of the Girl Scout members in your troop that could
affect their ability to equally participate in an activity. Work with members and families to understand how an
activity is perceived. Ensure that all Girl Scout members and their families feel comfortable and have access to
whatever is needed to fully participate, such as proper equipment, prior experiences, and the skills needed to enjoy
the activity. See the Equity section of the Introduction to Safety Activity Checkpoints for general advice about
expense,
Emergency Action Plan (EAP). Review and document your Emergency Action Plan (EAP) before starting any
activity and review it so all are prepared. Think through scenarios of what can go wrong such as an accident,
physical injury, missing person, sudden illness, or sudden weather or water emergencies.
Shooting Sports/Guns Checkpoints
Assess participants’ maturity level. Participants must be old enough to understand safety procedures and handle
equipment so as not to endanger themselves or others.
Verify instructor knowledge and experience. One adult needs to be a certified National Rifle Association Range
Safety Officer (RSO) or USA Shooting Sports instructor or have equivalent certification or documented experience
and skill teaching/supervising firearm safety or shooting sports according to your council’s guidelines.
Note: The instructor-to-participant ratio is different from the adult-to-youth ratio that is found in Introduction:
Standard Safety Guidelines. Both the instructor ratio and the adult-to-youth ratio must be complied with when
members are participating in target sports.
Connect with your Girl Scout council for approved sites. Groups are required to use council-approved indoor
and outdoor firing ranges. Your council must approve all sites in advance.
Keep in mind that safe sites include those where:
• Equipment is stored in a box, closet, or cabinet and locked when not in use.
• Ammunition and firearms are stored in separate, locked containers or areas with different locks and
combinations.
• Caliber firearms have working trigger locks for storage (exceptions: BB and air guns).
• Equipment, including targets, is checked each time and is in good condition.
• Clear safety signals and range commands to control the activity are posted and taught to all participants in
advance of stepping onto the range.
• Backstops or a specific safety zone are set behind the targets.
• Clearly delineated rear and side safety buffers are known to the entire facility population.
• The shooting line is clearly defined.
At an indoor range, check that:
• Targets are well-lit.
• Doors or entries to the range are locked or blocked from the inside.
• Fire exits are not blocked.
• Equipment is properly sized for the shooters.

2024–2026 Safety Activity Checkpoints Page 205 of 226
At an outdoor range, check that:
• Targets are not placed in front of houses, roads, trails, or tents.
• Areas with pedestrian traffic are avoided.
• Areas are clear of brush. A hillside backstop is recommended.
• The shooting area and the spectator area behind the shooting area are clearly marked.
• In the shooting area, there is a safe distance at least 100 yards behind the targets and 30 yards on each side
of the range.
• The range is not used after nightfall.
Learn about shooting. Girl Scouts develop skills based on proper procedures and form, handling the equipment,
getting the right stance, sighting, and observing safety practices.
Ensure firearms are always pointed in a safe direction. This is the primary rule of target shooting sport safety.
A safe direction means that the firearm is pointed so that even if it were to go off it would not cause injury or
damage. The key to this rule is to control where the front end of the firearm is pointed, always.
On the Day of Shooting
Dress appropriately. Avoid wearing dangling earrings, bracelets, and necklaces that may become entangled in
equipment. Tie back long hair.
Limit shooters’ exposure to lead. For firearm sports, be sure that the range safety officer and/or the instructor
provide wet wipes to cleanse hands and faces immediately after shooting. In addition, have participants wash their
hands and faces with soap and cold water as soon as possible. Cold water keeps pores closed so that less lead is
absorbed into the bloodstream. Do not take casings as souvenirs.
Ensure the instructor reviews the rules and operating procedures with participants beforehand. The
instructor covers safety procedures, including:
• No dry firing, as it can damage equipment.
• Keep the safety clip on until it is time to shoot.
• Always keep the firearm pointed in a safe direction, away from self and others.
Safety and Required Gear
• Firearm ammunition
• Targets
• Safety glasses
• Ear protection
• Barrel-blocking device (sleeve) for paintball
• Co2 or compressed air tank for paintball
• Paintball hopper (loader) for paintball

2024–2026 Safety Activity Checkpoints Page 206 of 226
Tethered Hot Air Balloon Rides
Council Approval: Required
Activity Permitted for: J C S A
About Tethered Hot Air Balloon Rides
Hot air or helium balloons that remain tethered to the earth provide a new perspective and exciting experience.
The balloons are attached to ground-level anchors while passengers ride in a basket or gondola under the balloon.
Riders must be Juniors and above and must be taller than the basket (their head above the basket, which is
typically 3.5 feet high).
Look for well-established amusement parks, zoos, and similar facilities that might offer helium balloon rides. Some
hot air balloon operators can set up temporary tethered rides in a suitable place. Contact local vendors.
Note: Untethered hot air balloons, blimps, helicopters, and small private planes are not permitted.
Learn More
• Tethered balloon basics
Include Girl Scout Members with Disabilities. Talk to Girl Scout members with disabilities and their caregivers.
Ask about needs and accommodations. Always be sure to contact the balloon ride operator or location in advance
to determine any safety steps that need to be prearranged and ensure they are able to accommodate those with
disabilities. For more information, visit the U.S. Access Board for transportation resources and information to
support people with disabilities.
Equity. Consider the history, culture, and past experiences of the Girl Scout members in your troop that could
affect their ability to equally participate in an activity. Work with members and families to understand how an
activity is perceived. Ensure that all Girl Scout members and their families feel comfortable and have access to
whatever is needed to fully participate, such as proper equipment, prior experiences, and the skills needed to enjoy
the activity. See the Equity section of the Introduction to Safety Activity Checkpoints for general advice about
expense,
Emergency Action Plan (EAP). Review and document your Emergency Action Plan (EAP) before starting any
activity and review it so all are prepared. Think through scenarios of what can go wrong such as an accident,
physical injury, missing person, sudden illness, or sudden weather or water emergencies.

2024–2026 Safety Activity Checkpoints Page 207 of 226
Tethered Hot Air Balloon Ride Checkpoints
Select a qualified operator. Ensure operators have liability insurance and are licensed through the Federal
Aviation Administration (FAA). Pilots must be currently licensed. Here are some questions to ask of an operator
you are considering:
• Do you comply with the Envelope of Safety or FAA Wings programs? (These voluntary programs, promoted
by the FAA, indicate an operator or pilot is willing to achieve a high level of preparation and training.)
• How long have you been flying/operating in this area?
• Do you have a commercial pilot’s FAA certificate?
• What is your safety/accident record?
• What insurance coverage does your company carry?
• Will you be flying or piloting our ride, or just booking it for another pilot?
• Do you have a business license for flying in this area?
• How will the balloon be tethered? (See Safety Gear section, below, for acceptable options.)
Choose a balloon that meets Girl Scout standards. The balloon must be certified and registered with the FAA for
passenger use.
• Helium balloon rides are likely to be permanently installed and inflated with helium, a gas lighter than air.
They can carry many riders in a donut-shaped gondola below the balloon. A single cable runs from the
balloon to the ground through the hole in the gondola. The operator controls the rise and descent of the
balloon with the cable.
• Tethered hot air balloons use heated air to inflate a large, colorful envelope. Because heated air is less
dense than ambient air, the balloon rises. A passenger basket or gondola is suspended below the balloon.
To rise and descend, a licensed pilot carefully manages the heated air with fuel—typically propane. The
aircraft is tethered by ropes or straps to three heavy or fixed items (anchors) on the ground. The pilot and
ground crew monitor wind direction and speed and anchor placement. A crew member manages any riders
waiting for a turn.
Know the local laws. Many other countries do not maintain the same strict flight standards as those in the United
States. Research the standards and enforcement practices of the country you will visit. Ride only in countries with
firm safety standards. Contact your Girl Scout council for guidance.
On the Day of Riding
Get a weather report. Be prepared to postpone or cancel rides in case of poor weather. Check Weather.com. There
should be no lightning storms predicted within a 50-mile radius of the site. Strong winds or lightning are especially
dangerous, but even winds of over 5 miles per hour can be too much. Contact the balloon operator or pilot for
guidance.
Observe general safety rules:
• Follow pilot and crew instructions about getting into and out of the basket or gondola.
• Listen to the orientation and follow the rules mentioned.
• Never lift someone to see over the edge of the basket.
• Use the buddy system and adult supervision, always.
• Follow instructions in an emergency.
• Do not play on or around the ground anchors or tethers.
Address motion sickness. Suggest that those who get motion sickness consider taking a remedy in advance. Other
tips:
• Bring mints, ginger candies, gingersnaps, or plain crackers to settle queasy stomachs.

2024–2026 Safety Activity Checkpoints Page 208 of 226
• Have motion sick persons stay in the fresh air. Have them keep their eyes on the horizon.
Safety Gear
• Tethers for hot air balloons may be ropes or straps, which must be in good condition. Operators should
inspect them before each use and monitor them throughout the ride(s). Hot air balloons should use a three-
point tether. Helium balloons may use a single tethering cable.
• Rescue and safety gear, according to industry standards for the aircraft type, including fire extinguishers
and weights.
• Layered clothing, according to the weather and no loose or dangling items
• Motion sickness remedies (see above) if needed.

2024–2026 Safety Activity Checkpoints Page 209 of 226
Tools—Hand and Power
Council Approval: May Be Required
Activity Permitted for: D B J C S A
Tools are specific to grade level; please review the Master Tool Chart.
About Hand and Power Tools
Tools vary greatly by their power source (battery operated, electric, or manual) as well as what job they are to be
used for. While using tools can achieve great accomplishments, using extreme caution with all tools is extremely
important. Adults must supervise tool use, always, and Girl Scouts should never operate tools on their own or be
left alone at any time. Adult supervision is mandatory for all projects using tools no matter how big or small.
Learn More
• Safety Tips from OSHA
• Department of Industrial Relations
Include Girl Scout Members with Disabilities. Talk to Girl Scout members with disabilities and their caregivers.
Ask about needs and accommodations. Always be sure to contact the location and/or the instructor in advance to
ensure they are able to accommodate those with disabilities.
Equity. Consider the history, culture, and past experiences of the Girl Scout members in your troop that could
affect their ability to equally participate in an activity. Work with members and families to understand how an
activity is perceived. Ensure that all Girl Scout members and their families feel comfortable and have access to
whatever is needed to fully participate, such as proper equipment, prior experiences, and the skills needed to enjoy
the activity. See the Equity section of the Introduction to Safety Activity Checkpoints for general advice about
expense,
Emergency Action Plan (EAP). Review and document your Emergency Action Plan (EAP) before starting any
activity and review it so all are prepared. Think through scenarios of what can go wrong such as an accident,
physical injury, missing person, sudden illness, or sudden weather or water emergencies.
Tools—Hand and Power Checkpoints
Assess maturity level. Participants must be old enough to understand safety procedures and handle equipment so
as not to endanger themselves and others.
Dress appropriately. Make sure that all participants avoid wearing dangling earrings, bracelets, and necklaces
that may become entangled in equipment. Also make sure long hair is tied back, and always wear closed-toed
shoes. Always use Personal Protective Equipment (PPE) such as eye goggles, leather gloves, and ear and head
protection (when necessary).
Verify instructor knowledge and experience. At least one adult needs to be trained in proper usage of the tools
being used including safety precautions, equipment use, emergency procedures, and which grade levels are
permitted to use which tools.
General safety tips for hand and power tools:
• Always have an adult who is trained in that piece of equipment or tool teach the participants how to use
each item.
• Buy quality tools. Many tools, including cutters and hammers, should be made of steel, and should be
heat-treated.

2024–2026 Safety Activity Checkpoints Page 210 of 226
• Regularly inspect tools to make sure they are in good shape and fit for use.
• Be sure to maintain your tools by performing regular maintenance, like grinding or sharpening. Always
follow the manufacturer’s instructions.
• Use the right tool for the job. In other words, do not try to use a wrench as a hammer.
• Make sure your feet are planted on a stable surface.
• Be aware of the people around you and make sure they stay clear of the tools you are using.
• Never carry tools up a ladder by hand. Instead, use a bucket or bag to hoist tools from the ground to the
worker.
• When working at heights, never leave tools lying out in areas where they could present a hazard to
workers below.
• Never carry pointed tools in your pocket. Carry them in a toolbox or cart instead.
• Inspect your tools on a regular basis, checking for damage. Report damaged tools to your supervisor.
• Make sure to keep extra tools handy in case the tool you had planned to use is damaged.
• Make sure tools are stored in a safe place.
Safety tips for electric power tools. To prevent hazards associated with the use of power tools, workers should
observe the following general precautions:
• Never carry a tool by the cord or hose.
• Never yank the cord or the hose to disconnect it from the receptacle.
• Keep cords and hoses away from heat, oil, and sharp edges.
• Disconnect tools when not using them, before servicing and cleaning them, and when changing accessories
such as blades, bits, and cutters.
• Keep all people not involved with the work at a safe distance from the work area.
• Secure work with clamps or a vise, freeing both hands to operate the tool.
• Avoid accidental starting. Do not hold fingers on the switch button while carrying a plugged-in tool.
• Maintain tools with care; keep them sharp and clean for best performance.
• Follow instructions in the user’s manual for lubricating and changing accessories.
• Be sure to keep good footing and maintain good balance when operating power tools.
• Wear proper clothing for the task. Loose clothing, ties, or jewelry can become caught in moving parts.
• Remove all damaged portable electric tools from use and tag them: “Do Not Use.”
• Keep floors dry and clean to avoid slipping while working with or around dangerous tools.
• Keep cords from presenting a tripping hazard.
• Use tools that are double-insulated or have a three-pronged cord and are plugged into a grounded
receptacle.
• Do not use electric tools in wet conditions unless they are approved for that use.
• Use a ground fault circuit interrupter (GFCI) or an assured grounding program.

2024–2026 Safety Activity Checkpoints Page 211 of 226
Master Tool Chart
Type of Tool
Grade Level(s) Permitted
D
B
J
C
S
A
Band/Scroll Saw
X
X
X
Belt Sander (electric, cordless)
X
X
X
Chain Saws
Not Permitted
Circular, Reciprocating, or Radial Saw
Not Permitted
Commercial Lawn Mower (push, self-propelled, riding)
Not Permitted
Coping Saw
X
X
X
X
X
Cordless Drill
X
X
X
Cutting Tools—Small (e.g., Dremel)
X
X
X
Edger (electric, gas powered)
X
Hacksaw
X
X
X
Hand Clipper—Small
X
X
X
X
X
Handheld Sander—Small
X
X
X
Handsaw
X
X
X
X
X
Hedge Trimmer (electric, gas powered)
X
Hoe
X
X
X
X
X
X
Hose Spray Washer
X
X
X
X
X
X
Hot Glue
X
X
X
X
Jigsaw
X
X
Leaf/Grass Blower (electric, gas powered)
X
Line Trimmer (electric, gas powered)
Not Permitted
Log Splitters
Not Permitted
Mattock
X
X
X
Nail Hammer
X
X
X
X
X
X
Paint Roller
X
X
X
X
X
X

2024–2026 Safety Activity Checkpoints Page 212 of 226
Paint Roller with Extension Pole
X
X
X
X
Paint Sprayer–Small, less than 50 psi.
X
X
X
Pickaxe
X
X
X
Pocket Knife
X
X
X
X
X
Posthole Digger
X
X
X
Pressure Washer (>50 but <100 psi.)
X
X
Rake
X
X
X
X
X
X
Residential Lawn Mower (push, electric, gas powered)
X
X
Residential Lawn Mower (self-propelled, riding)
Not Permitted
Retractable Knives
X
X
X
Router/Planer
Not Permitted
Screwdriver (electric)
X
X
X
X
Screwdrivers
X
X
X
X
X
X
Shovel
X
X
X
X
X
X
Soldering Iron
X
X
X
Trowel
X
X
X
X
X
Wheel Cart, one-, two-, or four-wheeled
X
X
X
X
Woodchippers
Not Permitted
Wood Chisel
X
X
X
X
Wood Sanding Block (handheld)
X
X
X
X
X
X

2024–2026 Safety Activity Checkpoints Page 213 of 226
Travel/Trips
Council Approval: Required for overnight trips
Activity Permitted for: D B J C S A
Note: Approval for international travel must often be obtained a year or
more in advance of the trip.
About Travel/Trips
Some of the most memorable moments in a Girl Scout’s life happen while taking trips. Travel offers a wealth of
opportunities for Girl Scouts to develop leadership, confidence, and practical life skills. The following information
can help you and Girl Scouts prepare for local, regional, or international travel.
Girl Scouts is a great place to learn how to plan and take exciting trips, because travel is built on a progression of
activities—one activity leads to the next. Daisies can begin with a discovery walk. As Girl Scouts grow in their
travel skills and can better manage the planning process, they progress to longer trips—even international ones!
For Daisies, this could mean a day trip to an arboretum to complete a badge requirement. For Seniors or
Ambassadors, it might mean a college visit trip to the other side of the country, whitewater rafting in Costa Rica, or
exploring the Our Chalet World Centre in Switzerland.
Although many troops decide to travel together, Girl Scouts might join a trip with other Girl Scouts from around
their council or form a new troop just to travel. Girl Scouts of the USA offers individual Cadette, Senior, and
Ambassador Girl Scouts the chance to travel independently and meet other Girl Scouts from across the country
through the Destinations program.
The recommended progression of trips and travel for Girl Scouts are:
Local Field Trips (Daisies and older): Try a trip during your regular troop meeting time! A walk to a nearby
garden or a short ride by car or public transportation to a firehouse or courthouse is a great first option for Daisies.
Keep it girl-led: they can choose the location!
Day Trips (Daisies and older): An all-day visit to a point of historical or natural interest (bringing their own lunch)
or a daylong trip to a nearby city (stopping at a restaurant for a meal) allows younger Girl Scouts to select locations
and do much of the trip planning, without being too far from home. Keep it girl-led: Girl Scouts choose the location
and an activity (maybe a badge activity?) and help make plans for lunch.
Note: Full-day trips may be challenging for Daisies, especially for kindergartners who have not experienced field
trips. Make sure to take some field trips before progressing to a full day trip.
Overnights (Daisies and older, must have experienced a day trip through Girl Scouts): A trip of one night could
start with a council event at a local museum or facility, or one night camping or staying at a Girl Scout council
property. An overnight is an important opportunity in helping Girl Scouts, and their caregivers, prepare for the
independence needed to take a full weekend trip. Keep it girl-led: Girl Scouts make the packing list and pack their
own bags.
Short Trips (Brownies and older, must have experienced an overnight through Girl Scouts): Spend two-
three nights in your region, up to a six-hour drive away from home. Keep it girl-led: Girl Scouts pack their own
bags, help to plan the activity and meals, and create travel games.
Note: These guidelines may differ from sleepaway camp guidelines. Check your council's camp guidelines for
details.

2024–2026 Safety Activity Checkpoints Page 214 of 226
Extended Trips (Juniors and older, must have experienced a short trip through Girl Scouts). Four or more nights
camping or staying in a hotel, motel, hostel, or vacation rental . Travel anywhere in the country can last up to a
week or more. Try to avoid ordinary recreational trips Girl Scouts might take with their families or schools and
consider those that offer some educational component—such as incredible cities, historic sites, and museums
around the country. Perhaps the Girl Scouts want to plan a trip to some national parks as part of the Girl Scout
Ranger program. Keep it girl-led: Girl Scouts lead the entire planning process and might plan to add a community
service or Take Action project.
International Trips (Cadettes and older, must have experienced an extended trips through Girl Scouts). Travel
around the world can require one to three years of preparation. Ensure passports, documentation, visas, and
customs requirements are in order well in advance of your trip. . Keep it girl-led: Girl Scouts download the Guide
to Global Travel and plan their entire trip—including learning about language, culture, passports and visas,
exchange rates, etc.
Independent Travel (Cadettes and older). Older Girl Scouts who already have national or international travel
experience can travel independently through council-offered travel opportunities or GSUSA’s Destinations
program. For opportunities, check with your Girl Scout council and visit the Destinations website.
When thinking about progression, consider things like Girl Scouts’:
• Ability to be away from parents/caregivers and their homes
• Ability to adapt to unfamiliar surroundings and situations
• Ability to make decisions for themselves and the good of the group well and easily
• Ability to get along with one another and handle challenges
• Previous cross-cultural experiences, skills, interests, and language skills (where applicable)
Non–Girl Scouts. If you plan to include non–Girl Scouts on your trip, such as siblings, they should also be the same
appropriate grade level in progression with travel experience. For example, an eight-year-old sibling of a Senior
should not participate in an international trip. Note: WAGGGS World Centres or your Girl Scout council may have
additional or different guidelines regarding age requirements for international travel.
Learn More
• WAGGGS World Centres
• Girl Scout troop events and camps your troop can rent
• Girl Scout Guide to U.S. Travel
• Girl Scout Guide to Global Travel
• Girl Scouts Destinations program: Ultimate Experiences in the United States and abroad
• U.S. Department of State: U.S. passports and international travel
• Travelers’ health (vaccines, medicine, advice): Centers for Disease Control
Include Girl Scout Members with Disabilities. Talk to Girl Scout members with disabilities and their caregivers.
Ask about needs and accommodations. Always be sure to contact the location and/or the instructor in advance to
ensure they are able to accommodate those with disabilities. For more information, visit Open Doors Organization,
a great reference for learning and traveling with disabilities.
Equity. Some of your troop members may have traveled before, while others may have never left their home town.
Travel could be new for them. Whatever your troop members’ experience levels with travel, make sure your
conversations normalize those experiences and include everyone. Steer conversations away from sharing about
past travel experiences (which could make some Girl Scouts feel excluded). Instead, encourage Girl Scouts to
connect about what is happening now, on this trip. Focus on shared and upcoming experiences.
Consider the history, culture, and past experiences of the Girl Scout members in your troop that could affect their
ability to equally participate in an activity. Work with members and families to understand how an activity is

2024–2026 Safety Activity Checkpoints Page 215 of 226
perceived. Ensure that all Girl Scout members and their families feel comfortable and have access to whatever is
needed to fully participate, such as proper equipment, prior experiences, and the skills needed to enjoy the activity.
Emergency Action Plan (EAP). Review and document your Emergency Action Plan (EAP) before starting any
activity and review it so all are prepared. Think through scenarios of what can go wrong such as an accident,
physical injury, missing person, sudden illness, or sudden weather or water emergencies.
Travel/Trips Checkpoints
Plan transportation in advance. When planning transportation, keep in mind that large 15-passenger vans
manufactured prior to 2013 without driver assistance technology have been flagged as unsafe by the National
Highway Traffic Safety Administration and should therefore be avoided. For more information on operating 15-
passenger vans see Transporting Girls under Standard Safety Activity Checkpoints in the Introduction. If a
commercial shuttle service is professionally using the van, this is acceptable.
For chartered buses or rented vehicles always verify safety credentials and commercial driving licenses, check the
availability of seat belts, and request a certificate of insurance showing a minimum of one million dollars Auto
Liability insurance.
Choose accommodations wisely. Girl Scout groups may stay in a variety of overnight accommodations. Evaluate
all options with a view to safety, cost, amenities, distance to planned sights or transportation, privacy, parking, and
insurance. Consider:
• Find a Girl Scout camp you can rent for travel.
• Learn about visiting national, state, or local campgrounds, many of which offer cabins to rent. Try
reserveamerica.com.
• Hostels that provide dorm-style space so your group can stay together.
• Hotels, and consider suites and adjoining rooms to enhance supervision. Avoid motels with doors opening
to the outside.
Vacation rentals. These are permitted. However, because these are privately owned properties, it can be difficult
to qualify safety and credibility. For these reasons, additional steps for rentals such as Airbnb, VRBO, and
HomeAway are required. Confirm the following ahead of time:
• The rental is for exclusive use of the home. No other renters will have access to the home during the rental
period.
• The space has smoke alarms, carbon monoxide detectors, and fire extinguishers (these are noted as
amenities on booking sites).
• The home and host have substantial, positive visitor reviews. Do not book places with negative, few, or no
reviews. Look for super-host status on Airbnb.
• The liability insurance from the host covers premises for commercial use, with a minimum of one million
dollars General Liability insurance.
• Check the host’s profile or identity verification. You may be asked to do the same, as a renter.
• The local host or manager contact info is available for immediate needs. Share this information with an in-
town contact (a person not on the trip).
• Check state laws to see if Airbnb, VRBO, and HomeAway are mandated to meet hotel laws and standards so
that you know there is an extra layer of protection.
Check accommodations on arrival. No matter what housing you book, inspect premises with the group
immediately on arrival. Let the front desk or host know if you find any deficiencies. Maintain a budget margin so
that you can move to another location if you find a property unsafe. Here are several points to check upon arrival:
• All points of entry are secure and lockable.
• Stairs or fire escapes are identified and shown to Girl Scouts.

2024–2026 Safety Activity Checkpoints Page 216 of 226
• Evacuation routes are clear and known to all. Identify an exterior meeting place in case of evacuation.
• Basic safety systems are in place, as appropriate to the type of building and according to building codes in
the jurisdiction, such as a fire extinguisher and smoke alarm.
• Location of local emergency services and how to reach them.
• Confirm any communication services (mobile carrier, Wi-Fi) are running and reliable.
Sleeping and bathroom arrangements. Follow these points:
• Adults are not required to sleep in the same space (i.e., hotel room) as Girl Scouts; if they do, there
should be at least two unrelated female adults in the room.
• Each participant has her own bed. Parent/guardian permission must be obtained if they are to share a
bed.
• Reduce the likelihood of spreading illness by keeping beds 6 feet apart, and/or sleeping head-to-toe,
when possible.
• Girl Scouts and adults do not share a bed. However, some councils make exceptions for mothers and
daughters.
• Males should not sleep in the same space as youth members. An exception is made for family members
during events such as parent-daughter or family overnights where one family may sleep together in an area
specifically designated to accommodate families. If possible, men should have their own designated
bathroom. If a unisex bathroom is used, the door must have a working lock, or a system for notifying others
that the bathroom is in use. This system should be reviewed and understood by all participants. When
traveling or camping, men should not have to walk through the youth sleeping area to get to the bathroom.
Men must stay in a tent or a cabin that is separate from the girls or women.
• For additional information on sleeping accommodations, see Introduction: Standard Safety Guidelines.
Additional Considerations
Try to make sure international permission slips are signed by both parents. Discuss with your Girl Scout
council about having both parents sign the permission slip and notarizing it. This is recommended by U.S. Customs
& Border Protection and is strongly suggested as a best practice.
Take the insurance. Protect troop and family funds. When booking flights, consider cancellation insurance which
primarily covers the cost for airfare in the event a trip is cancelled due to illness. Read the fine print carefully, as
some situations (such as pandemics) may not be covered. Broad cancellation insurance is called “Cancel for any
reason” (CFAR) and must be obtained immediately after the first booking. Discuss this option with your Girl Scout
council, if needed, as it could be costly. When planning to travel internationally, discuss liability insurance with
your Girl Scout council. You will need to confirm that your council’s liability insurance does not have any specific
exceptions or exclusion for international travel. For Activity Accident insurance, you must enroll and purchase a
specific policy from Mutual of Omaha to cover international trips; international trips are not covered on the Basic
Plan.
Plan for contingencies. Occasionally, things will not go as planned. Budget for extra money on hand as a
contingency fund for when unexpected changes come up, for example: a canceled accommodation, a train is
missed, or an illness requires quarantine or recuperation.
Verify leader/instructor knowledge, experience, judgment, and maturity. Ensure that at least one adult is
trained or possesses knowledge, skills, and experience in the following areas:
• First aid
• Travel progression and readiness, including homesickness
• Trip planning in a girl-led environment
• Safety management
• Program activities specific to the trip

2024–2026 Safety Activity Checkpoints Page 217 of 226
• Group dynamics and management
• Supervision of Girl Scouts and adults
• If the trip is international, leader must have international travel experience
Prepare a pre-trip orientation. Make sure Girl Scouts have a detailed itinerary, but do not post the itinerary on a
publicly accessible website where others may be able to see it. Ensure that all participants and parents receive
information about health, first aid, emergency procedures, plans for transportation, and any geographic detail such
as the terrain or environment. Also share basic operational procedures (i.e., buddy system at all times) and
behavior expectations. You may want to work with your troop or group to create a group behavior contract, and
have members sign it. Another suggestion is to create a personal emergency action plan that each participant can
write and carry with them. Make sure to discuss topics like:
• How the buddy system works
• What to do if separated from the group, whether by accident or due to a crime
• What to do if something significant is lost: money, passport, or luggage
• What to do if emergency help is needed
• How to perform basic first aid procedures
• How to deal with a large crowd, if applicable
• What positive behaviors are expected and the consequences of not living up to those behaviors
International Travel. International travel involves increased travel precautions and requirements compared to
domestic travel. The following Safety Checkpoints apply to International Travel:
• Register your trip with the U.S. government’s Smart Traveler Enrollment Program (STEP) so that you will
get updates about safety, and so that the State Department knows where you are traveling.
• Read on the Centers for Disease Control and Prevention website about health concerns for the country.
Make sure participants and parents/guardians review this information. Every participant traveling
internationally should visit their doctor to discuss their travel health requirements and any vaccinations or
medications necessary.
• Become aware of any quarantine, vaccine, or screening requirements for return to the United
States, as well as what is required for entry into destination countries. This information will help greatly
when deciding upon a destination.
• Confirm the travel advisory level for the country via the U.S. State Department’s Bureau of Consular
Affairs. Note: The State Department now classifies travel advisories with travel alert levels as follows:
o Level 1: Exercise Normal Precautions
o Level 2: Exercise Increased Precautions
o Level 3: Reconsider Travel
o Level 4: Do Not Travel
• Confirm that participants and their parents/guardians have the advisory information and are
aware of the travel alert level in the region you plan to visit. This can be reflected on a permission slip
if your Girl Scout council chooses to handle it that way.
• Read information about safety issues and concerns carefully. Pay attention to the in-country travel
alerts for the specific region you are interested in. For example, a certain country may be classified as a
Level 2, but a particular state or region within that Level 2 country may be categorized as Level 3.
• Check the travel alert status periodically in the months/weeks/days leading up to your trip for any
changes. For situations where there is a travel alert Level 1 or Level 2, take normal safety precautions.
• Travel Alert 4. When the travel alert Level is 4 (“do not travel”), Girl Scout members are not to travel to a
location under any circumstances.
• Travel Alert 3. For situations where the travel alert is a 3 (“reconsider travel”), there are several steps that
should be taken before moving forward:
o Strongly consider selecting a different location.

2024–2026 Safety Activity Checkpoints Page 218 of 226
o If interest is high, have a conversation with your local council’s safety or risk representative to fully
understand the specific risk factors in play.
o Contact the host destination facility and ask if they are aware of the travel alert level and what extra
security measures are in place, if any.
o Inform participants and parents/guardians and determine if there is still a compelling interest in
traveling to this location, considering the travel alert level.
o Get parents’/guardians’ explicit approval to travel to the location, according to specific risks, in
writing.
o Have a conversation with your Girl Scout council and get approval from a legal perspective from in-
house legal or outside legal counsel.
o Confirm that you have senior management approval within your council prior to moving forward
with your plans.
Finally, when traveling, be sure to follow the safety checkpoints for specific activities you plan to do on your trip.

2024–2026 Safety Activity Checkpoints Page 219 of 226
Tubing
Council Approval: Required
Activity permitted for: J C S A
Not Recommended for: Daisies and Brownies
About Tubing
Tubing involves floating down a river or other body of water in a doughnut-shaped inner tube. Tubing is popular
both as a relaxing leisurely activity (in slow-moving waters) and as an adventurous recreational activity in faster-
paced rivers. A fun thing to do on a tubing adventure is to create exploration games to see who can locate the most
interesting nature gems, such as caves and peculiar plants or birds.
As a safety precaution, keep in mind that tubes occasionally flip, causing tubers to sometimes fall out of their tubes
as they travel over rapids and through rough patches of water. Tubing can be done on lakes or rivers. As river
tubing is often a one-way trip, be sure to arrange for return transportation from the tubing final destination.
If participating in boat-towed tubing, be sure to take safety precautions that comply with Girl Scouts small craft
safety training and guidelines.
Learn More
• American Whitewater
• River Tubing U.S.A.
• Whitewater Rescue Institute
Include Girl Scout Members with Disabilities. Talk to Girl Scout members with disabilities and their caregivers.
Ask about needs and accommodations. Always be sure to contact the location and/or the instructor in advance to
ensure they are able to accommodate those with disabilities. Learn about water safety for children with special
needs.
Equity. Consider the history, culture, and past experiences of the Girl Scout members in your troop that could
affect their ability to equally participate in an activity. Work with members and families to understand how an
activity is perceived. Ensure that all Girl Scout members and their families feel comfortable and have access to
whatever is needed to fully participate, such as proper equipment, prior experiences, and the skills needed to enjoy
the activity. See the Equity section of the Introduction to Safety Activity Checkpoints for general advice about
expense,
Emergency Action Plan (EAP). Review and document your Emergency Action Plan (EAP) before starting any
activity and review it so all are prepared. Think through scenarios of what can go wrong such as an accident,
physical injury, missing person, sudden illness, or sudden weather or water emergencies.

2024–2026 Safety Activity Checkpoints Page 220 of 226
Tubing Checkpoints
Adult Supervision. In addition to the standard adult-to-girl ratio under universal safety standards and guidelines,
one adult will be the lead tuber, while another adult will be the sweep tuber. The lead adult knows firsthand the
hazards and rapids on any river to be tubed.
Know the river flow. Be careful about where you roll out of a tube. If tubing in fast-moving water, the
undersurface current may catch you off guard. Do not get out of a tube where the flow of water is fastest—just
above the riverbed, where there is little resistance to flow. If towing behind a motorboat, the operator must be an
adult driver with a valid license to operate the motorboat. There must be a spotter at the stern watching a Girl
Scout while towing, always. Girl Scouts are not permitted to be towed by jet skis or wave runners.
Girl Scouts are not permitted to drive or operate motorized boats.
Verify instructor knowledge and experience. One adult must complete Girl Scouts small craft safety training,
Moving Water Module, have experience in teaching and/or supervising tubing activities, or have similar and
equivalent documented experience according to your council’s guidelines.
Confirm swimming ability. Success on the water depends on comfort and ability in the water. Conducting a
swimming assessment in advance is highly recommended. See Swimming Safety Activity Checkpoints for a sample
or ask your instructor for guidelines. If a swimming assessment is not possible, presume all participants are non-
swimmers.
Prior to tubing, participants receive verbal instruction. This should include how to float through rapids, how to
breathe while swimming in rapids, and how to swim to shore. There is only one person to a tube, and tubes that
are tied together are secured very snugly, with no slack between the tubes. Avoid long, dangling ropes that can get
snagged on various obstructions.
Research river condition. Never go whitewater tubing on water that has not been run and rated. No tubing is
taken on whitewater more difficult than Class II, as defined by the International Scale of River Difficulty or
Whitewater Rapid Classification System. Be aware of possible changes in river level and its effects on the run’s
level of difficulty. Make sure tubing on whitewater or semi-protected waters meets the Safety Code of American
Whitewater.
Prepare for emergencies. Ensure the presence of a waterproof first aid kit and a first aider with a current
certificate in first aid, including adult and child CPR or CPR/AED, who is prepared to handle cases of near-
drowning, immersion hypothermia, and sunburn. If any part of the activity is located 30 minutes or more from
emergency medical services, ensure the presence of a first aider with Wilderness First Aid certification.
Safeguard valuables. Do not leave personal belongings and valuables unattended in a public place. Check with
your vendor about lockers you might rent.
Get a weather report. Never go tubing on a stormy day. On the day of the activity, consult Weather.com or other
reliable sources to assess weather and river conditions and water and air temperature. If weather conditions
prevent the trip, be prepared with a backup plan or alternative activity.
Be prepared in the event of a storm with lightning. Exit water immediately and take shelter away from tall
objects (including trees, buildings, and electrical poles). Find the lowest point in an open flat area. Squat low to the
ground on the balls of the feet, and place hands on knees with head between them. During storms, if shore cannot
be reached, keep a sharp lookout for boats and other obstructions.
Safety Gear
• U.S. Coast Guard–approved life jacket (Type III recommended) that fits according to weight and height
specifications. Inspect life jackets to ensure that they are in good condition and contain no tears.
• Closed-toe sport sandals with heel strap, water socks, or shoes (no flip-flops).

2024–2026 Safety Activity Checkpoints Page 221 of 226
• At least one graspable and throwable Coast Guard–approved personal flotation device (Type IV buoyant
cushion or ring buoy or equivalent) immediately available for each group on the water.
• Waterproof sunscreen and lip balm with SPF.

2024–2026 Safety Activity Checkpoints Page 222 of 226
Waterskiing and Wakeboarding
Council Approval: Required
Activity Permitted for: J C S A
About Waterskiing and Wakeboarding
As with surfing, learning to stand up on water skis or a wakeboard (a single board resembling a snowboard) is one
of the sport’s primary challenges, especially for beginners. Waterskiing requires thorough instruction and practice.
Key elements of successful waterskiing include balance, a strong grip, and proper-fitting skis/board and bindings.
Skiers either wear one board (called slalom) or two skis (called combo); barefoot waterskiing is an advanced skill.
Beginners must learn the waterski position: knees bent and together, leaning back with weight on the balls of the
feet, head up, arms straight, and skis pointing forward. Participants will learn technique and safety to prevent
injuries; for example, water skiers must learn (contrary to instinct) to release the towline as soon as they begin to
lose their balance.
Girl Scouts can start the learning process on land. Before entering the water, it is helpful to simulate the
waterskiing process on a sandy beach and learn how to wear the skis and hold onto a water-ski handle properly.
They can and should also learn to communicate with the spotter (the person on the back of the boat watching the
skier) with specific and agreed-upon hand signals. This way the spotter can then shout out to the driver when
necessary.
Another fun technique is to learn by watching others—videotape other Girl Scouts who are learning to waterski
and watch it together to find out how to improve performance.
Open bodies of water, such as lakes and bays, are ideal. Connect with your Girl Scout council for site suggestions
and search online for lakes nearby.
Learn More
• USA Water Ski & Wake Sports
• U.S. Coast Guard’s Boating Safety Division
Include Girl Scout Members with Disabilities. Talk to Girl Scout members with disabilities and their caregivers.
Ask about needs and accommodations. Always be sure to contact the location and/or the instructor in advance to
ensure they are able to accommodate those with disabilities. For more information visit USA Water Ski’s Adaptive
Water Skiing page for information on amenities for water skiers with disabilities, and learn about water safety for
children with special needs.
Equity. Consider the history, culture, and past experiences of the Girl Scout members in your troop that could
affect their ability to equally participate in an activity. Work with members and families to understand how an
activity is perceived. Ensure that all Girl Scout members and their families feel comfortable and have access to
whatever is needed to fully participate, such as proper equipment, prior experiences, and the skills needed to enjoy
the activity. See the Equity section of the Introduction to Safety Activity Checkpoints for general advice about
expense,

2024–2026 Safety Activity Checkpoints Page 223 of 226
Emergency Action Plan (EAP). Review and document your Emergency Action Plan (EAP) before starting any
activity and review it so all are prepared. Think through scenarios of what can go wrong such as an accident,
physical injury, missing person, sudden illness, or sudden weather or water emergencies.
Waterskiing and Wakeboarding Checkpoints
No aerial or acrobatic tricks on skis. Members are not permitted to attempt aerial tricks on water skis or
wakeboards.
Protect hands. Water skiers can get blisters from the pressure of holding onto the rope handle; wearing gloves or
taping hands can help.
No ocean skiing. Skiers stay in bays, inlets, lakes, and gulfs and do not ski in the ocean without explicit council
approval.
Learn skiing safety, like staying behind the boat, as it is dangerous to curve around the boat. Also, skiing outside
the wake is an advanced technique for experienced skiers only.
Verify instructor and boat driver knowledge and experience. Ensure that the adult or instructor is certified by
USA Water Ski or possesses equivalent certification or documented experience according to your council’s
guidelines. Confirm that the boat driver is an adult of at least 21 years of age, has an appropriate license, and is
skilled in operating the watercraft.
Confirm swimming ability. Success on the water depends on comfort and ability in the water. Conducting a
swimming assessment in advance is highly recommended. Skiers should be strong swimmers. See Swimming Safety
Activity Checkpoints for a sample or ask your instructor for guidelines. If a swimming assessment is not possible,
presume all participants are non-swimmers.
All skiers must wear a U.S. Coast Guard–approved life jacket. Type III life jackets are recommended and should
fit according to weight and height specifications. Inspect life jackets to ensure that they are in good condition and
contain no tears.
Check the boat safety features. Make sure the boat has sufficient power to tow the skier(s) and is equipped with
a side-angle rearview mirror, fire extinguisher, flags, paddle, horn, bailing device, two gas tanks (for outboard
motors), mooring ropes (extra line), boarding ladder, and throw bag.
Prepare for emergencies. If a lifeguard is not on duty, an adult with rescue and resuscitation experience and/or
certification is present. Ensure the presence of a waterproof first aid kit and a first aider with a current certificate
in first aid, including adult and child CPR or CPR/AED, and who is prepared to handle cases of near-drowning,
immersion hypothermia, and sunburn. If any part of the activity is located 30 minutes or more from emergency
medical services, ensure the presence of a first aider with Wilderness First Aid certification.
Be prepared in the event of a storm with lightning. Exit the water immediately and take shelter away from tall
objects (including trees, buildings, and electrical poles). Find the lowest point in an open flat area. Squat low to the
ground on the balls of the feet, and place hands on knees with head between them. During storms, if shore cannot
be reached, keep a sharp lookout for other boats and obstructions.
Keep track of water skiers. Use a list or checkboard system to stay aware of water skiers’ whereabouts.
Privately owned towing boats. If using a boat that is privately owned, ensure that the owner/operator:
• Is a knowledgeable adult with the understanding and ability of their responsibility for Girl Scouts’ safety
and well-being.
• Agrees to follow the Safety Activity Checkpoints relevant to the activity.
• Maintains the vessel in accordance with the Safety Activity Checkpoints.

2024–2026 Safety Activity Checkpoints Page 224 of 226
• Coordinates with the activity leader to confirm the required safety gear is available for all participants, and
that the gear meets the specifications of authorities for the local jurisdiction.
• Meets Coast Guard and/or local jurisdictional requirements.
• Maintains insurance and registration as required by law in their jurisdiction.
For privately owned vessels over 30 feet, also see Offshore Water Vessels Safety Activity Checkpoints.
Carbon monoxide warning. Never allow “teak surfing,” swim platform dragging, or bodysurfing behind any
vessel. Do not operate a motor or generator while anyone is on or holding onto a swim platform, swim deck, swim
step, or swim ladder, except for a very brief time when docking, or entering/exiting the vessel. Carbon monoxide
emitted at the stern (back) of the boat can cause death in these situations.
Safety Gear
• U.S. Coast Guard–approved life jacket (Type III recommended) that fits according to weight and height
specifications. Inspect life jackets to ensure that they are in good condition and contain no tears.
• At least one graspable and throwable Coast Guard–approved personal flotation device (Type IV buoyant
cushion or ring buoy or equivalent) immediately available for each group on the water
• Towing boat
• Ski lines (tow lines) at least 75 feet long; a single handle is used on the ski line
• Wakeboard or rounded (not pointed) skis that are appropriate to the skill and size of the skier
• Water skis
• Foot bindings appropriate for skier’s weight and skiing speed
• Waterproof sunscreen (SPF of at least 15), applied every two hours, and lip balm
• Beach towel
• Dry clothing and sunglasses to wear after skiing
• Wetsuit if water temperatures are cold, below 70 degrees Fahrenheit

2024–2026 Safety Activity Checkpoints Page 225 of 226
Windsurfing
Council Approval: Required
Activity Permitted for: J C S A
Not Recommended for: Daisies and Brownies
About Windsurfing
Windsurfing is an exciting surface water sport that combines the elements of surfing and sailing by using a
standing board and sailing rig. It consists of a board usually 8 to 10 feet long, powered by the wind. The rig is
connected to the board and consists of a mast, boom, and sail. Learning to windsurf entails learning the concepts of
wind and balance. It can be experienced both inland and at the coast, from cruising across flat water in a lake to
riding waves at the beach.
To fully enjoy the sport, windsurfers should be comfortable in the water, be strong swimmers, and possess a
certain measure of strength, balance, coordination, and attention.
It is best for beginners and intermediate-level windsurfers to learn and practice in standing-level water
surrounded by land, such as a lake or saltwater bay or alcove. Advanced to expert windsurfers can ride waves in
the ocean. Windsurfing instructors usually begin the instructional process on land to guide students through a
start-up sequence so participants can orient themselves to the equipment and know what to do when they get in
the water.
Learn More
• Surfer Today: How to Sail
Include Girl Scout Members with Disabilities. Talk to Girl Scout members with disabilities and their caregivers.
Ask about needs and accommodations. Always be sure to contact the lake or beach area park office and the
instructor or facility hosting the event in advance to ensure they are able to accommodate those with disabilities.
Learn about water safety for children with special needs.
Equity. Consider the history, culture, and past experiences of the Girl Scout members in your troop that could
affect their ability to equally participate in an activity. Work with members and families to understand how an
activity is perceived. Ensure that all Girl Scout members and their families feel comfortable and have access to
whatever is needed to fully participate, such as proper equipment, prior experiences, and the skills needed to enjoy
the activity. Learn about equity in sailing through the stories of sailors of many different identities and experiences.
Emergency Action Plan (EAP). Review and document your Emergency Action Plan (EAP) before starting any
activity and review it so all are prepared. Think through scenarios of what can go wrong such as an accident,
physical injury, missing person, sudden illness, or sudden weather or water emergencies.

2024–2026 Safety Activity Checkpoints Page 226 of 226
Windsurfing Checkpoints
Confirm swimming ability. Success on the water depends on comfort and ability in the water. Conducting a
swimming assessment in advance is highly recommended. Windsurfers should be competent swimmers. See
Swimming Safety Activity Checkpoints for a sample assessment or ask your instructor for guidelines. If a swimming
assessment is not possible, presume all participants are non-swimmers.
All windsurfers must wear a U.S. Coast Guard–approved life jacket. Type III life jackets are recommended and
should fit according to weight and height specifications. Inspect life jackets to ensure that they are in good
condition and contain no tears.
Size up sailboards. Communicate ages, heights, and weights with windsurfing instructors to ensure the
appropriate size equipment is available. Request that sails be the appropriate size (according to weight, height, and
ability level) for windsurfers; the larger the sail, the more powerful the sailing capacity. Sailboard decks should be
textured (not smooth) to provide traction.
Select a safe location with a soft, sandy, or muddy bottom. Choose a location that does not have a sharp-edged
or rocky bottom, which can be dangerous and cut feet and limbs. The launching area should be easily accessible
and clear of overhead power lines.
Safeguard valuables. Do not leave personal belongings and valuables unattended in a public place. If working
with a windsurfing school or camp, call to inquire about the organization’s storage amenities.
Prepare for emergencies. In addition to a lifeguard, at least one adult present should have Girl Scouts small craft
safety training or equivalent experience. Ensure the presence of a waterproof first aid kit and a first aider with a
current certificate in first aid, including adult and child CPR or CPR/AED, who is prepared to handle cases of near-
drowning, immersion hypothermia, and sunburn. If any part of the activity is located 30 minutes or more from
emergency medical services, ensure the presence of a first aider with Wilderness First Aid certification.
Learn recovery techniques. One thing is certain about windsurfing: you will fall off the board. Learn how to
recover quickly and easily to avoid fatigue.
Stay with the board. If remaining in the water while taking a break from windsurfing, stay near the board.
Lifeguards become concerned if they see a windsurf board “missing” a windsurfer.
Troubleshoot exhaustion. In the case of fatigue while in the water (and in light winds), raise the sail down over
the back of the board, position leg on top of the sail to prevent it from falling off the board, and paddle (or walk, if
water is shallow enough) back to shore.
Safety Gear
• The facility will provide the windsurfing board, sail, and life jackets.
• U.S. Coast Guard–approved life jacket (Type III recommended) that fits according to weight and height
specifications. Inspect life jackets to ensure that they are in good condition and contain no tears.
• At least one graspable and throwable Coast Guard–approved personal flotation device (Type IV buoyant
cushion or ring buoy or equivalent) immediately available for each group on the water.
• Bring waterfront/beach essentials, blankets for the sand, towels, and a change of clothes.
